
How to Create a Storefront Funnel
Published: Updated:
A Storefront Funnel is a quick way to set up a simple online store to sell one or a few products without building a full e-commerce site. It’s great for testing product ideas, running flash sales, or getting a small offer live fast. This article will walk you through how to build, customize, and launch your own Storefront Funnel using the available tools and templates in your workspace.
Requirements
Section titled “Requirements”-
An active ClickFunnels account
How Storefront Funnels Work
Section titled “How Storefront Funnels Work”A Storefront Funnel gives you a simple way to sell products online without the complexity of a full store. Instead of managing dozens of pages and categories, you get a clean layout where customers can browse a small set of offers and complete their purchase in just a few clicks. It’s fast to launch and easy to customize, which makes it ideal for testing new products, running limited-time promotions, or validating offers before investing in a larger buildout.
For fitness businesses, here are a few ways to use a Storefront Funnel:
-
Promote one-on-one coaching sessions or group training programs
-
Sell digital downloads like workout plans, meal guides, or wellness challenges
-
Offer physical products such as supplements, branded gear, or fitness accessories
The storefront setup keeps the focus on the offer and makes it easier for visitors to decide and buy without distractions.
Storefront Funnel Structure
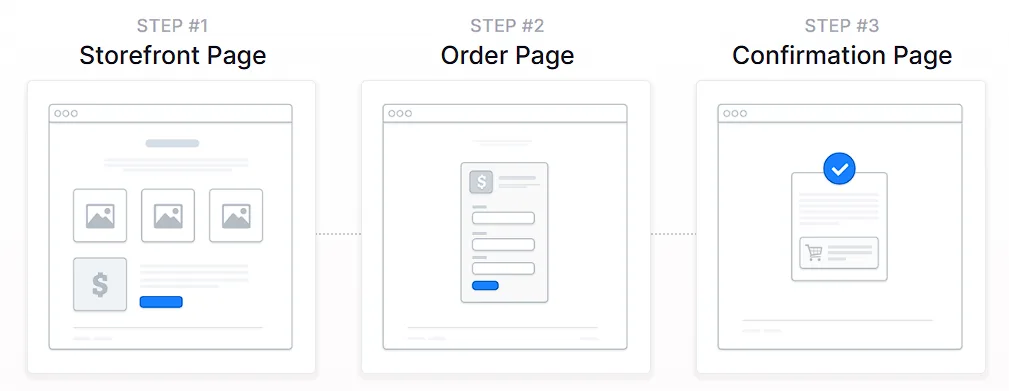
Section titled “Storefront Funnel Structure”Here’s a quick breakdown of the Storefront Funnel structure. It’s made up of three core pages that guide visitors from browsing to purchase:
-
Storefront Page: This is the first page visitors see. It displays a small selection of products with clear calls to action. Each product links to the order page, keeping things focused and simple.
-
Order Page: After clicking on a product, customers land here. This page collects their payment and shipping details. You can also offer quantity options, order bumps, or subscriptions depending on your setup.
-
Confirmation Page: Once a purchase is complete, customers see a confirmation with their order summary. This page can also include next steps, download links, or additional offers.
Creating a Storefront Funnel
Section titled “Creating a Storefront Funnel”A Storefront Funnel can be built quickly using ClickFunnels pre-designed templates. Instead of starting from scratch, you can choose a template that matches your needs, customize it with your content, and launch your funnel in just a few steps.
-
In ClickFunnels, go to the Funnels section from the left navigation menu.
-
Click the Create Funnel button.
-
Browse the available funnel types and select a Storefront Funnel.
-
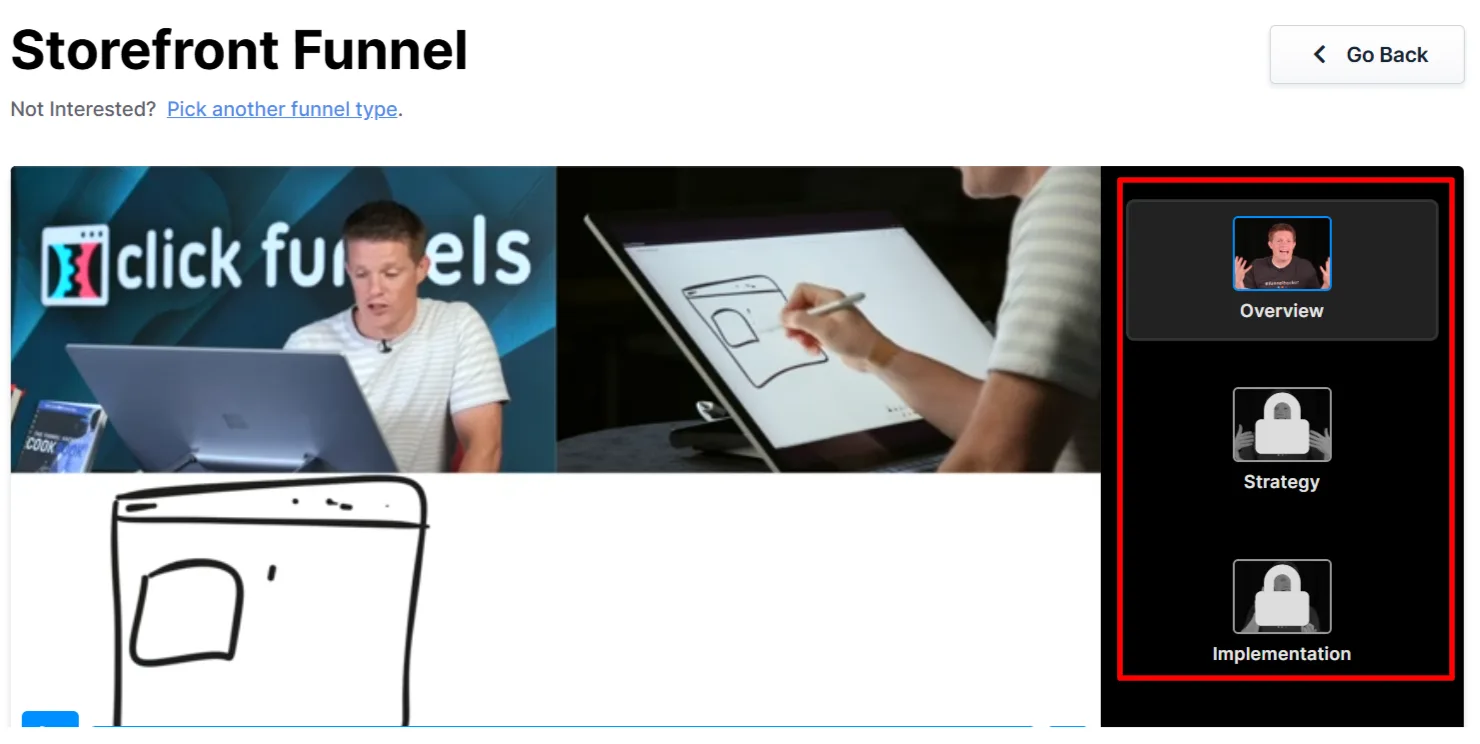
Each funnel type includes a training section with:
-
Overview: Understanding how a Storefront funnel works.
-
Strategy: Learning how to structure your funnel and offer for maximum impact.
-
Implementation: A step-by-step guide to customizing your funnel.
You can also watch the full training video at the top of this article. It covers all three parts in one walkthrough.
-
-
If you prefer a completely custom setup, click Start from Scratch to build your Storefront funnel manually. Refer to the How to Create a New Funnel article for instructions.
-
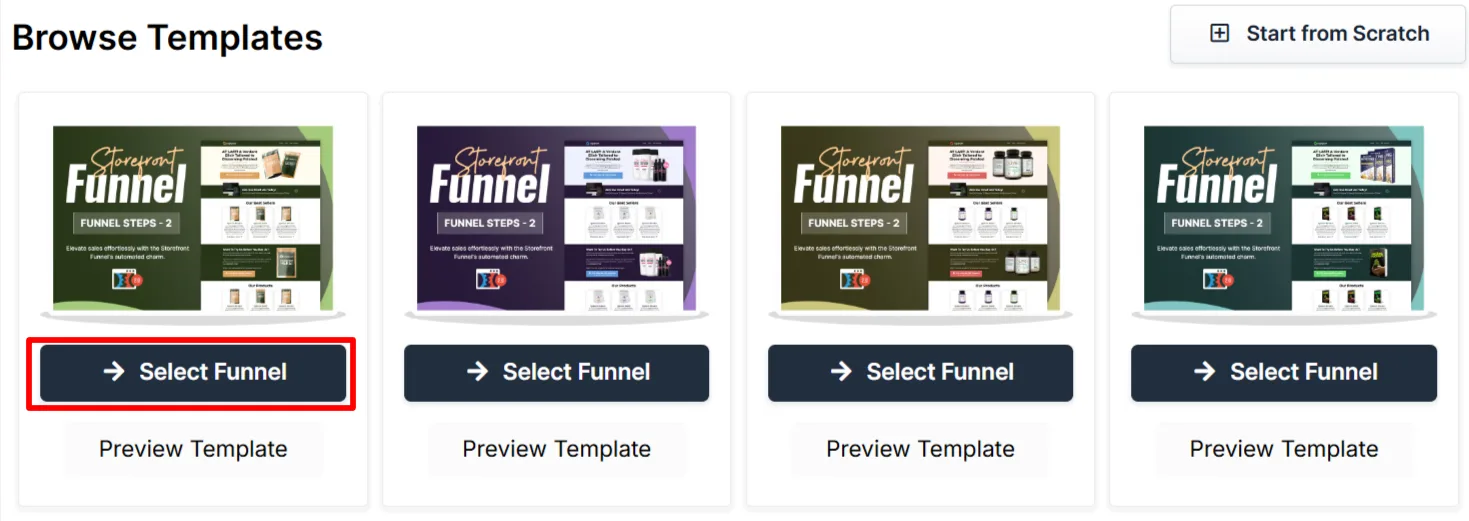
Scroll through the available templates and click Select Funnel under the one that best fits your business.
-
Wait for the funnel to install, then:
-
Click Close to exit the installation window.
-
Or click Customize Now to start editing your pages and adjust your call-to-action.
-
Once the template is loaded into your workspace, you can begin customizing it to fit your business, audience, and sales message.
Editing Storefront Funnel Pages
Section titled “Editing Storefront Funnel Pages”Once the Storefront Funnel is installed, you can customize it by clicking Customize Now from the installation screen or by going to the Funnels section in your dashboard. From there, select the Storefront Funnel to open the page editor.
-
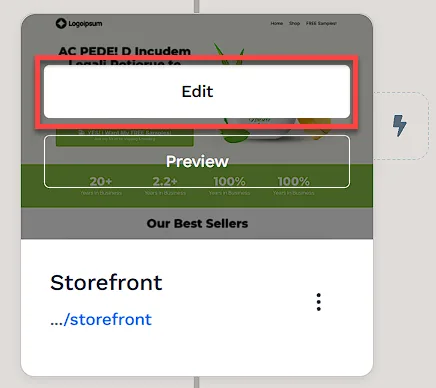
Open the Funnel Workflow Editor by clicking on the funnel. Find the page you want to edit, hover over it, and click Edit.
-
Each page is made up of sections, columns, rows, and elements. For a Storefront Funnel, key areas to customize include:
-
Headline: Clearly state the deal and create urgency.
-
Product Details: Highlight what’s included and why it’s valuable.
-
Order Form: Review and adjust settings as needed for your offers.
-
CTA Buttons: Link each product to its order page with a strong call to action.
-
Thank You Message: Confirm the order and provide next steps.
To learn more about editing elements in ClickFunnels, refer to the Getting Started with the ClickFunnels Page Editor article.
-
-
Click Save at the top right to keep your changes.
-
Use the Preview option to check how your funnel looks before publishing. Remember to view your funnel on mobile devices to ensure it looks great on all screens. For detailed instructions, check our article on Mobile Optimization Techniques.
Adding Products to The Order Form Page
Section titled “Adding Products to The Order Form Page”Once potential customers reach the order form page, they need to see clear product details to complete their purchase. Adding products correctly ensures the right offer is displayed and checkout settings are configured properly.
-
Scroll to the Order Form page in the Funnel Workflow Editor.
-
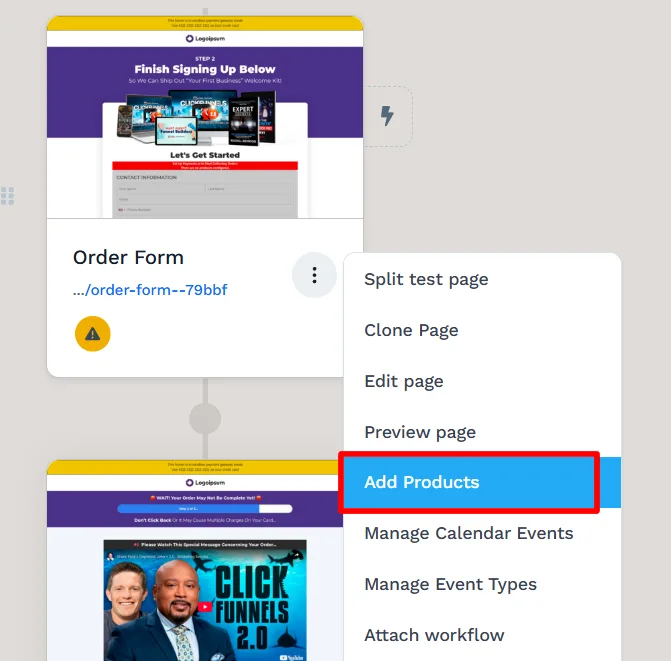
Click the three-dot (⋮) icon next to the page and select Add Products.
-
Click + Add Product, then choose an existing product or create a new one.
-
Once added, click the Gear (⚙) icon to adjust product settings, such as the title or description.
-
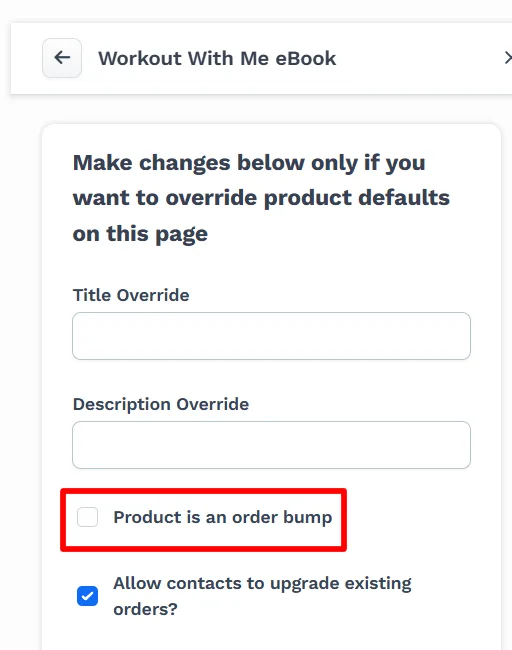
To add an Order Bump, enable the Product is an Order Bump checkbox or drag the product into the bump section.
-
Adjust the Checkout Settings based on how products should be selected:
-
Single Product allows one product per order.
-
Multiple Products with Quantity lets customers choose multiple items with set limits.
-
Multiple Products with Checkbox allows selection of multiple products with no quantity restriction.
-
-
Click Update to save changes.
Automating Communication with Workflows
Section titled “Automating Communication with Workflows”Workflows help keep potential customers engaged throughout the process without the need for manual messaging. They can send reminders, segment contacts, and deliver content at the right time.
With workflows, you can:
-
Send order confirmation emails with delivery or access instructions
-
Tag customers who completed a purchase
-
Send follow-up emails with related offers or bundle deals
-
Deliver bonus content like digital downloads or coupon codes
To create a workflow:
-
Locate the funnel step where you want to trigger the workflow.
-
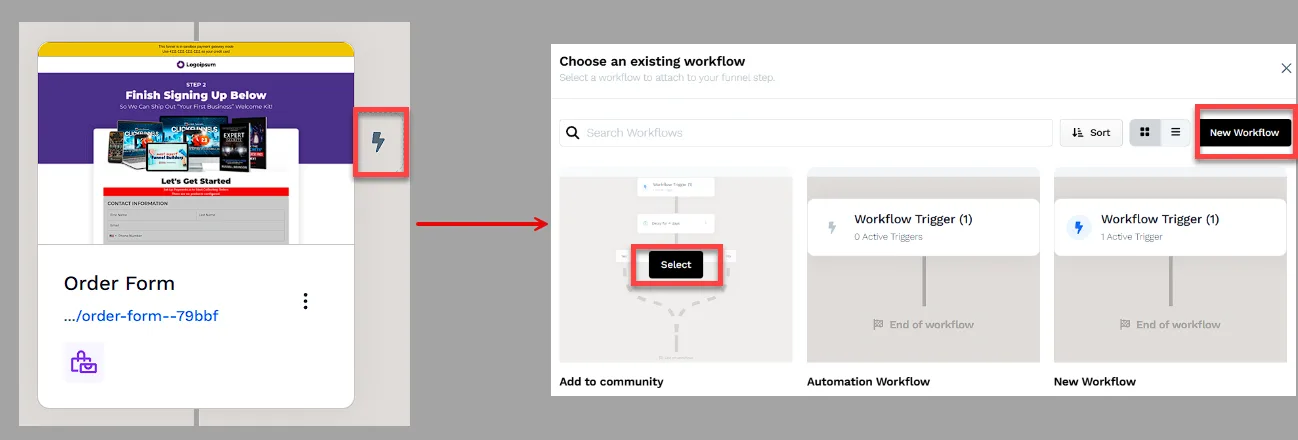
Click the Lightning Bolt icon next to the step to add a new or existing workflow.
-
Select an existing workflow from the list or create a new one.
-
Click + (Plus) icon to add actions such as Send an Email, Send an Asset, or Tag Contact.
-
(Optional) Add a Delay to space out follow-up actions over time.
-
In the top right corner of the workflow navigation, find the Status option.
-
Toggle the status option. The workflow status will change from disabled to active.
Testing and Publishing Your Funnel
Section titled “Testing and Publishing Your Funnel”Before making your funnel live, it’s important to test its functionality to ensure everything works as expected.
-
Test the Funnel
-
Verify that all pages are connected in the correct order.
-
Check buttons, forms, and links to confirm they function properly.
-
Test the funnel on different devices and browsers for a smooth experience.
-
To run a full checkout test, follow the steps in How to Test Funnel Checkout in Test / Sandbox Mode.
-
-
Enable Live Mode
-
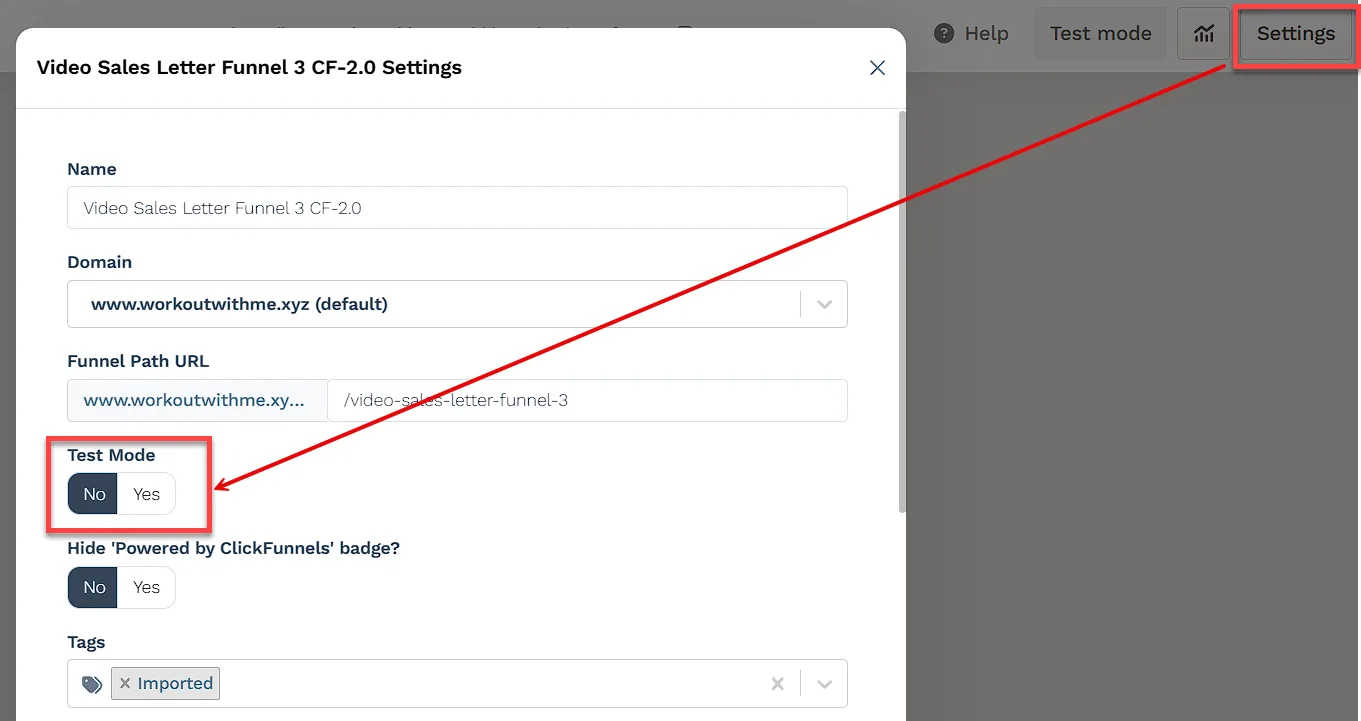
Click the Settings button at the top-right corner of the funnel workflow editor to open the funnel’s settings.
-
Set the funnel to Live Mode to make it accessible to customers.
-
-
Copy and Share Your Funnel URL
-
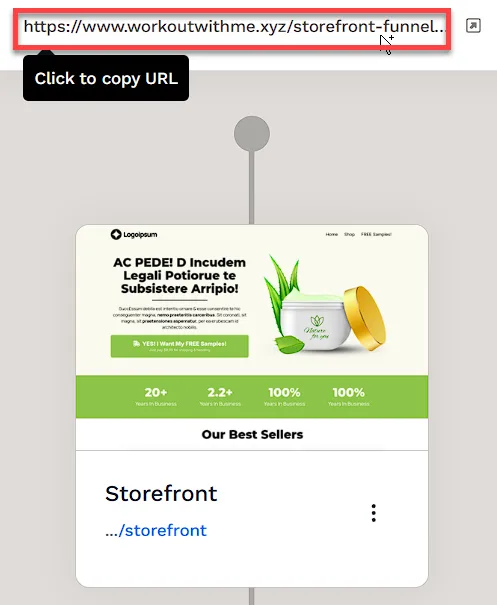
Hover over the URL at the top of the funnel workflow page and click to copy.
-
Share the link via your website, social media, or email campaigns.
-
Learn more about publishing and sharing your funnel in this article.
-
Fulfilling Customer Orders After Purchase
Section titled “Fulfilling Customer Orders After Purchase”If your Storefront Funnel includes physical products, digital downloads, or a combination of both, it’s important to set up appropriate fulfillment methods to ensure a smooth post-purchase experience for your customers.
Physical Product Fulfillment Methods
Section titled “Physical Product Fulfillment Methods”-
ShipStation Integration: If your business uses ShipStation for logistics and shipping, you can connect your account in ClickFunnels. When a customer completes a purchase, order data is automatically sent to ShipStation for processing, packaging, and shipping.
-
Shippo Integration: ClickFunnels also integrates with Shippo, which allows you to generate accurate shipping labels, compare live carrier rates, and access discounted shipping prices. When connected, Shippo can automatically display calculated shipping costs at checkout, helping you streamline fulfillment while offering cost-effective shipping options for your customers.
-
Zendrop Fulfillment: If your product was imported from Zendrop, ClickFunnels automatically sends the order data to Zendrop when the purchase is made. Zendrop then handles the packaging and delivery of the product on your behalf.
-
Manual Fulfillment: If you’re fulfilling orders manually, you can manage and track customer purchases inside your Orders tab. You’ll need to mark orders as fulfilled manually or use internal processes to ship products and notify customers.
To give you a general overview of how order fulfillment works in a Storefront Funnel, here are the most common scenarios depending on your business needs:
-
Automated Fulfillment with Shipping Services: If you want to fully automate shipping, including label generation, packaging, and delivery, you can use integrated services like ShipStation or Zendrop. These platforms handle logistics after the order is placed.
-
Manual Fulfillment with Live Shipping Rates: If you prefer to fulfill orders yourself (e.g., from your home or warehouse) but still want to charge accurate shipping fees, consider using Shippo. It allows you to display live carrier rates during checkout and print shipping labels manually.
-
Creating Shipping Profiles: You can set up domestic and international shipping profiles in ClickFunnels to display calculated shipping prices automatically when the customer enters their address during checkout.
-
Manual Order Management: You can also manually manage your entire fulfillment process by reviewing orders in the Orders tab, handling packaging and shipping yourself, and marking each order as fulfilled.
-
Manual Fulfillment: You can manually manage customer orders by reviewing purchases in your Orders tab. Once shipped, you can mark orders as fulfilled.
-
Shipping Integrations: If you’re using third-party services like ShipStation or Shippo, ClickFunnels can send order data directly to those platforms for automated label creation and tracking.
Digital Product Fulfillment
Section titled “Digital Product Fulfillment”If you’re selling a digital product, you can easily manage delivery using ClickFunnels Digital Assets feature.
Uploading Digital Assets:
-
Navigate to Workspace Settings > Digital Assets in your ClickFunnels workspace.
-
Upload your file (.pdf, .doc, .txt, or other formats).
Delivering Digital Assets Automatically:
Once uploaded, you can connect the digital asset to your product settings. When a customer completes a purchase, the file becomes accessible to the buyer.
-
From your ClickFunnels dashboard, click Products and select All Products.
-
Access the product added to your funnel.
-
Scroll down to the Purchase Actions section.
-
Click the Plus (+) icon next to the Digital Asset Access option.
-
Select an asset from the list with this product. You can also upload a new asset by clicking on New Digital Asset.
-
After selecting the assets, click Save to apply the settings.