
Adding a Checkout (Order Form) Page in a Funnel
Published: Updated:
The Funnel Checkout page, also known as the Order Form page, is a funnel page where customers finalize their orders and securely process their payments. ClickFunnels makes it easy to create Checkout pages using a pre-designed template or manually adding a Checkout element to any funnel page. In this article, you’ll learn exactly how to set up, customize, and attach products to your Checkout page in ClickFunnels.
Requirements
Section titled “Requirements”-
An active ClickFunnels account
-
At least one product created in the workspace
What is a Funnel Checkout Page
Section titled “What is a Funnel Checkout Page”A Funnel Checkout page is where customers complete their purchases within a funnel. It collects payment details, applies order bumps, and finalizes transactions. You need a Checkout page to sell any product inside a funnel and deliver a seamless buying experience. You don’t create products inside the funnel step. Instead, ClickFunnels uses Global Products, allowing you to manage your products centrally and reuse them across funnels and other selling channels.
Step 1: Create a Product in ClickFunnels
Section titled “Step 1: Create a Product in ClickFunnels”ClickFunnels uses a global products system, which means you create a product once and reuse it across multiple funnels and the Store app.
-
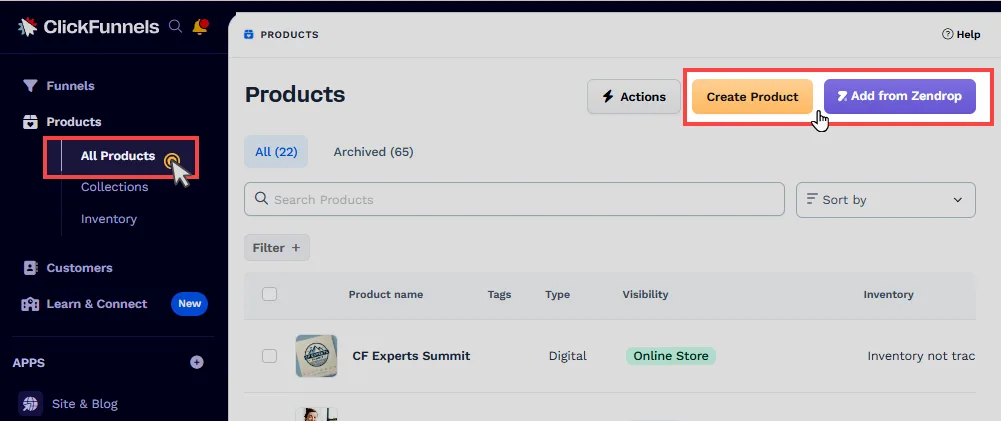
From the left side of the navigation, click the Products menu and select All Products.
-
Click Create Product, or to import Zendrop products, click Add from Zendrop.
-
In the prompt, choose the type of product you wish to sell: Physical or Digital.
-
Enter the product information, including the Product name and Description.
-
Click the Create Product button to confirm the action.
-
Select the Price type from the following options: One time, Subscription, and Payment plan.
-
Click Set Price to confirm your pricing details, or choose the Set Later option if you prefer to add the price later.
For detailed steps, refer to our article: How to Create and Manage Products.
Step 2: Add a Checkout Page to Your Funnel
Section titled “Step 2: Add a Checkout Page to Your Funnel”-
Go to Funnels in the side navigation menu and select your funnel.
-
Click on the Name of the funnel to edit it.
-
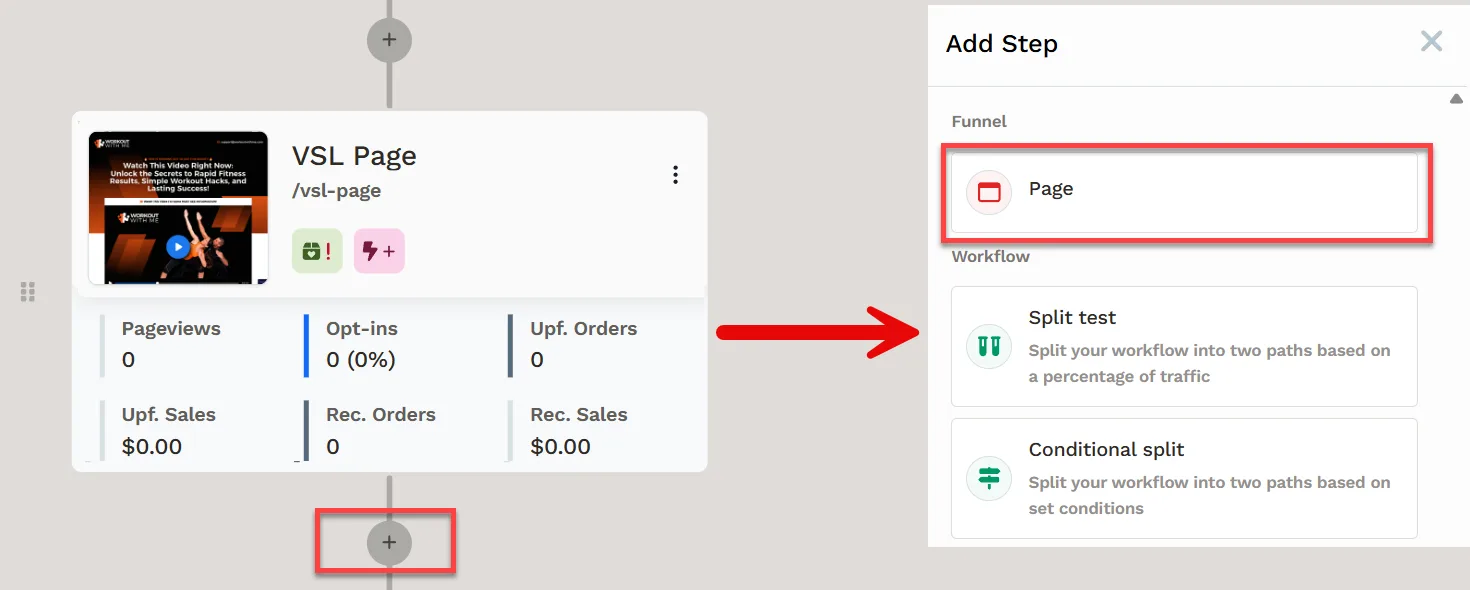
Click the + (Plus Node) where you want to insert the Checkout page.
-
Click Page from the right-hand widget.
-
Select Order as the page type category. ClickFunnels will present a variety of order page templates from which you may choose a suitable template.
-
Fill in the page details such as Page Name, Description_,_ Path, Style Guide, and Search Engine Indexing.
-
Click Create Page.
-
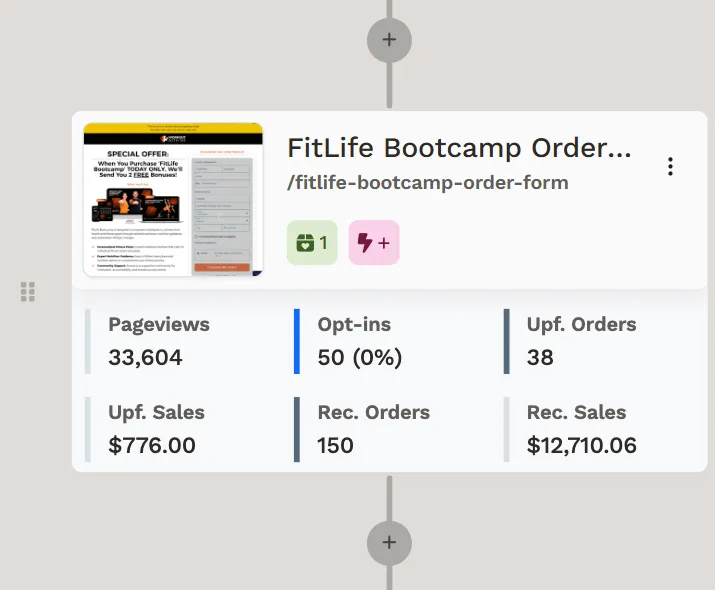
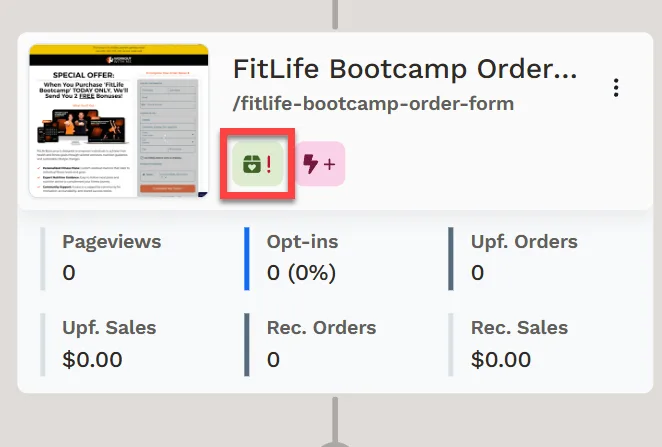
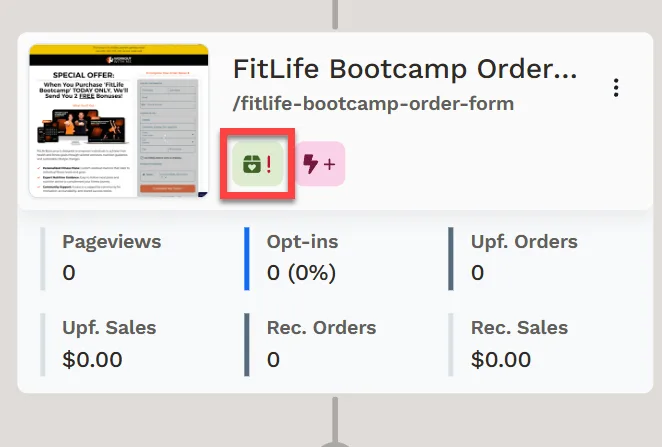
A new page will be added to the funnel, and a green Products icon will appear on the funnel step card. If no product has been attached yet, the icon will display a red exclamation mark (!) to alert you. Once a product is added, the exclamation mark will be replaced by the number of products attached.
Step 3: Attach Products to the Checkout Page
Section titled “Step 3: Attach Products to the Checkout Page”Once your Checkout page is added, follow these steps to attach a product:
-
Locate the Checkout page in your funnel.
-
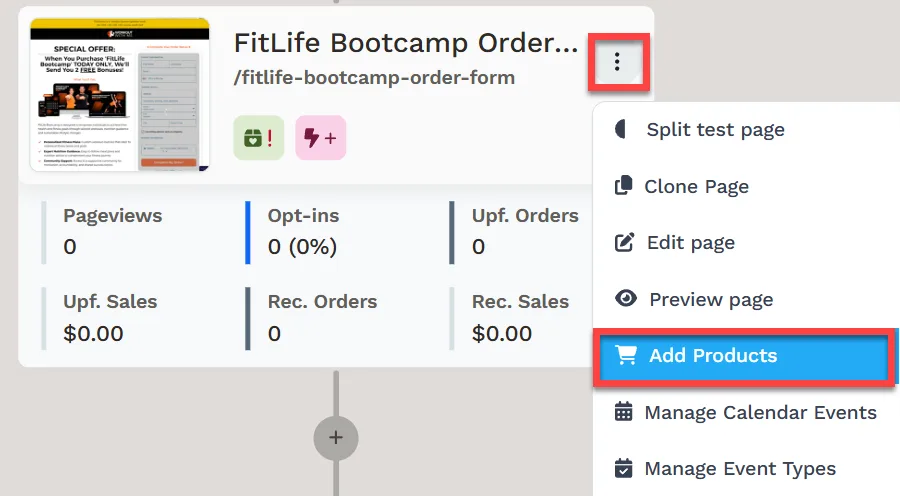
Click the Three-Dot Menu (⋮) beside the page.
-
Select Add Products.
-
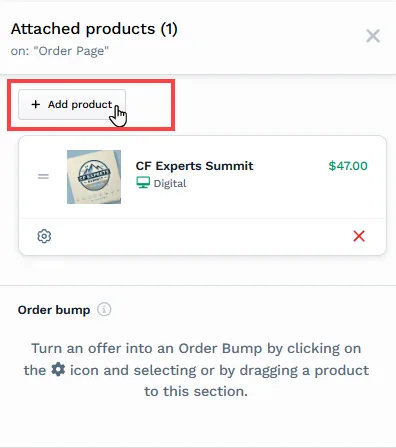
Click + Add Product to open the product selection window.
-
Hover over the desired product and click Select Product, or use the Add Product button at the top right to create a new product.
-
To add more products, click the Add Product button again to open the product selection window.
Step 4: Configure the Product for the Checkout Page
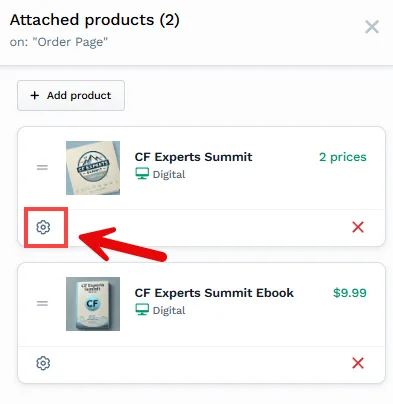
Section titled “Step 4: Configure the Product for the Checkout Page”When you add a product to a Checkout page, ClickFunnels allows you to customize how the product appears and behaves on that specific page. These options let you adjust titles, pricing, and other settings without changing the original product. When the products are attached, click the Gear ⚙️ icon to access the product settings:
Title and Description Overrides
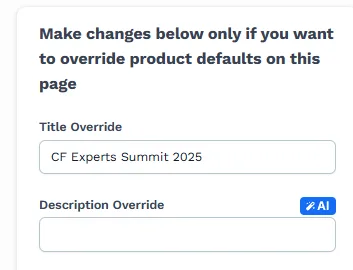
Section titled “Title and Description Overrides”You can override the default product title and description displayed in the Checkout. This is helpful when you want to use the same product in multiple funnels but customize how it’s presented in each one. For example, you may want the product to appear as “Summit Access Pass” in one funnel and “All-Access Ticket” in another.
Marking a Product as an Order Bump
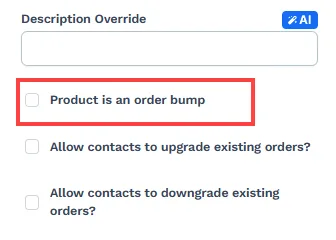
Section titled “Marking a Product as an Order Bump”Selecting the option “Product is an order bump “ shows the product as an add-on item that customers can choose to include with their main purchase or skip. Order bumps help increase the overall order value without interrupting the checkout experience.
Example: If someone is buying a course, you might offer a bonus ebook or checklist as an optional bump product they can add before completing the checkout.
Upgrade and Downgrade Options
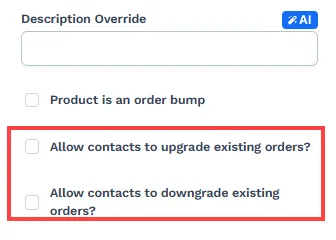
Section titled “Upgrade and Downgrade Options”If your product includes subscription pricing, ClickFunnels allows you to offer returning customers the ability to upgrade or downgrade their existing subscriptions. This feature only applies to customers who have already purchased a subscription from your workspace and is recognized when they revisit your Checkout page—typically after entering their contact information, such as an email address.
-
Upgrade: Customers subscribed to a lower-tier plan (e.g., $9/month) can choose to switch to a higher-tier plan (e.g., $29/month) to access additional features or benefits. For example, a customer subscribed to a basic monthly plan may choose to upgrade to a premium monthly plan with extra resources or bonus content.
-
Downgrade: Similarly, customers can move from a higher-tier plan to a lower-priced plan if enabled. This gives them the flexibility to adjust their subscription based on their needs.
Availability and Prices
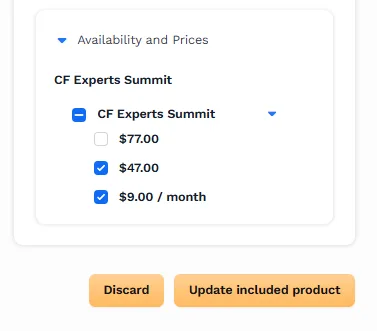
Section titled “Availability and Prices”You can choose which pricing options to display on the Checkout page. If your product has multiple prices—such as a one-time price and a subscription plan—you can select one of each to present.
Example: You may want to offer a one-time payment of $47 or a monthly payment of $9 for 6 months.
Step 5: Add Bump Offers (Optional)
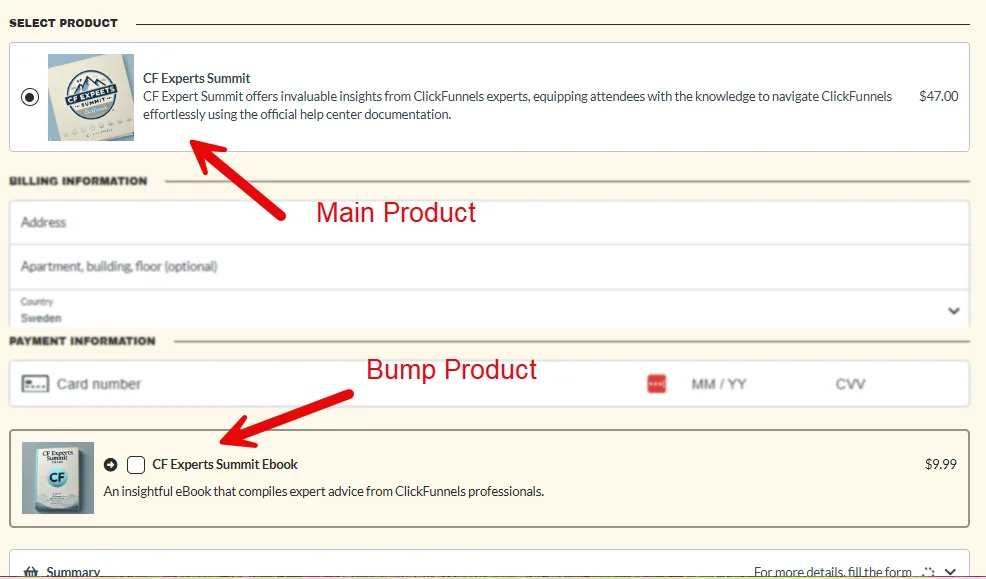
Section titled “Step 5: Add Bump Offers (Optional)”A bump offer is a small add-on product that appears on the Checkout page alongside the main product. In ClickFunnels, a bump product is an optional item that customers can add to their purchase or skip entirely. For example, if a customer is buying a burger, the bump product could be a soda—an extra item that complements the main offer without disrupting the buying process.
To offer a bump product:
-
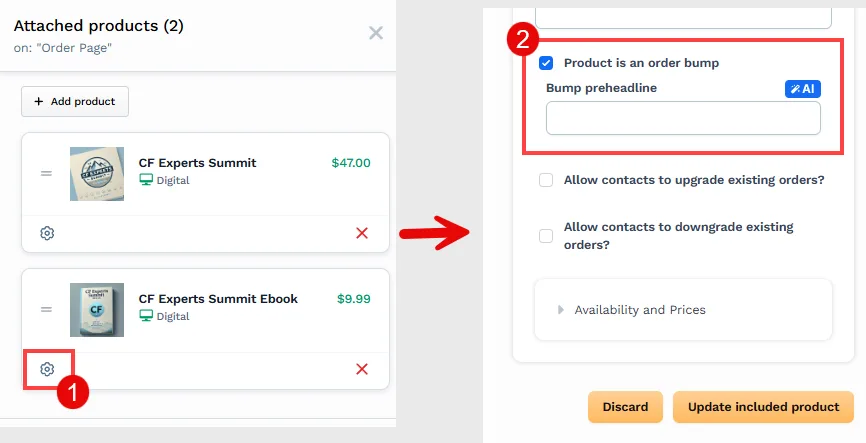
Click the Gear ⚙️ icon next to the added product.
-
Enable the “Product is an Order Bump” checkbox.
-
Alternatively, You can drag a product into the Order Bump section for a quicker setup.
-
Add a Preheadline to highlight the offer.
-
Click Update Included Product to save changes.
The bump products will be incorporated as add-on products during the checkout process. Buyers have the option to include this product in their cart as an optional item. Below is a preview example:
Step 6: Configure Checkout Settings
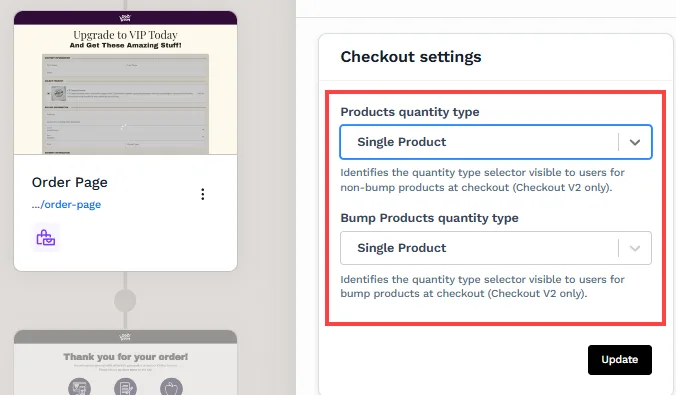
Section titled “Step 6: Configure Checkout Settings”The Checkout Settings panel allows you to define how customers interact with the products on your Checkout page. You can configure two settings: Products quantity type and Bump Products quantity type. These settings control how many products a customer can select during checkout and how the selection appears.
Single Product
Section titled “Single Product”This option allows the buyer to select only one product at a time. It is ideal when you’re offering product variants or mutually exclusive offers.
Example: A fitness business selling access to two different bootcamps—“Morning Bootcamp” and “Evening Bootcamp”. With the single product setting, the customer can only choose one of the two sessions.
Multiple Products with Quantity
Section titled “Multiple Products with Quantity”This setting allows buyers to add multiple products to their cart and specify the quantity for each product individually. Quantity selectors (such as plus/minus buttons) appear beside each item, enabling buyers to choose how many units they want. If a buyer sets the quantity to zero, the product will not be included in the checkout. This approach is especially useful when selling physical items, packages, or event tickets where buyers may want to purchase multiple units of the same product.
Example: A fitness store selling protein shakes and resistance bands. Customers can choose to buy 3 protein shakes and 2 resistance bands in one checkout session.
Multiple Products with Checkbox
Section titled “Multiple Products with Checkbox”This option allows customers to select multiple products using checkboxes. However, quantity selection is unavailable—they can only choose whether to include the product.
Example: A fitness instructor offering multiple digital resources like a workout planner, meal prep guide, and mobility guide. Customers can select any combination of these guides without choosing quantity.
How to Convert Any Funnel Page into a Checkout (Order Form) Page
Section titled “How to Convert Any Funnel Page into a Checkout (Order Form) Page”If you didn’t choose an Order page template, you can manually turn any page into a Checkout page by adding the smart Checkout element.
-
Open the funnel page in the Editor.
-
Within the page editor, please insert a Section and Row where you want to position the element.
-
Click the orange + Plus or Add New Element button inside the row to insert a new element.
-
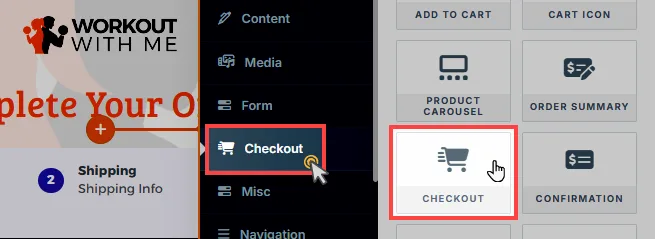
From the Checkout category, select the Checkout element.
-
Click Save to save changes.
-
Once the Checkout element has been added, you may associate the products with the page settings, as Step 3 of this article outlines.
-
ClickFunnels visually confirms the setup by displaying a green Products icon on the funnel step card. The number on the icon shows how many products are attached to that step. Clicking the icon opens the product panel, where you can review or manage the attached products.
Gain a comprehensive understanding of the Checkout element by referring to the article: Checkout: Enable Users to Complete their Purchase.
Testing a Funnel Checkout Page
Section titled “Testing a Funnel Checkout Page”Before testing your Checkout page, you need to ensure that your funnel is in Test Mode. This allows you to simulate the checkout experience without processing real payments. To test successfully, you must also have a payment processor connected to your workspace or enable test purchase settings.
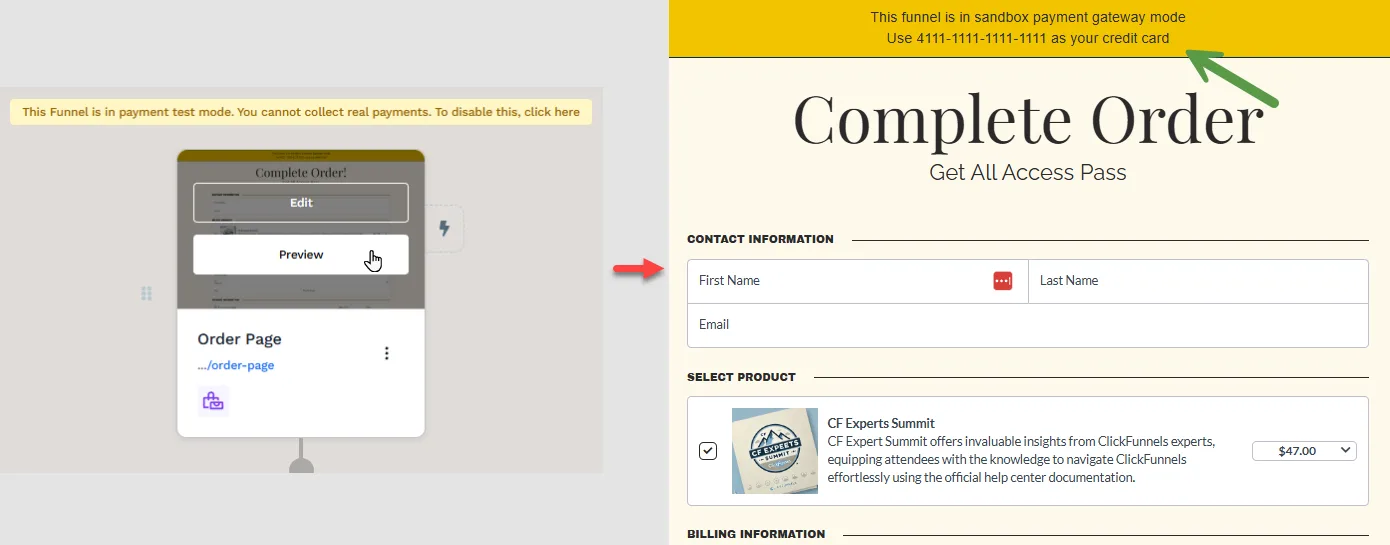
Here’s a quick overview of what you need to do:
-
Make sure your funnel is set to Test Mode.
-
Ensure a payment gateway (like Stripe or Payments AI) is connected, or activate Test Purchase Mode in your workspace.
-
Submit a test order on the checkout page using the test card number (e.g.,
4111-1111-1111-1111), any valid future date, and any 3-digit CVV number (e.g.,123). -
Complete a test checkout flow to verify that the page functions as expected and product selections work correctly.
Learn more about testing your funnel in test How to Test Funnel Checkout in Test / Sandbox Mode.