
How to Customize Style Borders
Published: Updated:
Customizing Style Borders in ClickFunnels is a great way to enhance the visual appeal and structure of your funnels. Borders can help highlight important sections, create separation between different elements, and add a polished, professional look to your pages. This article will walk you through the steps to customize style borders in ClickFunnels, making it easy to give your funnels a unique and cohesive appearance. Let’s get started!
Requirements
Section titled “Requirements”- An active ClickFunnels account
Accessing Style Borders
Section titled “Accessing Style Borders”-
Click on Workspace Settings at the bottom left of your ClickFunnels dashboard.
-
Scroll down the menu on the left and click on the Styles tab.
-
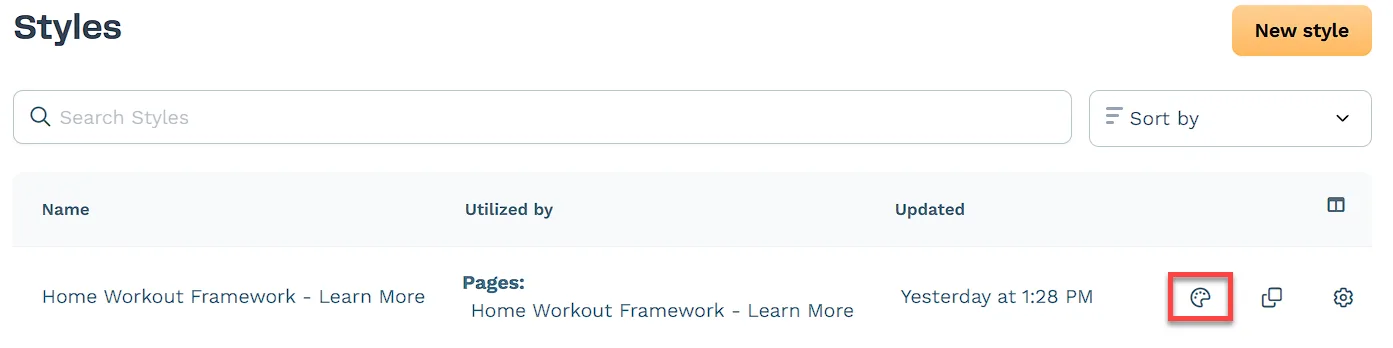
Find the Style you want to edit and click on the Customize Design
 icon to the right of it.
-
In the left menu, click on Border to access and edit the style’s Border settings.
Customizing Shadow Settings
Section titled “Customizing Shadow Settings”-
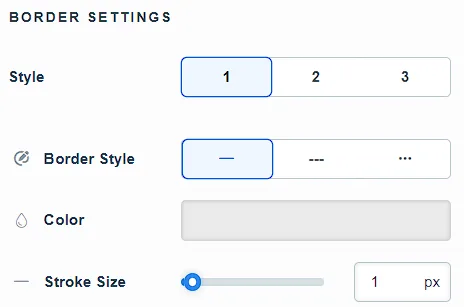
There are Three Styles available. Select the style you want to customize.

-
Choose the Border Style from the drop-down menu: either Solid, Dashed, or Dotted.
-
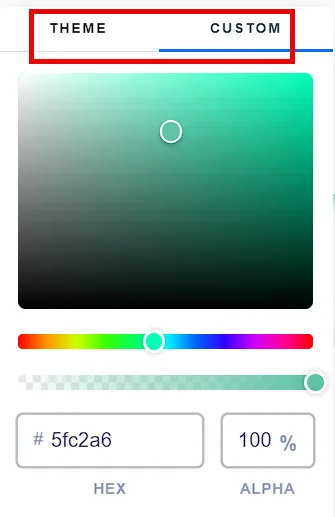
Click on the Color box to open the color palette and choose a color using one of these methods:
-
Move the custom color slider and drag the hand icon on the color palette to select your desired color. Use the transparency slider to adjust the color’s opacity.
-
Enter the HEX code for a specific color and adjust the opacity percentage using the box next to the HEX code.
-
Alternatively, switch to the Theme tab to choose a color that matches your theme.
-
-
Adjust the Stroke Size using the slider or the box next to it to insert a pixel number.
-
(Optional) If you want to customize additional border styles, repeat the steps above for each style.
-
Click Update to save your changes.