
Connecting a Domain to Your Site and Funnel
Published: Updated:
Connecting a domain to your site and funnel in ClickFunnels means linking a custom web address to your online content. This process makes your site more professional and easier for visitors to find and remember. In this article, we’ll show you how to connect a domain to your site and funnels step by step.
Requirements
Section titled “Requirements”-
An active ClickFunnels account
-
A domain connected to your workspace
How to Connect the Domain to the Workspace Site
Section titled “How to Connect the Domain to the Workspace Site”After successfully integrating your domain with your workspace, follow these steps to connect it to your site:
-
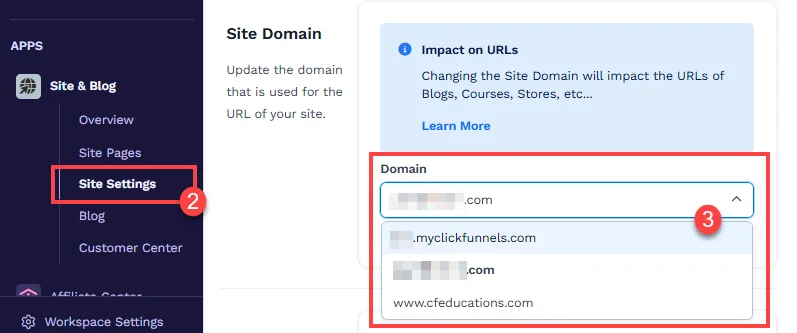
From your workspace, click on the Site & Blog app in the left-hand menu.
-
Select Site Settings.
-
Scroll to the Site Domain section and choose the domain you wish to use for your site in the Domain field.
-
Click the Update site button to save your changes.
How to Connect a Domain to a Funnel
Section titled “How to Connect a Domain to a Funnel”-
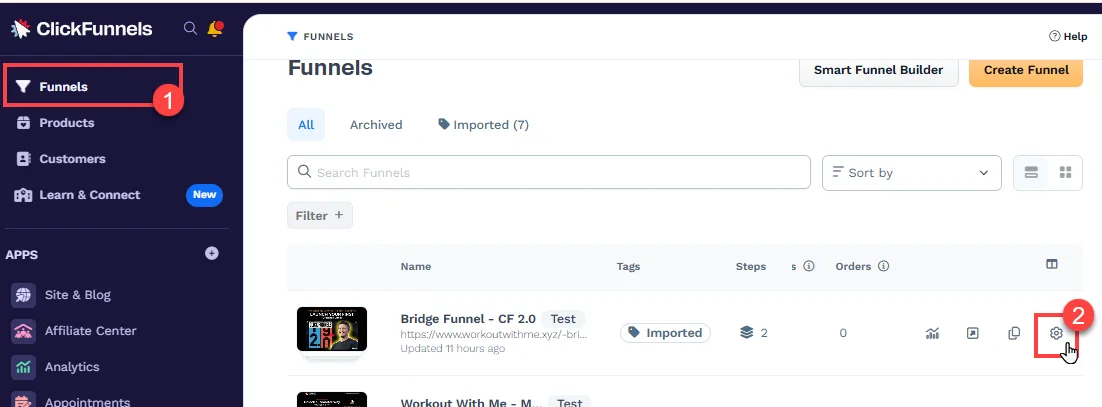
Click on Funnels from the left navigation menu.
-
Identify a funnel you wish to associate with your domain and click the Gear ⚙️ icon to access the funnel’s settings.
-
In the Domain field, select the desired domain from the dropdown menu.
-
Enter the desired path in the Funnel Path URL field, such as
/webinar,/blog, or/about. To set this funnel as the domain’s default page, enter a single/character.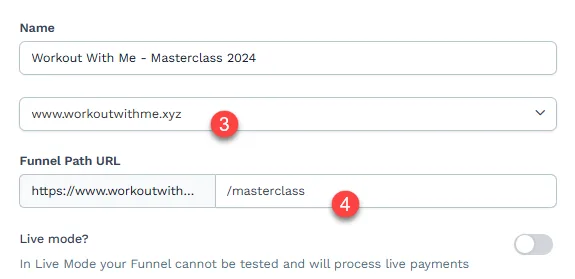
-
Alternatively, you can access these settings directly within your funnel in two ways:
-
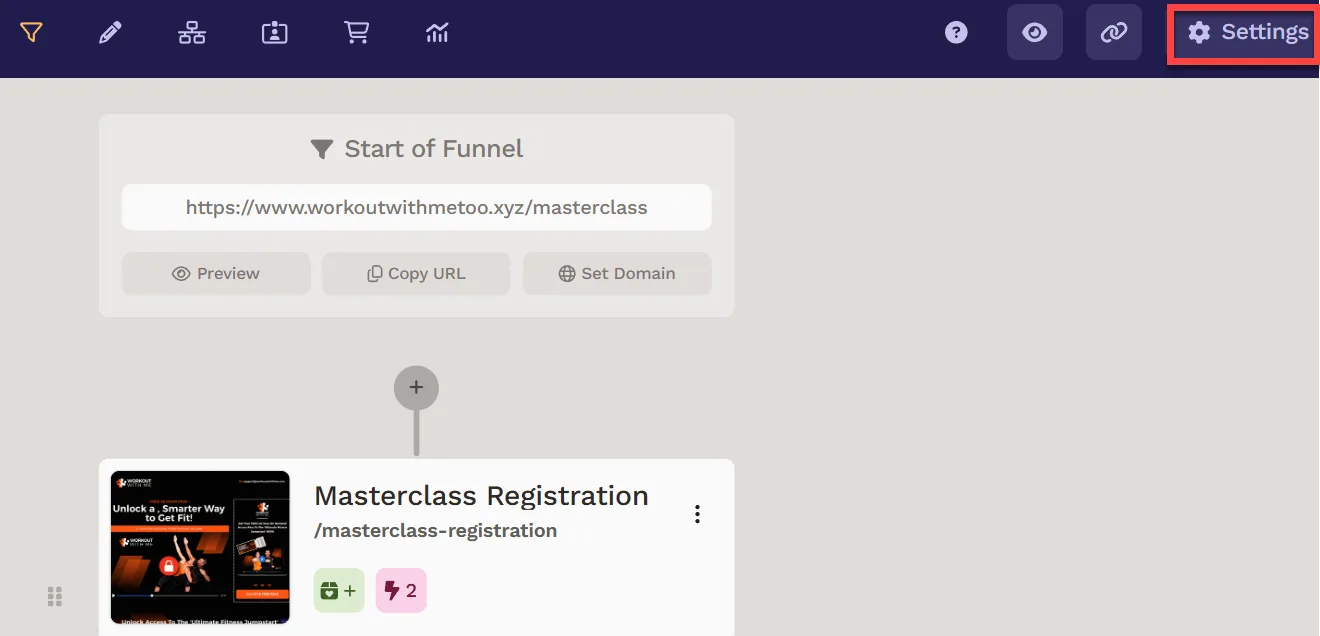
Option 1: Open the funnel, click the Settings button in the top-right corner, and follow steps 3 and 4.
-
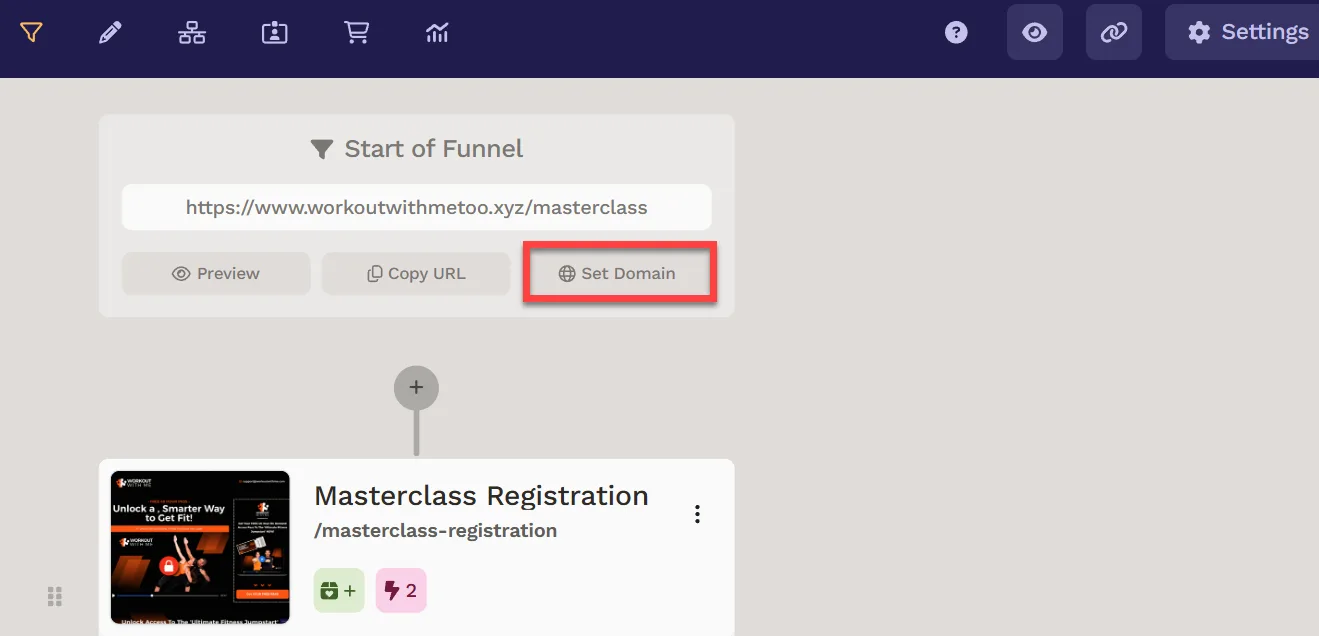
Option 2: From the Start of Funnel section, click Set Domain. This opens the same settings window, where you can select your domain and set the funnel path.
-
-
Click Update Funnel to save changes.