Collecting Custom User Data with Custom Input Fields
Published: Updated:
ClickFunnels allows you to use custom input fields in forms to gather unique and personalized information from your users. This guide will walk you through adding custom fields, setting them up, and managing the collected data effectively.
Requirements
Section titled “Requirements”-
An active ClickFunnels account
-
A page created in your workspace
-
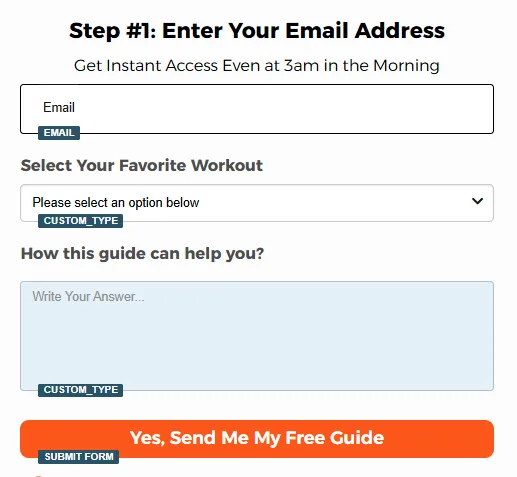
A Form element (Input, Select Box, Checkbox Input, Textarea, or Survey)
Choosing the Appropriate Form Element
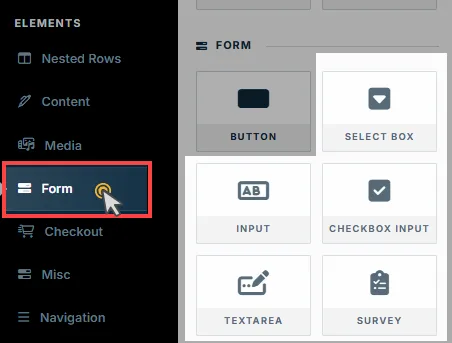
Section titled “Choosing the Appropriate Form Element”To collect custom information, you can use any of the following FORM category elements from the elements list:
-
Input Field: Best for collecting short answers such as a single word or small phrase. Learn more about the Input field element here.
-
Text Area: Ideal for collecting longer text responses, such as comments or open-ended questions. Learn more about the Textarea field element here.
-
Select Box: Allows users to choose from a predefined list of options. Learn more about the Select Box element here.
-
Checkbox Input: Allows users to select the choice. This element is particularly useful for capturing agreements or user preferences, such as “Accept Terms and Conditions” or “Subscribe to Newsletter.” Learn more about the Checkbox element here.
-
Survey: Dynamically displays surveys in the funnel step to collect feedback or responses. You need to create a survey and attach it to the funnel step for this element to work. Learn more about the Survey element here.
Choose the element that best matches the type of information you want to collect. Each element serves a unique purpose and can be customized to align with your form’s goals.
Setting the Element Type as “Custom Type”
Section titled “Setting the Element Type as “Custom Type””After adding the desired form element to your funnel:
-
Set the Type:
-
Click on the element in your editor.
-
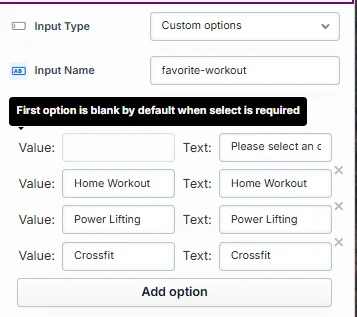
In the settings panel, change the Input Type to Custom Type/Options. This setting allows you to assign a unique identifier to the input.
-
-
Assign a Custom Input Name:
-
In the Custom Type / Input Name field, enter a unique name that represents the data you want to collect (e.g.,
favorite-workoutoruser_feedback). Here is an example of the Select Box input type:
-
Finding Existing Contact Custom Attributes
Section titled “Finding Existing Contact Custom Attributes”Contact Custom Attributes are user-defined fields where you can store the custom data submitted through your forms.
How to Access Custom Attributes:
Section titled “How to Access Custom Attributes:”-
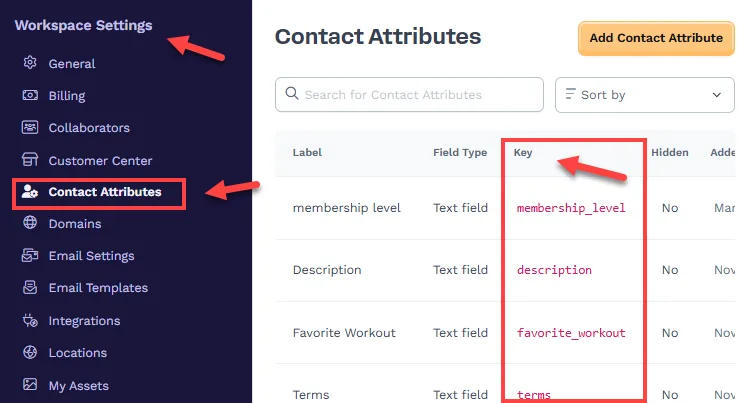
Navigate to Workspace Settings.
-
Select Contact Attributes from the menu.
-
Here, you’ll find a list of existing attributes along with their:
-
Label: The display name for the attribute.
-
Field Type: Defines the type of data collected (e.g., text field).
-
Key: The unique identifier used to map input fields in your forms.
-
You can use these keys as the Custom Type Name when setting up your form elements. This ensures the data submitted by users maps correctly to their contact profile.
Adding Custom Input in the Checkout Form
Section titled “Adding Custom Input in the Checkout Form”You can also collect custom user data directly in a Checkout Form using the Custom Slot feature. This feature allows you to include additional input fields in the checkout process.
How to Use Custom Slots:
Section titled “How to Use Custom Slots:”-
Add the Checkout element to your funnel step.
-
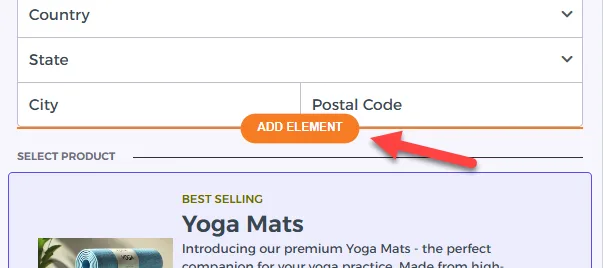
To insert a block element, hover over any component inside the Checkout element, and an orange “Add Element” button will appear.
-
Clicking this button opens up options for adding block elements. Select a Form type input element to collect the user’s custom information in the Checkout form.
Learn more: Checkout: Enable Users to Complete their Purchase.
Finding Users’ Data After Form Submission
Section titled “Finding Users’ Data After Form Submission”Once a user submits a form, their data, including custom input, is stored in their Contact Profile.
How to Access Submitted Data:
Section titled “How to Access Submitted Data:”-
Go to the Customers » Contacts menu in your workspace.
-
Select a contact to view their profile.
-
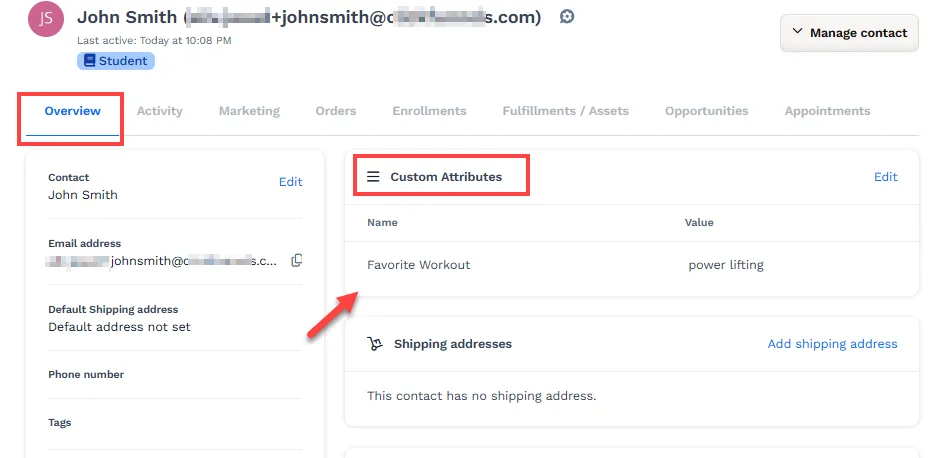
Click the Overview tab.
-
In the Custom Attributes section, all the custom data collected from the user is displayed alongside the field name and value.