
Creating a Double Opt-In Sequence in ClickFunnels
Published: Updated:
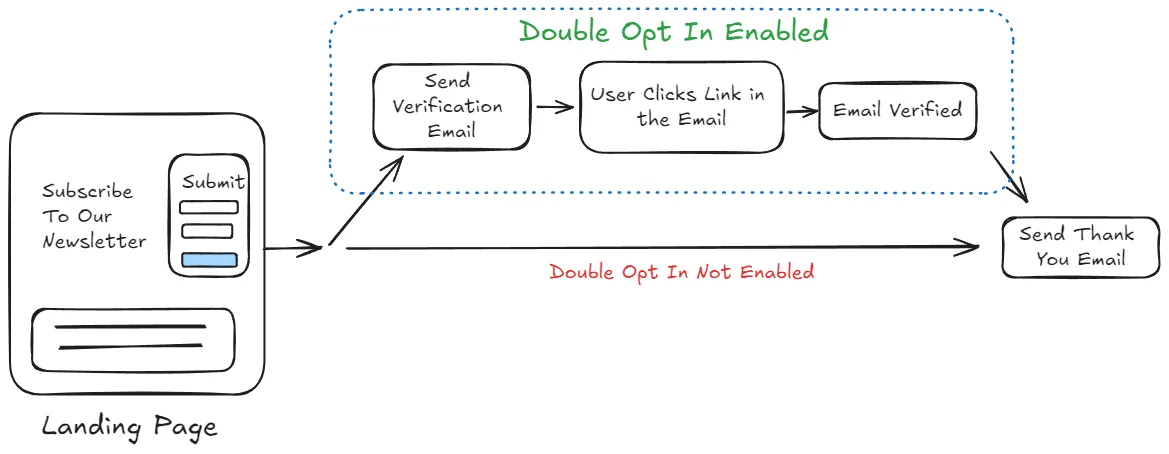
In email marketing, double opt-in is a crucial practice that ensures subscribers are genuine and enthusiastic about receiving your content. The Double Opt-In method helps to ensure that the email addresses collected are valid by having users verify their email addresses after signing up. In this article, we’ll walk through how to set up a Double Opt-In process using ClickFunnels’ Workflows and Quick Actions feature.
Requirements
Section titled “Requirements”-
An active ClickFunnels account
-
The Automations app added to your workspace
-
The Landing Pages app added to your workspace
What is Double Opt-In
Section titled “What is Double Opt-In”Double opt-in involves sending a confirmation email to subscribers after they initially sign up. This email contains a verification link. Only when the subscriber clicks on this link is their subscription confirmed. This method helps reduce spam complaints and ensures your email list is composed of engaged individuals.
Example:
Imagine you’re a nutrition coach offering a free meal plan to potential clients who sign up for your newsletter. A user signs up and receives a confirmation email with a link to verify their email. After clicking the link, their email is marked as verified, and they receive the free meal plan. This ensures a quality mailing list with engaged subscribers.
Strategy Behind This Double Opt-In Automation
Section titled “Strategy Behind This Double Opt-In Automation”Here’s an overview of the strategy:
-
Tag-Based Verification:
- We’ll create a common tag, such as
contact-verified, that will mark when a contact has verified their email.
- We’ll create a common tag, such as
-
Workflow and Conditional Split:
-
A Workflow will be set up to trigger when someone signs up.
-
The Workflow will use a Conditional Split Path to check if the user has the verification tag.
-
-
Verification Email:
-
If the contact doesn’t have the verification tag, they will receive an email asking them to confirm their email address by clicking a link.
-
The link will lead to a confirmation landing page, which will apply the verification tag to the contact using the Quick Action feature.
-
Step 1: Create a Funnel with Opt-In and Thank You Pages
Section titled “Step 1: Create a Funnel with Opt-In and Thank You Pages”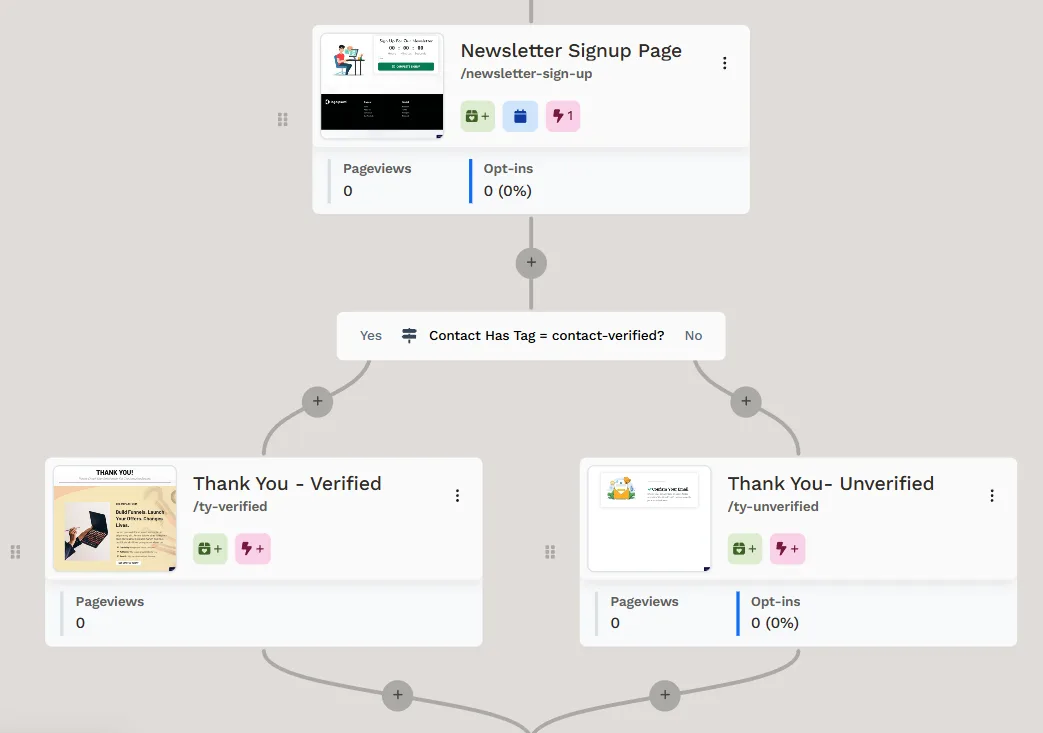
-
Create an Opt-in Page:
-
Create a funnel with an opt-in page where visitors sign up and input their email address.
-
-
Add Conditional Split Path:
-
Add a Conditional Split Path to check if the contact has the
contact-verifiedtag.-
Yes Path: If the contact has the tag, they can be directed to a Thank You page for verified users.
-
No Path: If they don’t have the tag, they will see a page asking them to check their email to verify their email address.
-
-
-
Create two Thank You Pages:
-
Thank You - Verified: For users who already have the verification tag, thanking them for confirming.
-
Thank You - Not Verified: Informs users to check their inbox to confirm their email address.
-
Step 2: Create a Confirmation Landing Page with Quick Action
Section titled “Step 2: Create a Confirmation Landing Page with Quick Action”-
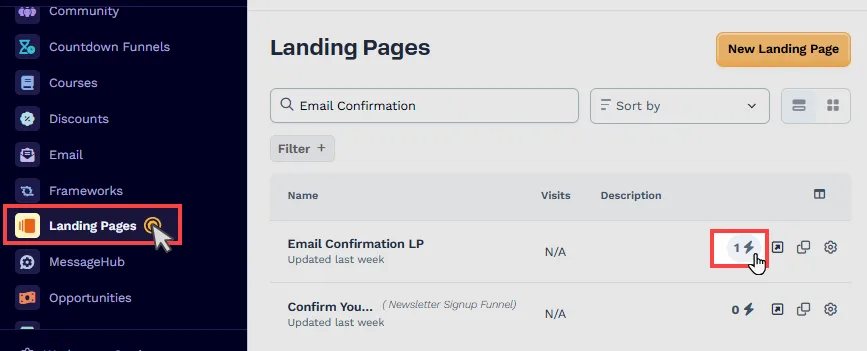
Navigate to the Landing Pages app in ClickFunnels and create a new landing page. This page will serve as the confirmation success page once users click on the link in the verification email.
-
Add a Quick Action to the landing page:
-
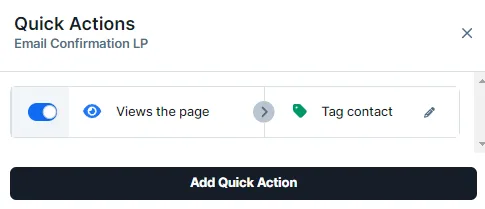
Set the trigger as Views the Page.
-
Next, add an effect by selecting Add/Remove Contact Tag.
-
Choose the action Add Tag and select the appropriate tag in the Contact Tags field.
-
This Quick Action will automatically apply the
contact-verifiedtag to the user once they view the page.
-
Learn more about the Quick Actions feature in the article Automations: How to Add and Manage Quick Actions.
Step 3: Create a Workflow for Double Opt-In
Section titled “Step 3: Create a Workflow for Double Opt-In”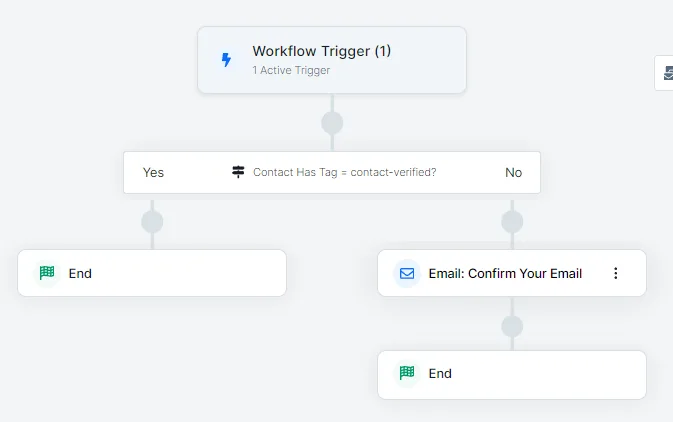
-
Create a Workflow: Navigate to the Automations app in ClickFunnels and create a new workflow in the Workflows menu.
-
Set the Trigger: Configure the workflow to trigger from the funnel opt-in page where users sign up.
-
Conditional Split Path: Check if the user already has the
contact-verifiedtag.-
Yes Path: Users who have already verified can skip the verification process.
-
No Path: For users without the verification tag, send them an email to confirm their email address.
-
-
Verification Email:
-
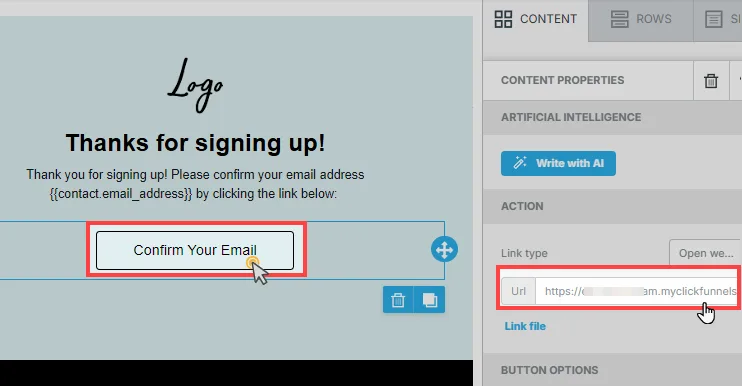
In the email, hyperlink the confirmation landing page URL (created in Step 2). In this example, we have used a button in the email editor to insert the landing page URL here.
-
Once the email is received, the subscriber will click the link and be redirected to the confirmation page. The
contact-verifiedThe tag will be applied from the landing page’s quick action.
-
To set up a double opt-in process in ClickFunnels:
-
Create a funnel with a signup page and conditional thank you pages based on the verification status.
-
Create a confirmation landing page with a quick action to apply the
contact-verifiedtag. -
Set up a workflow that checks if the user has been verified and, if not, sends them an email with a link to confirm their email address