
How to Create and Manage Products
Published: Updated:
This article explains how to create and update a product in ClickFunnels. To sell an item on the ClickFunnels store and funnels, you need to create a product and set it up in the Products menu. From the products page, you can add a product and then update its details, prices, variants, access, shipping and availability in the product editor.
Requirements
Section titled “Requirements”- An active ClickFunnels account
How to Create a New Product
Section titled “How to Create a New Product”You create a product, its type and its first price in a single Create Product dialog, so every new product already has a price.
-
Navigate to Products in the side navigation menu, then select All Products.

-
Click the Create Product button in the All Products dashboard.
-
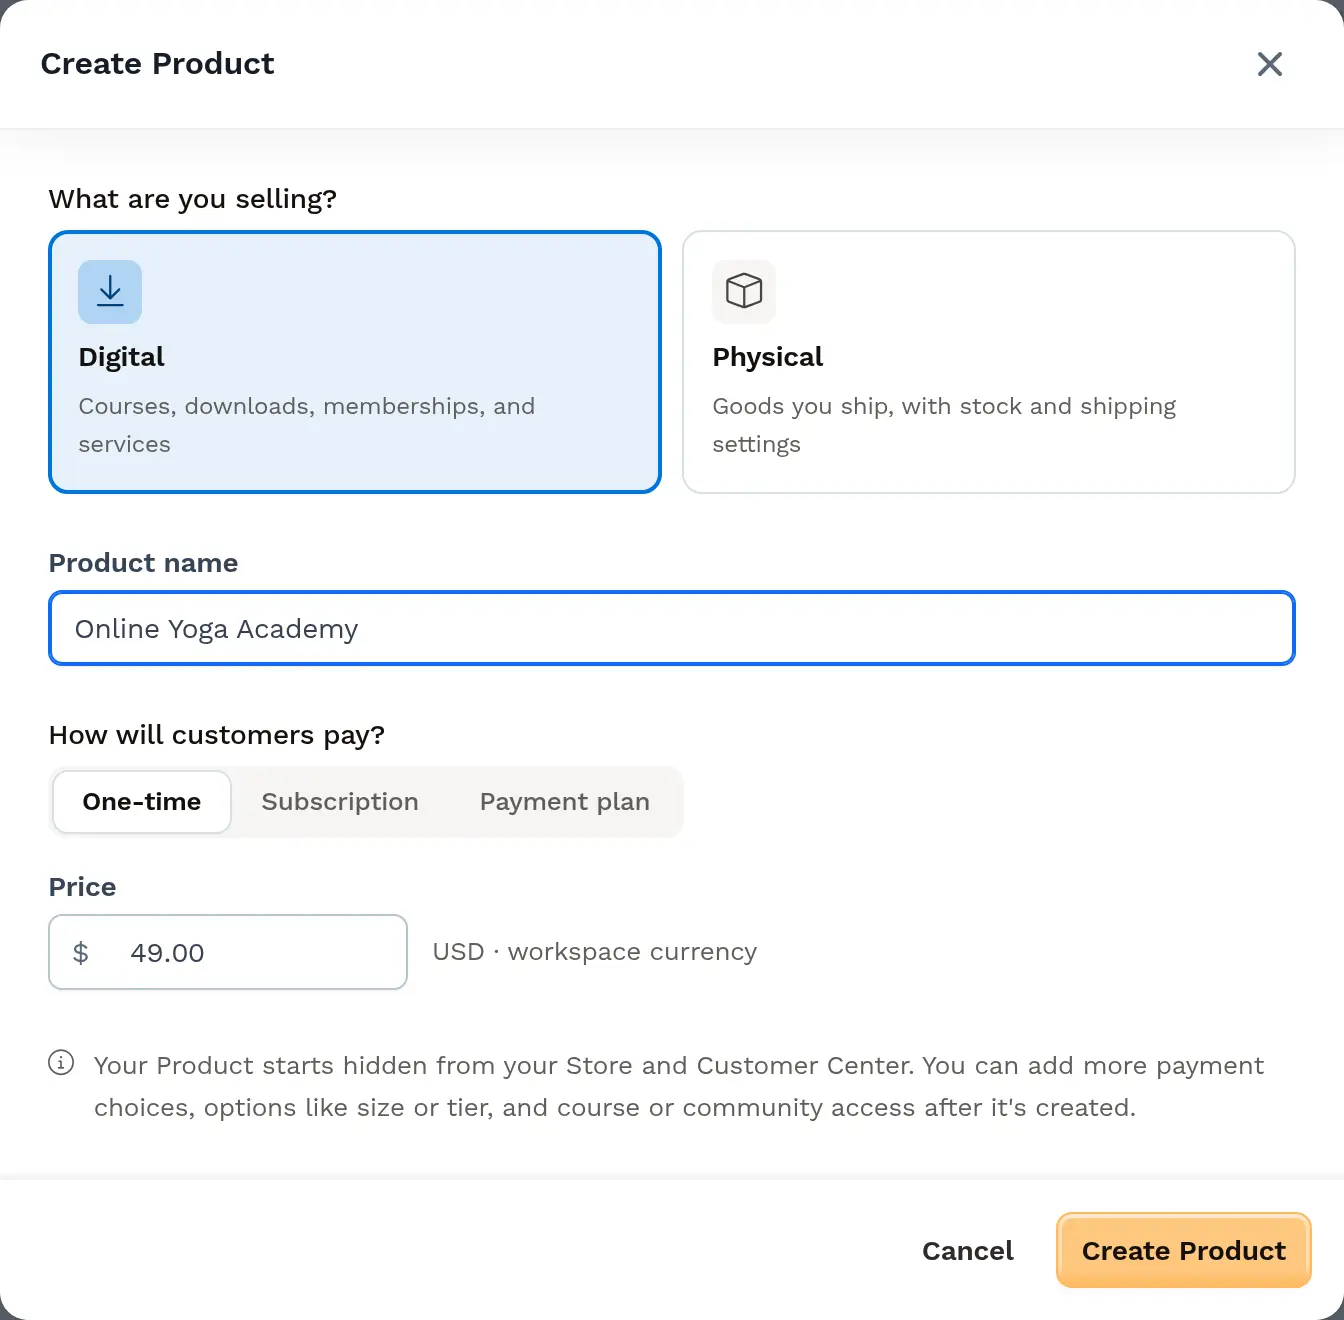
Under What are you selling?, choose the product type:
-
Digital: Courses, downloads, memberships, and services.
-
Physical: Goods you ship, with stock and shipping settings.
-
-
Enter the Product name.
-
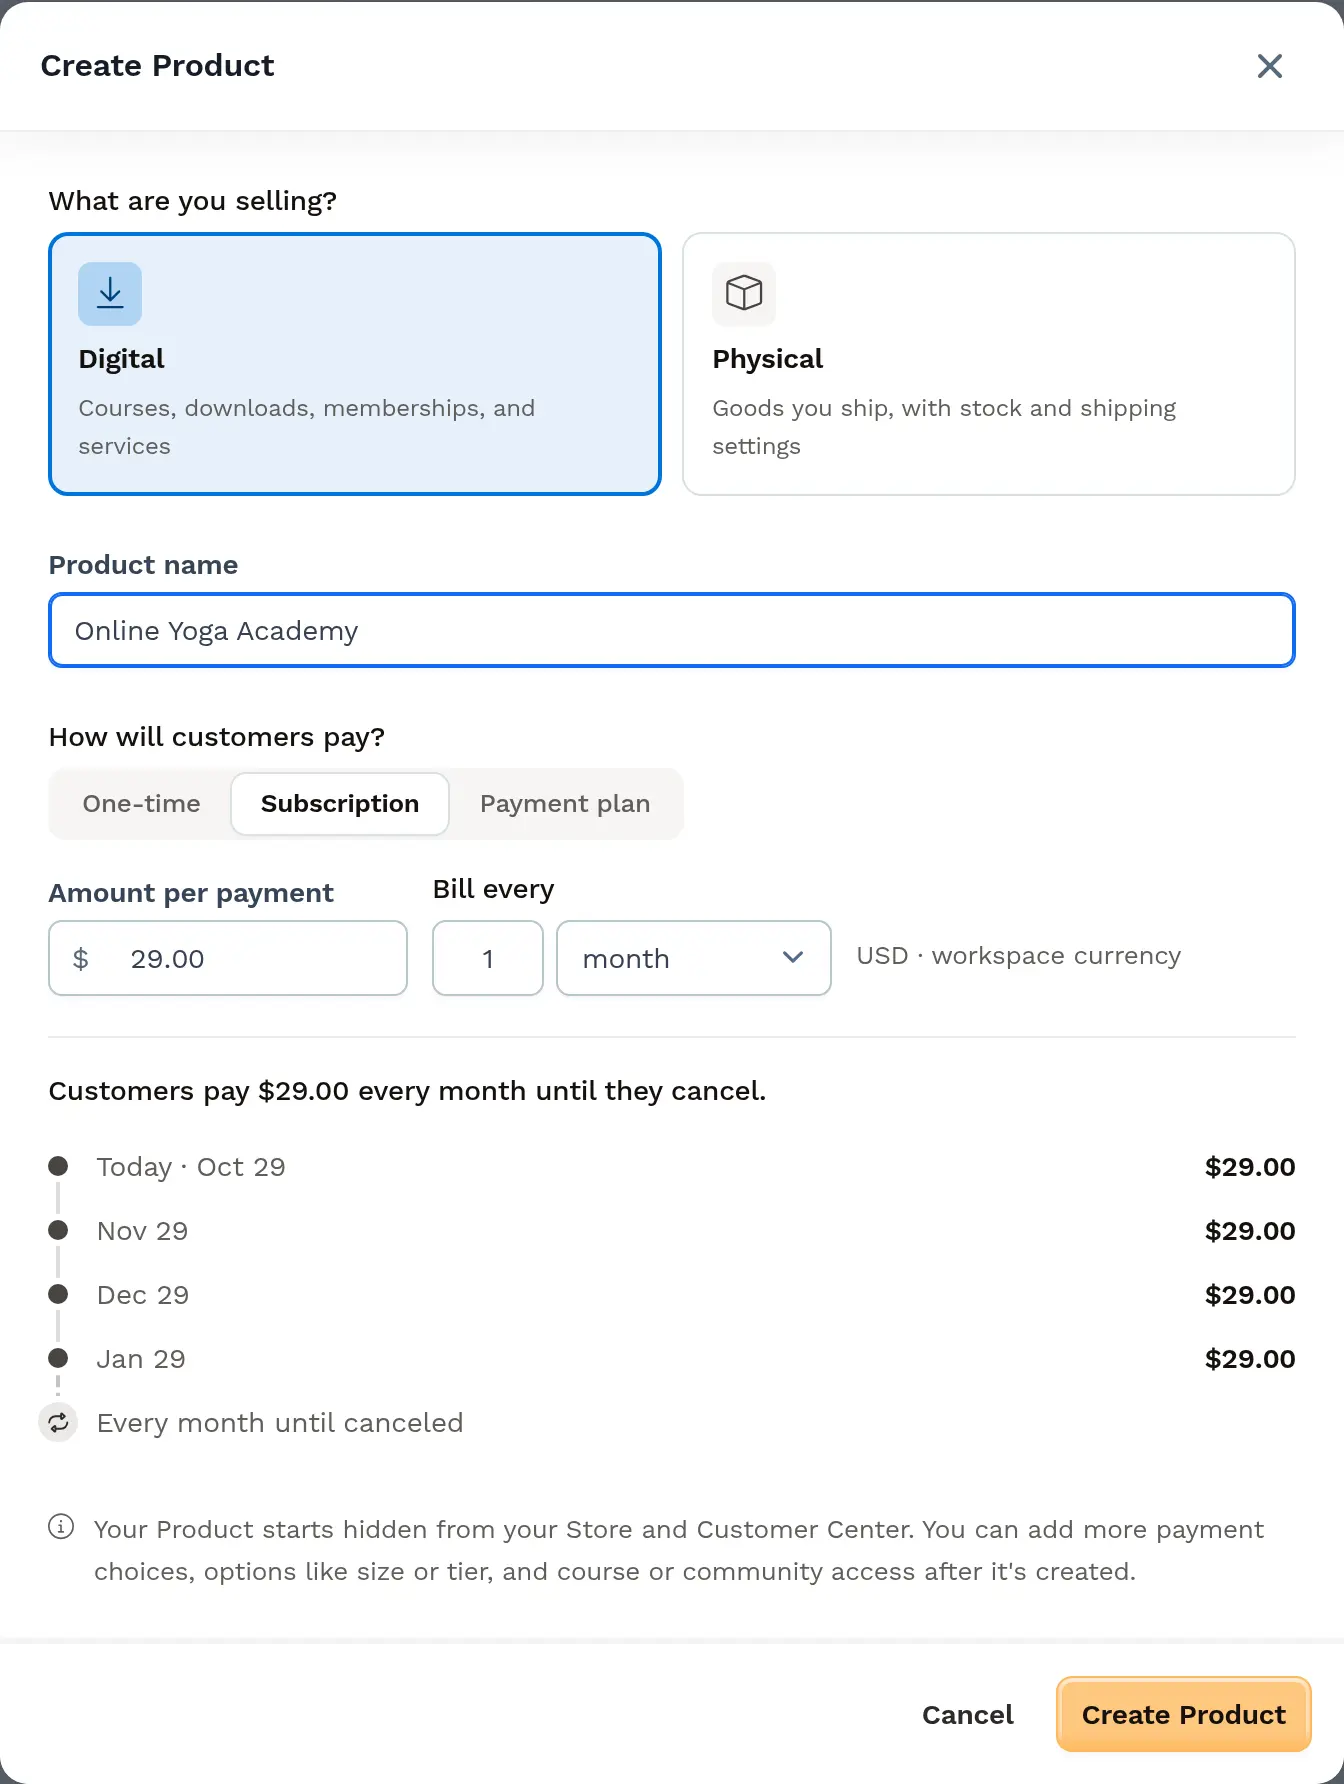
Under How will customers pay?, choose One-time, Subscription or Payment plan, then enter the price details:
-
One-time: Enter the Price.
-
Subscription: Enter the Amount per payment and how often to Bill every (for example,
1Month). -
Payment plan: Enter the Amount per payment, how often to Bill every, and the number of Payments.
Prices are charged in your workspace currency. For subscriptions and payment plans, the dialog shows a summary of the billing and an example billing schedule, so you can check the terms before you create the product.
-
-
Click Create Product.
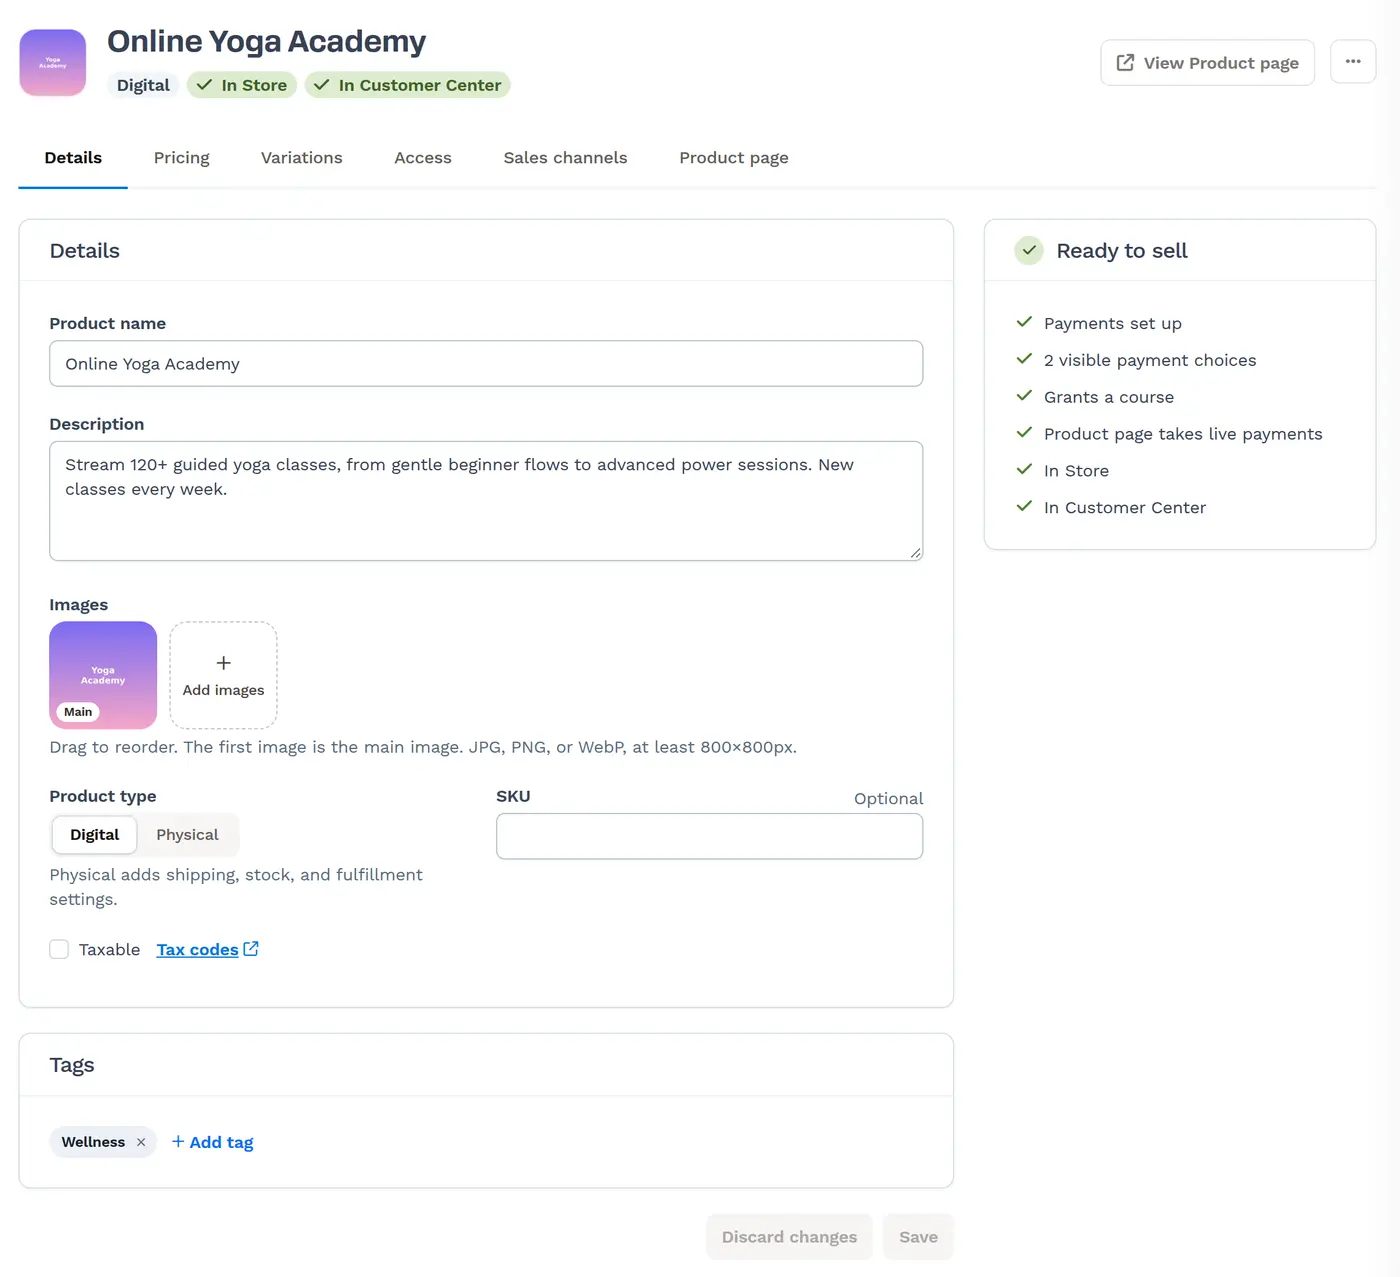
The product opens in the product editor on its Details tab. A new product starts hidden from your Store and Customer Center. After it’s created, you can add more prices, options such as size or tier, and course or community access. The Ready to sell panel on the right shows what’s left to do before customers can buy it.
For more information on the product editor, visit the Product Settings Overview article.
How to Edit an Existing Product
Section titled “How to Edit an Existing Product”-
Navigate to Products in the side navigation menu.
-
On the Products page, locate the product you want to edit. You can either click on the product itself, its image, or the settings ⚙ icon. The product opens in the product editor on its Details tab.
-
Select the tab that holds the settings you want to change: Details, Pricing, Variations, Access, Inventory & shipping (called Inventory for digital products), Sales channels or Product page.
-
Make your changes, then click Save at the bottom of the tab. To throw away changes you haven’t saved, click Discard changes and confirm.
Save each tab before you switch to another one. If a tab has unsaved changes when you switch tabs or leave the page, you’re asked to confirm: “You’ve made changes that haven’t been saved. Clicking ‘OK’ will discard them. Do you want to continue?” Click Cancel to stay on the tab and keep your changes, or OK to discard them. Prices, variants and access are added and edited in their own drawers and dialogs, and the Store and Customer Center switches on the Sales channels tab save as soon as you change them.
For more information on each tab, visit the Product Settings Overview article.
How to Bulk Edit Products
Section titled “How to Bulk Edit Products”Bulk editing products allows you to make changes to multiple products simultaneously, saving time and ensuring consistency across your product catalog. This feature is particularly useful for applying uniform tags, adjusting visibility settings, and making other modifications to multiple products at once, streamlining your workflow and enhancing overall productivity.
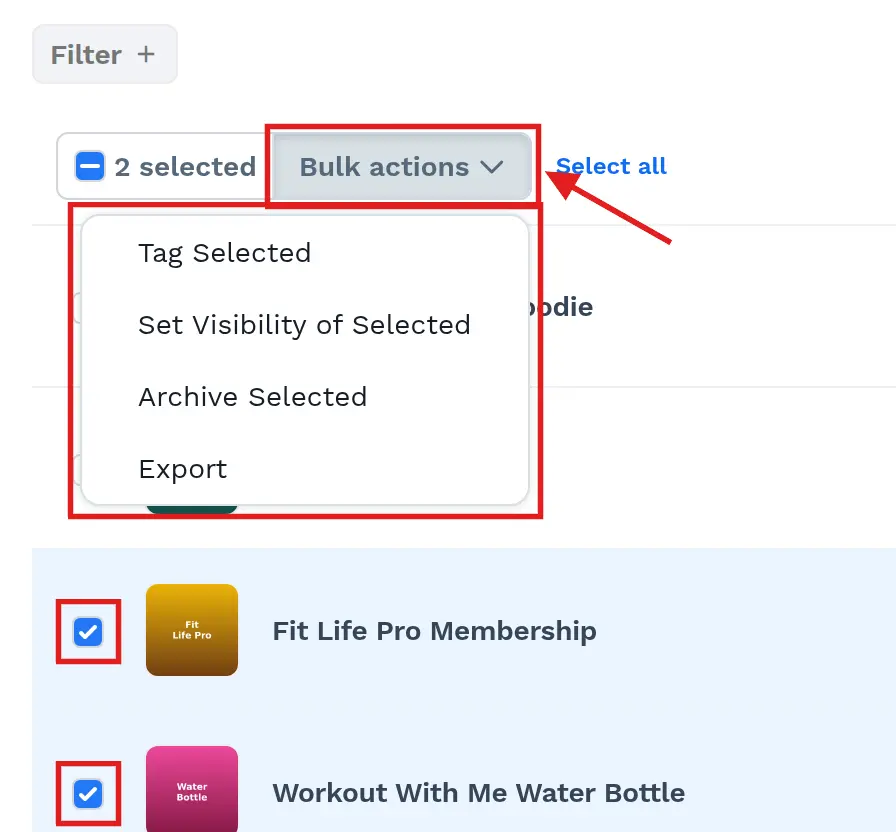
To streamline product management tasks, you can bulk edit products by following these steps:
-
Navigate to Products in the side navigation menu.
-
On the products page, locate the products you want to modify. Use the Checkboxes to select the products that you want to modify or update.
-
Click Bulk actions and select one of the following actions:
-
Tag Selected: Add or remove tags from the selected products.
-
Set Visibility of Selected: Make the selected products visible or invisible in the workspace store and customer center.
-
Archive Selected: Archive or remove the selected products.
-
Export: Export product details into a CSV file. Exporting product information to a CSV file can facilitate data analysis, inventory management, and record-keeping. Before exporting, you can select the product fields to include in the CSV file. Additionally, you can access previous exports and download them. To view previous exports, click Actions > Exports in the top right corner of the product page. The Actions menu appears once you have at least one export.
-
How to Remove or Archive Products
Section titled “How to Remove or Archive Products”-
Navigate to Products in the side navigation menu.
-
Archiving a Single Product:
-
On the products page, locate the specific product you wish to remove.
-
Click directly on the product, its image, or the settings ⚙ icon to open it in the product editor.
-
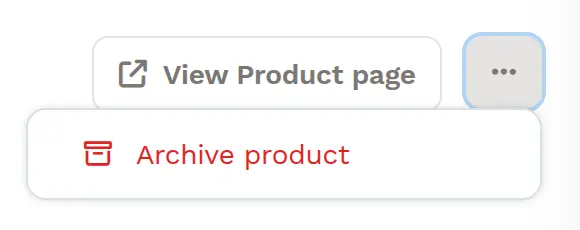
Click the ⋯ (More product actions) button at the top right of the product editor, then select Archive product.
-
Confirm the removal by clicking Confirm Archive.
-
-
Archiving Products in Bulk:
-
Identify the products you want to archive on the products page.
-
Use the Checkboxes to select the desired products.
-
Click the Bulk actions menu.
-
Choose the Archive Selected option.
-
Confirm the archiving by clicking Confirm Archive in the prompt.
-
Upon archiving, the product will be removed from the products page. You may need to refresh the browser to see the updated products page.
How to Restore Archived Products
Section titled “How to Restore Archived Products”-
Navigate to Products in the side navigation menu.
-
Click on the Archived tab.

-
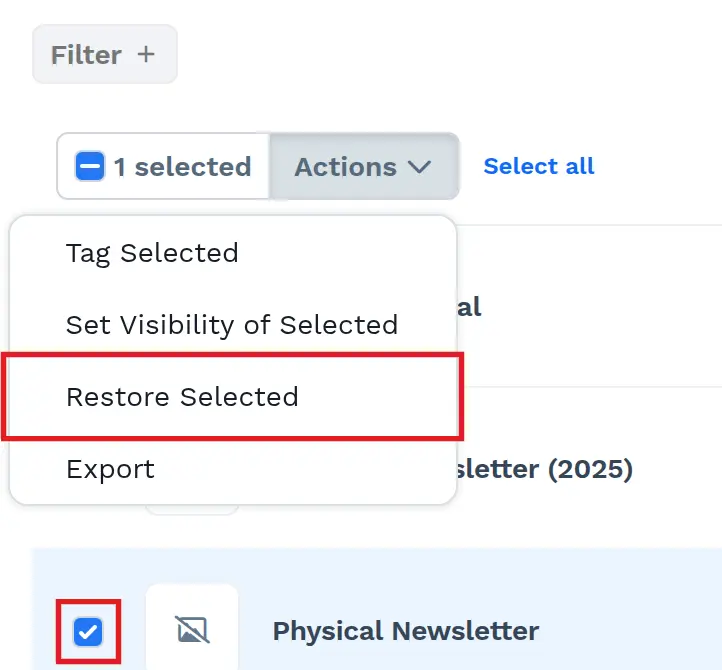
Locate the products you want to restore. Use the Checkboxes to select the products that you want to restore. You can select one or multiple products for restoration.
-
Click the Bulk actions menu.
-
Choose the Restore Selected option.
-
In the prompt that appears, click Confirm Restore to finalize the restoration.
Upon restoration, the selected products will be visible again on the products page.
To restore a single product, you can also open it from the Archived tab, click the ⋯ (More product actions) button in the product editor, select Unarchive product, then click Confirm Restore.
How to Add Quick Actions to Products
Section titled “How to Add Quick Actions to Products”-
Navigate to the Products section in your ClickFunnels dashboard.
-
Find the product you want to add a Quick Action to.
-
Click the lightning bolt icon (⚡) in the right-hand column of the product’s row. This icon appears only when the Automations app is installed in your workspace.

-
Select Add Quick Action.
-
Choose a trigger for your Quick Action. For products, triggers include:
-
Makes a purchase
-
Cancels an order
-
Upgrades subscription
-
Downgrades subscription
-
Churns an order
-
-
Select an effect that will occur when the trigger is activated.
-
Activate your Quick Action using the toggle switch.
For more detailed instructions, please refer to the How to Add Quick Actions to Products