
Divider: Separate Contents with Dividers
Published: Updated:
The Divider element in ClickFunnels is designed to add separation and structure within your page content. It allows you to create clear boundaries or subtle spacing to improve readability and organization on your page. With customization options for styling, alignment, and spacing, the Divider element can be used to visually break up content blocks or act as an invisible spacer for smoother transitions. This guide will walk you through the settings and customization options of the Divider element, showing you how to optimize it for your page layout.

Requirements
Section titled “Requirements”-
An active ClickFunnels account
-
A page created in your workspace
Adding a Divider Element in the Page Editor
Section titled “Adding a Divider Element in the Page Editor”-
Inside the page editor, add a Section where you want to place the element.
-
Add a Row within that section.
-
Click the orange + Plus or Add New Element button inside the row to insert a new element.
-
From the MISC (Miscellaneous) category, select the Divider element.

Once the Divider element is added, you can customize its appearance to fit your page design.
Customizing the Divider Element
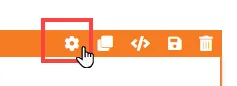
Section titled “Customizing the Divider Element”When you hover over an element, its border will be highlighted in orange. To access an element’s settings, click on the gear ⚙️ icon or click directly on the element.
Top Margin
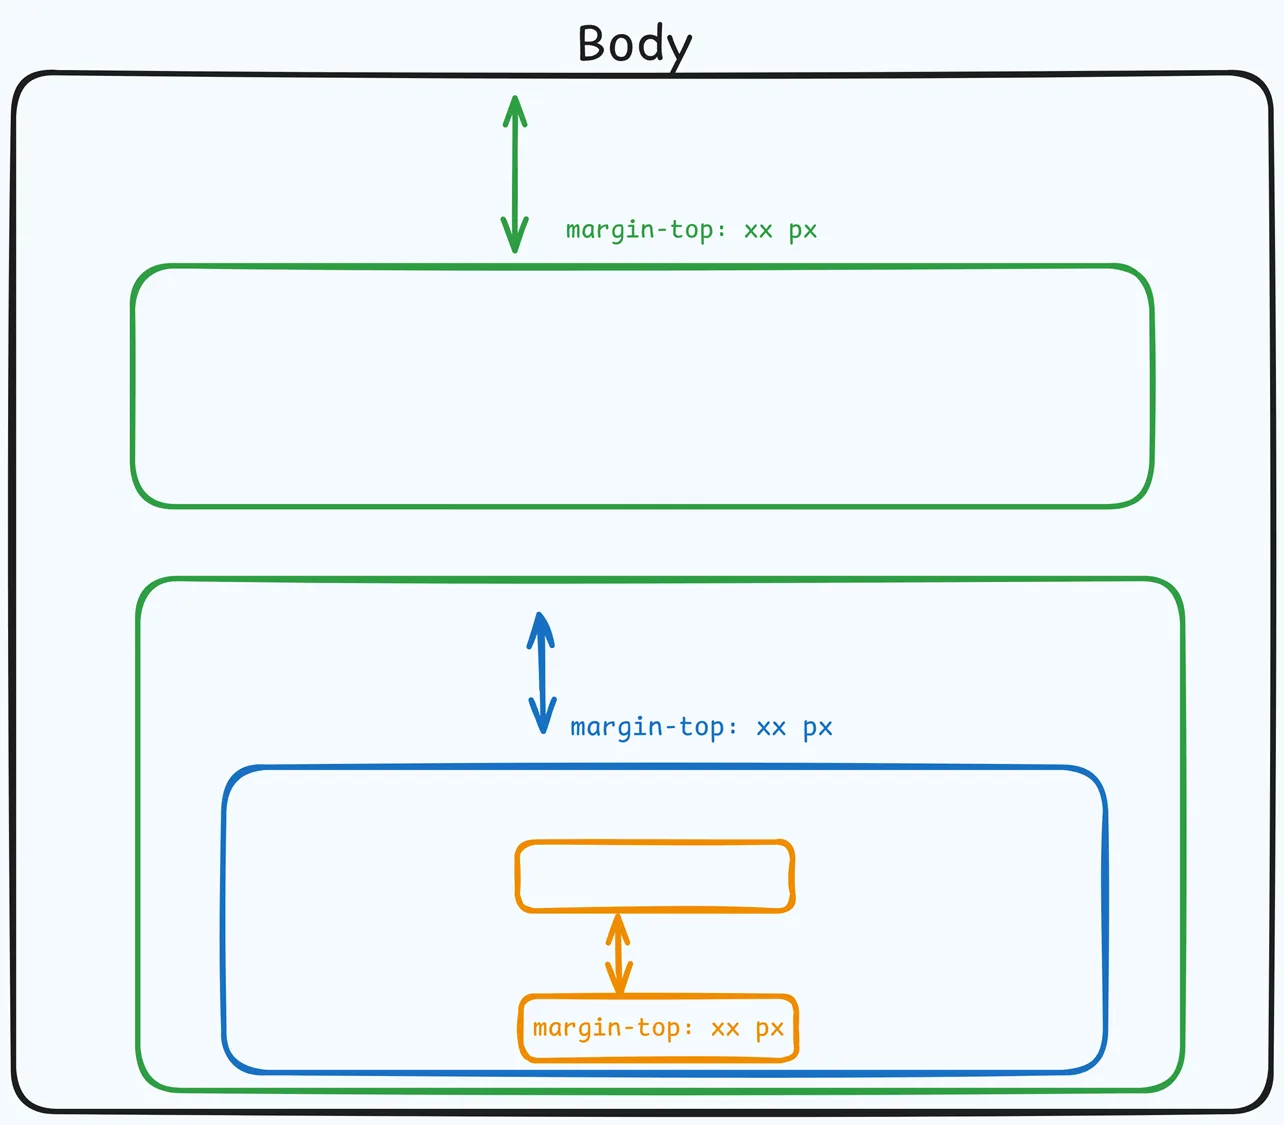
 The Top Margin setting lets you control the space between the current container (section, row, flex, and element) and the container directly above it. If no previous container exists, the margin will be applied relative to the parent container. If no preceding container is added, the Body will be the parent.
You can set top margin values independently for desktop and mobile by using the device icons (🖥️ & 📱 ). If no mobile value is specified, it will inherit the desktop setting by default. Use the slider or manually enter a value in pixels (px) or percentage (%) to create consistent spacing across screen sizes.
Divider Settings
-
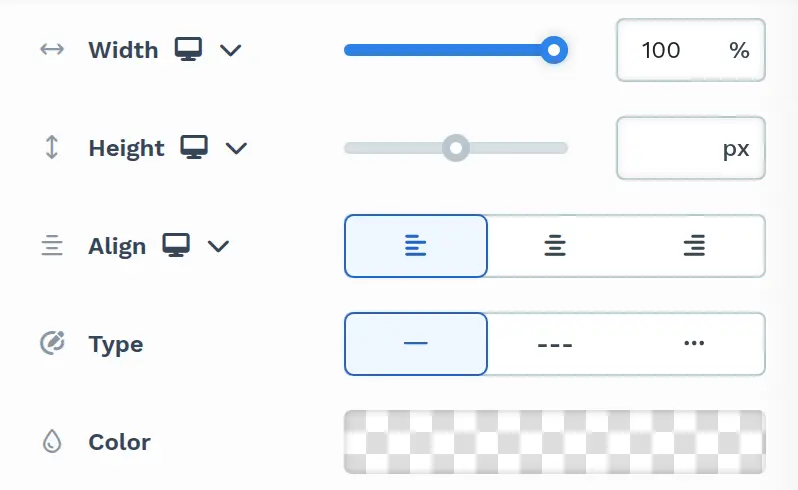
Width: Control the width of the divider relative to the container, as a percentage, up to 100%. The default, 100%, spans the entire container width, while reducing the value shortens the divider within the container. You can set the width independently for desktop and mobile by using the device icons (🖥️ & 📱 ). If no mobile value is specified, it will inherit the desktop setting by default. Use the slider or manually enter a percentage (
%). -
Height: Define the thickness of the divider line for a bolder line or a more subtle appearance. The height is set in pixels (
px), from 1px to 100px, and defaults to 1px. You can also set the color to transparent and increase the height to create an invisible spacer that adds spacing without a visible line. You can set the height independently for desktop and mobile by using the device icons (🖥️ & 📱 ). If no mobile value is specified, it will inherit the desktop setting by default. Use the slider or manually enter a value in pixels (px). -
Align: You can choose to align the divider to the left, center, or right within the row. This setting is particularly useful for dividers with less than 100% width. Click the left, center, or right align button to set it. You can set the alignment independently for desktop and mobile by using the device icons (🖥️ & 📱 ). If no mobile value is specified, it will inherit the desktop setting by default.
-
Type: Select from different line styles, such as solid, dashed, or dotted, to match the theme of your page.
-
Color: Choose a color for the divider line that stands out or blends seamlessly with your page design. To create invisible dividers, simply set the color to transparent.
Padding

The Padding settings control the space between the content and the inside edge of its container (such as a section, row, column, or element). This internal spacing helps ensure your content has room to breathe and appears visually balanced. Use the slider or manually enter a value in pixels (px) or percentage (%) to create consistent spacing across screen sizes.

By default, the Divider has 10px of padding at the top and bottom.
Padding Options:
-
Top: Add space between the top of the element container and its content.
-
Bottom: Add space between the bottom of the element container and its content.
-
Left + Right: Adjust the horizontal spacing between the element container and its content.
Desktop & Mobile (🖥️ & 📱)Customization:
The padding settings allow you to define separate values for desktop and mobile views. Use the device toggle at the top of the padding controls to switch between screen modes and adjust spacing accordingly. If no mobile value is specified, it will inherit the desktop setting by default.
This feature ensures your layout remains optimized for different screen sizes, enhancing the mobile and desktop experience.
Shadow
The Shadow settings allow you to add depth and emphasis to elements by applying shadow effects, enhancing the visual appearance. On the Divider, the shadow is applied to the divider line itself. Here’s how to customize shadow properties:

-
Style: Select one of the predefined shadow styles from your page’s style guide. Click on the numbered styles (1, 2, or 3) to apply preset shadow settings defined in your style guide.
-
Shadow Style: Choose between Inset (shadow within the element) and Outset (shadow outside the element) to achieve the desired shadow effect.
-
X-direction: Adjusts the horizontal positioning of the shadow. A positive value moves the shadow to the right, while a negative value shifts it to the left.
-
Y-direction: Controls the vertical placement of the shadow. Positive values push the shadow downward, while negative values pull it upward.
-
Blur: Controls the softness of the shadow edges. Higher values create a more diffused, softer shadow, while lower values keep the shadow sharp.
-
Spread: Adjust the size of the shadow. Positive values expand the shadow, while negative values make it narrower.
-
Color: Use the color picker to choose to set the shadow color.
Control Panel
The Control Panel appears at the bottom of every container(Section, Row, Flex, and Element) in the page editor, offering quick access to essential settings and actions for that container. Here’s what each icon represents:

-
ALL: The container will be visible on all devices (desktop, tablet, and mobile).
-
Desktop (🖥️) Icon: The container will only be visible in desktop view (screens 771px and wider).
-
Mobile (📱) Icon: The container will only be visible in mobile view (screens up to 770px wide).
-
Eye (👁️) Icon: Hides the container on all devices. It isn’t deleted. To show it again, select All, Desktop, or Mobile in this panel, or open Layout in the top bar and turn the container’s desktop or mobile toggle back on.
-
Code (
</>): Opens the code editor for this container, where you can add custom CSS to change its styling. The editor shows the container’s CSS ID Selector so your CSS targets only this container. Open it from the code icon at the top of the settings panel, or hover over the container on the page and click Code in its toolbar. -
Trash (🗑️) Icon: Removes the container from the page editor entirely.
Advanced Settings
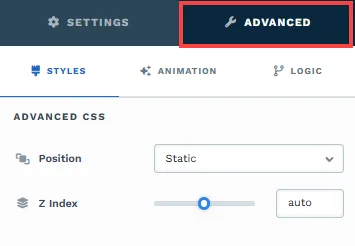
To further customize your container (section, row, column, and element), ClickFunnels provides Advanced settings that allow you to control style, advanced CSS, animation, and rendering logic. We’ve separated these advanced features into dedicated articles to avoid overwhelming you with too much content in one place and to keep our documentation concise. Explore the following resources for more details:
-
Advanced Settings - Customize Styles: Learn how to populate contents dynamically, position containers, and apply z-index.
-
Advanced Settings - Customize Animation: Learn how to add animations, control entry and exit effects, and adjust animation delay.
-
Advanced Settings - Customize Logic: Learn how to apply conditional logic to elements and add custom attributes.