
Uploading Image Assets
Published: Updated:
Adding images to your funnel pages can enhance your brand, communicate ideas visually, and engage visitors more effectively. With ClickFunnels, you can easily upload and manage your image assets in one central location. In this article, you’ll learn how to upload image files, organize them, and use them inside the page editor.
Requirements
Section titled “Requirements”-
An active ClickFunnels account
-
An image file for uploading (accepted formats include:
jpg,png,svg,gif,webp, andico) -
Maximum image file size: 10MB
Uploading an Image
Section titled “Uploading an Image”-
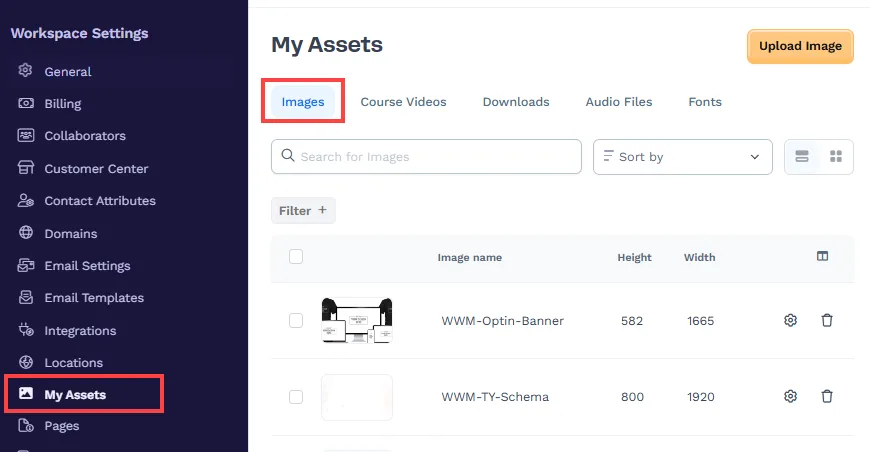
From your ClickFunnels dashboard, navigate to Workspace Settings.
-
Select My Assets.
-
Click on the Images tab.
-
Upload your images directly from the Images page. You can either drag and drop one or more image files anywhere onto the page — a full-page overlay appears while you drag — or click Select Files to Upload in the header (or the empty-state button) to choose images from your device. You can add multiple images at once, and each uploads with its own progress indicator.
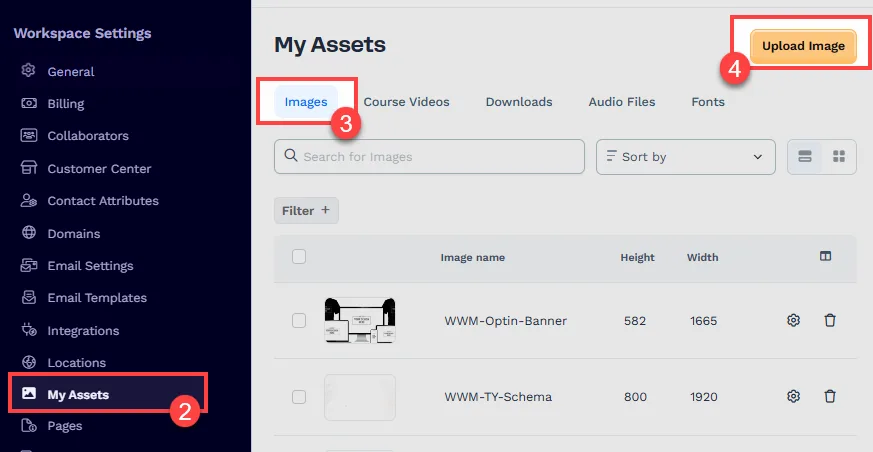
ClickFunnels automatically files each image under the Images tab based on its file type. The recommended file size is less than 3MB to optimize loading speed and ensure a smooth user experience across devices. The maximum file size can be 10MB. Accepted formats include
.png,.jpg,.webp,.gif, and.ico. -
Each image’s name is derived from its file name. After uploading, you can edit an image’s details, including its folder, name, and alt attribute:
-
Folders: Choose or create a folder to help categorize your image.
-
Image Name: Provide a descriptive name to identify the image later.
-
Image alt attribute: Write a brief description for accessibility and SEO.
-
Once uploaded, your image will appear in the list of image assets with details like file name, size, upload date, etc.
Managing Images
Section titled “Managing Images”To help you keep track of your files, ClickFunnels displays each uploaded image in a sortable table with columns for filename, image alt attribute, height, width, and upload date.
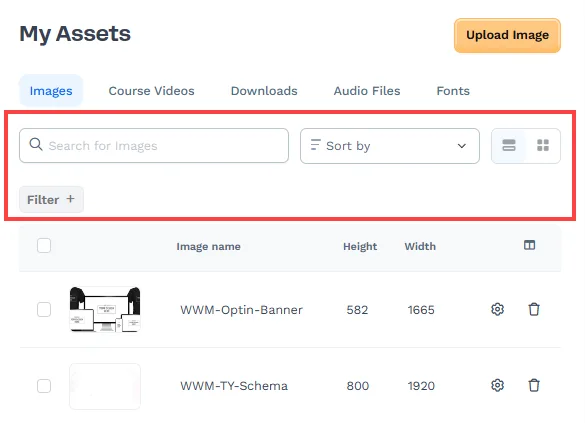
You can manage and locate specific images using the following tools:
-
Search Bar: Enter any part of the image filename to locate a specific image quickly.
-
Filter Button: Click the Filter + button to open filter options. You can filter by attributes such as folder, name, creation date, and update date.
-
Folders: Organize images into folders and use the filter to view images by folder.
-
Sort Options: Use the dropdown to sort by name, size, or date added.
-
Image Actions: Use the gear icon next to each image to rename, delete, or view details.
These features help you stay organized, especially when managing large volumes of image assets across different funnels.
Using Images in the Page Editor
Section titled “Using Images in the Page Editor”To use an uploaded image on a page:
-
Open the page you want to edit.
-
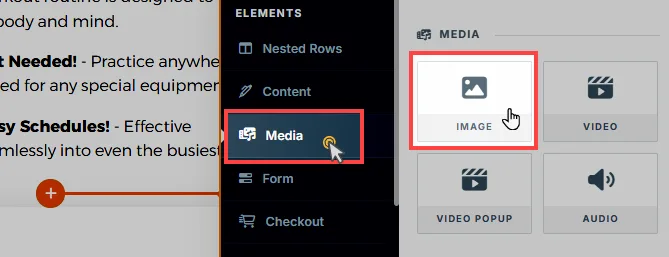
Click the orange + Plus or Add New Element button inside the row to insert a new element.
-
From the Media category, select the Image element.
-
Hover the image element and click the Gear ⚙️ icon to access the image settings.
-
In the Image URL field, click the Image icon to view uploaded images.
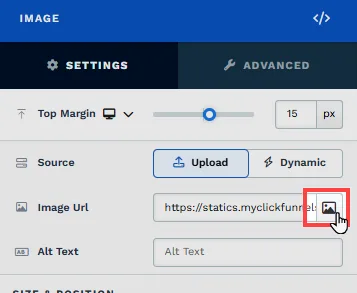
-
Select an uploaded image from your assets or upload a new one. You can also select a folder from the left side of the navigation to find the specific images tagged in a folder.