
Select Box: Allow Users to Choose Options from a List
Published: Updated:
The Select Box element in ClickFunnels allows you to add a drop-down menu (HTML <select> element) to your forms, enabling visitors to choose from a list of options. This is particularly useful for gathering structured data, such as country, state, or custom selections. This article will guide you through adding and customizing the Select Box element.

Requirements
Section titled “Requirements”-
An active ClickFunnels account
-
A page created in your workspace
Adding a Select Box Element in the Page Editor
Section titled “Adding a Select Box Element in the Page Editor”-
Inside the page editor, add a Section where you want to place the element.
-
Add a Row within that section.
-
Click the orange + Plus or Add New Element button inside the row to insert a new element.
-
From the Form category, select the Select Box element.

Once the Select Box element is added, you can customize its appearance to fit your page design.
Customizing the Select Box Element
Section titled “Customizing the Select Box Element”When you hover over an element, its border will be highlighted in orange. To access an element’s settings, click on the gear ⚙️ icon or click directly on the element.
Top Margin
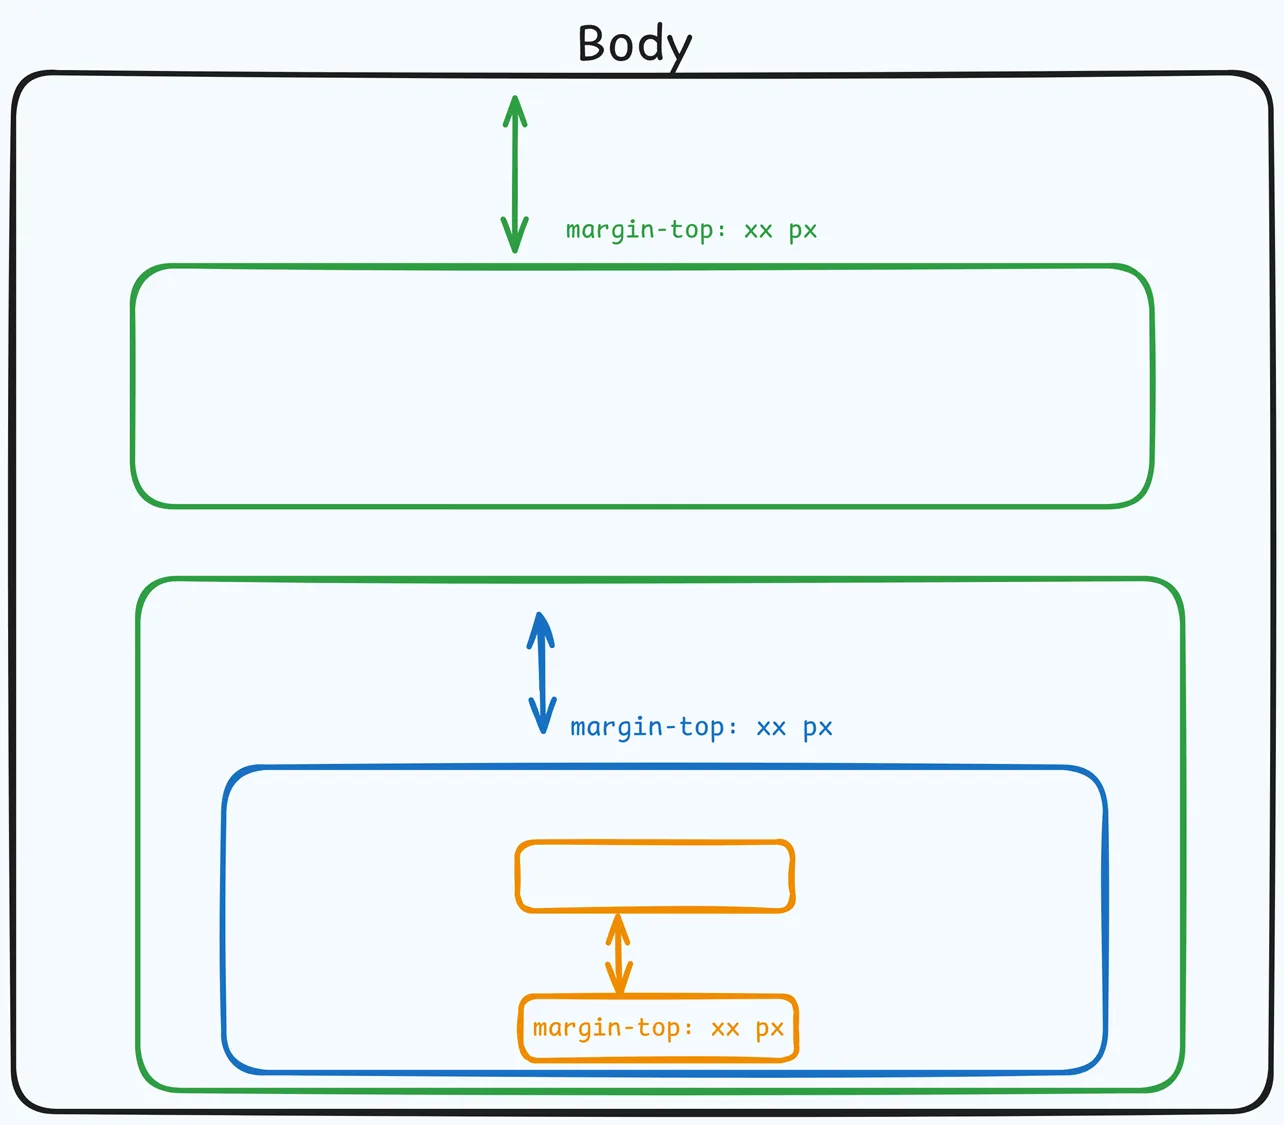
 The Top Margin setting lets you control the space between the current container (section, row, flex, and element) and the container directly above it. If no previous container exists, the margin will be applied relative to the parent container. If no preceding container is added, the Body will be the parent.
You can set top margin values independently for desktop and mobile by using the device icons (🖥️ & 📱 ). If no mobile value is specified, it will inherit the desktop setting by default. Use the slider or manually enter a value in pixels (px) or percentage (%) to create consistent spacing across screen sizes.
Input Type
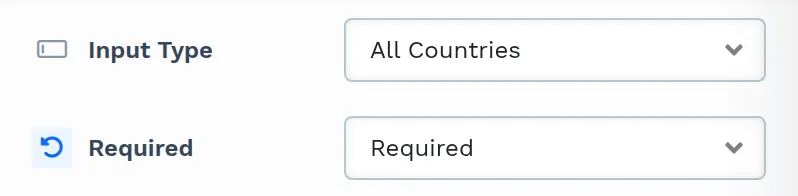
Under Input Type, you can choose from a variety of preset options or create a custom selection:
-
All Countries: Adds a dropdown list containing all countries.
-
All United States: Adds a list of all U.S. states.
-
All Canadian Provinces: Adds a list of Canadian provinces.
-
Custom Options: This option allows you to define a personalized list of options, perfect for collecting custom data that doesn’t fit into standard categories.
When you choose All Countries, All United States, or All Canadian Provinces, the editor shows a single placeholder option (Select Country, Select State, or Select Province). The full list is filled in on the published page:
-
All United States and All Canadian Provinces start with a Select State option, followed by the states or provinces.
-
All Countries lists the United States, Canada, the United Kingdom, Ireland, Australia, and New Zealand first, followed by all other countries. There is no placeholder option, so the first country in the list is selected until the visitor picks another one.
Custom Options
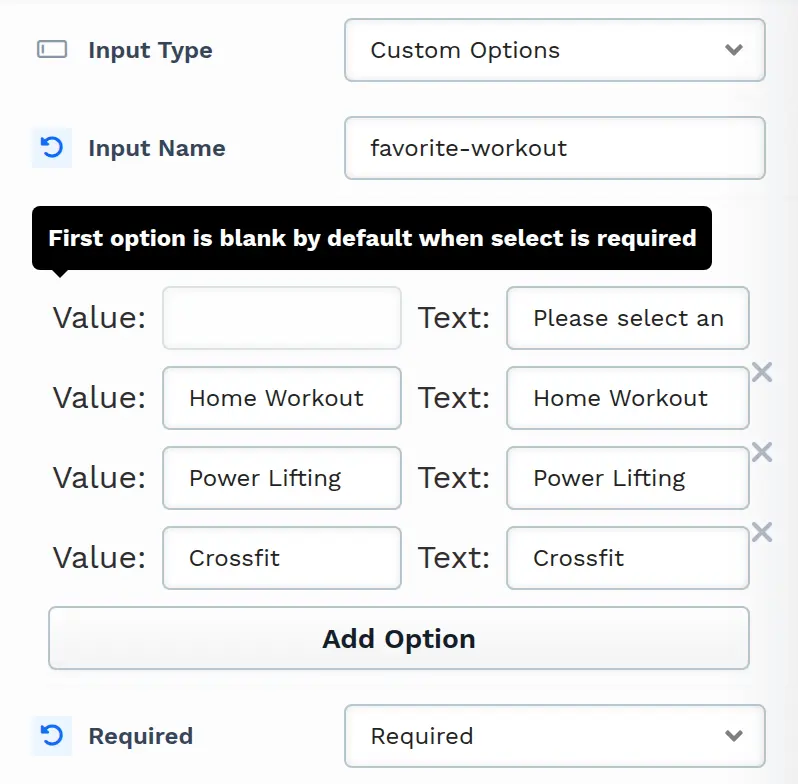
If you select Custom Options in the Input Type, enter a unique Input Name for the field (the field shows name as a placeholder). This name identifies the field, and the selected value is saved under it in the contact profile. Then manually add values and text for each dropdown option:
-
Value: The internal value associated with each option will be saved in your contact profile in the workspace.
-
Text: The visible label that users will see in the dropdown menu.
Click Add Option to add as many custom options as needed. When the field is Required, ClickFunnels automatically adds a first option with a blank value and the text Please select an option below. Its Value can’t be edited (hovering over it shows “First option is blank by default when select is required”), but you can customize its Text to guide users, such as “Select Your Choice…” or similar instructional text.
Example: In the following example, we’ve added three options—Home Workout, Power Lifting, and Crossfit—for users to choose from in response to the question, “Select Your Favorite Workout.” ClickFunnels automatically includes a default option with a blank value, prompting users to “Please select an option below.” This instructional text helps guide users to make a selection. Once users choose an option from the dropdown and submit the form, the selected value is saved in their contact profile as a custom attribute.

Required
The Required setting determines whether a user must select an option before submitting the form. Choose Required or Not Required from the dropdown. When set to Required, visitors cannot submit the form until they complete the selection. This is useful for collecting essential information and capturing critical data. When set to Not Required, the field is optional, and users can submit the form without selecting an option in the element.
Background Color
The Background section allows you to set the element’s background color. You can choose a predefined color from the Style Guide or create a custom color. When using the Custom color picker, you can select the color using the slider or input a specific HEX code.

Size
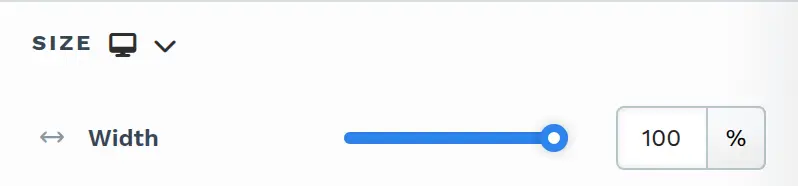
- Width: The width setting allows you to control the element’s width. You can specify this width as a percentage of the container it’s placed in (e.g., 100%, the default, to make it full width) or in pixels (px, up to 2500px) for a fixed width. Adjusting this setting can help you align the element with other components on the page or create a balanced layout.
You can set width values independently for desktop and mobile by using the device icons (🖥️ & 📱 ). If no mobile value is specified, it will inherit the desktop setting by default.
Padding

The Padding settings control the space between the content and the inside edge of its container (such as a section, row, column, or element). This internal spacing helps ensure your content has room to breathe and appears visually balanced. Use the slider or manually enter a value in pixels (px) or percentage (%) to create consistent spacing across screen sizes.

Padding Options:
-
Top: Add space between the top of the element container and its content.
-
Bottom: Add space between the bottom of the element container and its content.
-
Left + Right: Adjust the horizontal spacing between the element container and its content.
-
Gap: In particular elements, such as the Accordion, the gap property is added to establish spacing between the items within the container. For example, it is possible to adjust the gap between each accordion item within the Accordion element without defining padding at the top and bottom.
Desktop & Mobile (🖥️ & 📱)Customization:
The padding settings allow you to define separate values for desktop and mobile views. Use the device toggle at the top of the padding controls to switch between screen modes and adjust spacing accordingly. If no mobile value is specified, it will inherit the desktop setting by default.
This feature ensures your layout remains optimized for different screen sizes, enhancing the mobile and desktop experience.
Inner Padding
 The inner padding is applied within the input box and calculated from its edges rather than from the edges of the element border. You can adjust the inner padding of the input box by modifying the sliders for the top, bottom, and left-right dimensions.
Select Align
 The align option controls the horizontal alignment of the text input fields within its container. Depending on your design preference and layout needs, you can align the input to the left, center, or right. This setting helps you maintain consistent alignment across your form elements for a professional appearance.
You can set the alignment independently for desktop and mobile by using the device icons (🖥️ & 📱 ). If mobile alignment is not specified, it will inherit the desktop alignment by default.
Typography
The Typography settings allow you to control the appearance of text in your element. At the top, choose a text style preset from your Style Guide: S, M, L, or XL. With a preset selected, click Edit Style to change that preset in your Style Guide (this affects every element that uses it), or click Override to adjust the font settings for this element only. Select … to skip the presets and set the font settings directly.
-
Font Family: This option allows you to select the font type for your text. ClickFunnels provides a range of popular fonts from the Google Fonts library. Additionally, you can upload and use your own custom fonts by navigating to Workspace Settings > My Assets > Fonts. Once uploaded, your custom fonts will appear in the selection list for use.
-
Weight: This option defines the thickness of the text. The weights you can choose depend on the selected font, because each font lists only the weights it supports (for example, Thin, Regular, Semi Bold, or Bold). Lighter weights provide a subtle look, while bolder weights create more visual impact.
-
Font Size: You can adjust the text size using the slider or manually inputting a specific value. Additionally, you can choose between rem or px for the size measurement, such as 2rem or 32px. You can also set font size values independently for desktop and mobile by using the device icons (🖥️ & 📱 ).
-
Rem is a relative unit based on the base font size defined in your style guide. For example, if you select a text size of 2rem and your style guide specifies a base font size of 16px for desktop, the resulting text size will be 32px for desktop view (i.e., 2rem × 16px = 32px).
-
Px is an absolute measurement, providing precise control over the text size.
-
-
Letter Spacing: Adjust the space between individual letters. You can increase or decrease the value using the slider or input a specific value (measured in rem). More spacing spreads the letters apart, while less spacing brings them closer together. You can also set letter spacing values independently for desktop and mobile by using the device icons (🖥️ & 📱 ).
-
Color: Use the color picker to select the text color. You can choose a predefined color from the Style Guide or create a custom color. When using the Custom color picker, you can select the color using the slider or input a specific HEX code. Additionally, you can adjust the opacity (Alpha value) using the second slider—moving it to the left reduces the opacity and makes the color more transparent, while moving it to the right makes it fully opaque.
-
Decoration: Add text decorations such as:
-
Underline: Draw a line beneath your text.
-
Strikethrough: Cross out your text with a horizontal line.
-
Underline + Overline: Draw a line both below and above your text.
-
-
Opacity: Adjust the opacity of the text. The slider allows you to make the text more or less transparent. Moving the slider to the left (0) decreases the opacity (making the text more transparent), while moving it to the right (1) makes the text fully opaque.
Text Shadow
The Text Shadow section adds a subtle shadow behind your text, creating depth and improving readability. You can control the following parameters:

-
Offset-x and Offset-y: Adjust the horizontal and vertical positioning of the shadow.
-
Blur: Set how blurred or sharp the shadow appears.
-
Color: Choose the shadow color to match or contrast your page design.
Border
The Border settings enable you to add and style borders around an element, allowing for enhanced visual definition and separation on the page:

-
Style Presets (1, 2, 3): Choose from predefined border styles in your Style Guide. These presets provide consistent border styles across your page and can be quickly applied to elements.
-
Edit Style: To modify the preset border styles in the Style Guide (affecting all elements using that style), select Edit Style to adjust the design in your global settings.
-
Override: Use the Override option to customize the border settings specifically for this element without impacting the global Style Guide settings.
-
Borders: Select which sides of the element should display a border. Options include any combination of top, bottom, left, and right borders.
-
Border Style: To fit your design preferences, choose the border’s line style, such as solid, dashed, or dotted.
-
Color: Use the color picker to select a border color. You can choose a color from the Style Guide or select a custom color, ensuring the border color aligns with your design scheme.
-
Stroke Size: You can adjust the border’s thickness using the Stroke Size slider or by inputting a specific pixel value, creating anything from thin outlines to bold frames.
Corner
The Corner settings let you adjust the roundness (border-radius) of an element’s corners, providing flexibility to create either rounded or sharp edges:

-
Style Presets (1, 2, 3): Choose from predefined corner styles set in your Style Guide. These presets (1, 2, or 3) offer quick styling options that align with your page’s overall design.
-
Edit Style: To modify a style directly in the Style Guide (affecting all elements using that style), click Edit Style to adjust the preset in your global settings.
-
Override: To apply custom corner settings without changing the Style Guide, click Override. This allows you to tailor the corner radius for this specific element only.
-
All Corners: Adjust the slider or enter a specific value in pixels or percentages to set a uniform border radius for all four corners.
-
Separate Edges: Enable Separate Edges to adjust each corner independently. You can set different values for the Top Left, Top Right, Bottom Left, and Bottom Right corners to achieve unique shapes.
Shadow
The Shadow settings allow you to add depth and emphasis to elements by applying shadow effects, enhancing the visual appearance. Here’s how to customize shadow properties:

-
Style: Select one of the predefined shadow styles from your page’s style guide. Click on the numbered styles (1, 2, or 3) to apply preset shadow settings defined in your style guide.
-
Shadow Style: Choose between Inset (shadow within the element) and Outset (shadow outside the element) to achieve the desired shadow effect.
-
X-direction: Adjusts the horizontal positioning of the shadow. A positive value moves the shadow to the right, while a negative value shifts it to the left.
-
Y-direction: Controls the vertical placement of the shadow. Positive values push the shadow downward, while negative values pull it upward.
-
Blur: Controls the softness of the shadow edges. Higher values create a more diffused, softer shadow, while lower values keep the shadow sharp.
-
Spread: Adjust the size of the shadow. Positive values expand the shadow, while negative values make it narrower.
-
Color: Use the color picker to choose to set the shadow color.
Control Panel
The Control Panel appears at the bottom of every container(Section, Row, Flex, and Element) in the page editor, offering quick access to essential settings and actions for that container. Here’s what each icon represents:

-
ALL: The container will be visible on all devices (desktop, tablet, and mobile).
-
Desktop (🖥️) Icon: The container will only be visible in desktop view (screens 771px and wider).
-
Mobile (📱) Icon: The container will only be visible in mobile view (screens up to 770px wide).
-
Eye (👁️) Icon: Hides the container on all devices. It isn’t deleted. To show it again, select All, Desktop, or Mobile in this panel, or open Layout in the top bar and turn the container’s desktop or mobile toggle back on.
-
Code (
</>): Opens the code editor for this container, where you can add custom CSS to change its styling. The editor shows the container’s CSS ID Selector so your CSS targets only this container. Open it from the code icon at the top of the settings panel, or hover over the container on the page and click Code in its toolbar. -
Trash (🗑️) Icon: Removes the container from the page editor entirely.
Advanced Settings
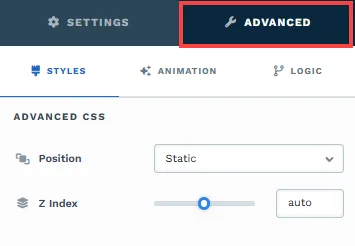
To further customize your container (section, row, column, and element), ClickFunnels provides Advanced settings that allow you to control style, advanced CSS, animation, and rendering logic. We’ve separated these advanced features into dedicated articles to avoid overwhelming you with too much content in one place and to keep our documentation concise. Explore the following resources for more details:
-
Advanced Settings - Customize Styles: Learn how to populate contents dynamically, position containers, and apply z-index.
-
Advanced Settings - Customize Animation: Learn how to add animations, control entry and exit effects, and adjust animation delay.
-
Advanced Settings - Customize Logic: Learn how to apply conditional logic to elements and add custom attributes.