
How to Manage Course Modules
Published: Updated:
Managing course modules is key to creating organized, effective courses in ClickFunnels. Modules help you structure your content into logical sections, improving the learning experience for your students. This article explains how to manage course modules in your ClickFunnels account. This way, you’ll be able to build well-structured courses and control your content more efficiently.
Requirements
Section titled “Requirements”-
An active ClickFunnels account
-
The Courses app added to workspace
Accessing Course Modules
Section titled “Accessing Course Modules”-
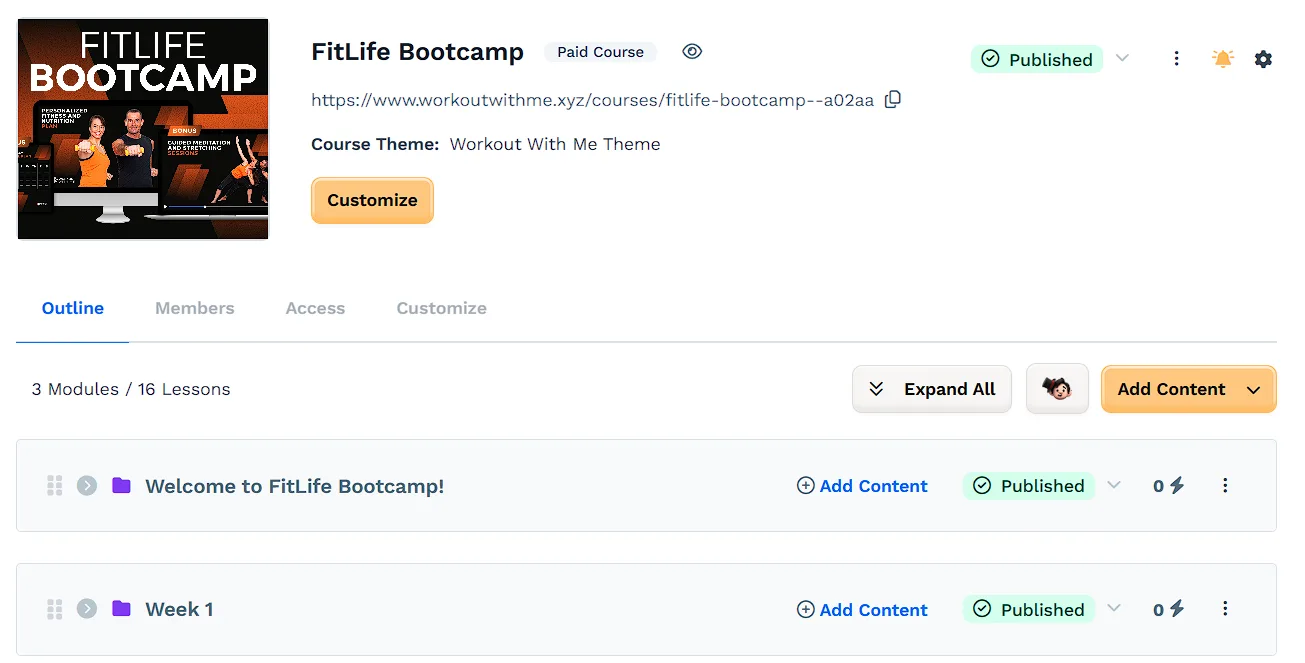
Click on the Courses app from the left navigation menu.
-
Click on the Title of the course you wish to manage its modules.
Create a New Module
Section titled “Create a New Module”-
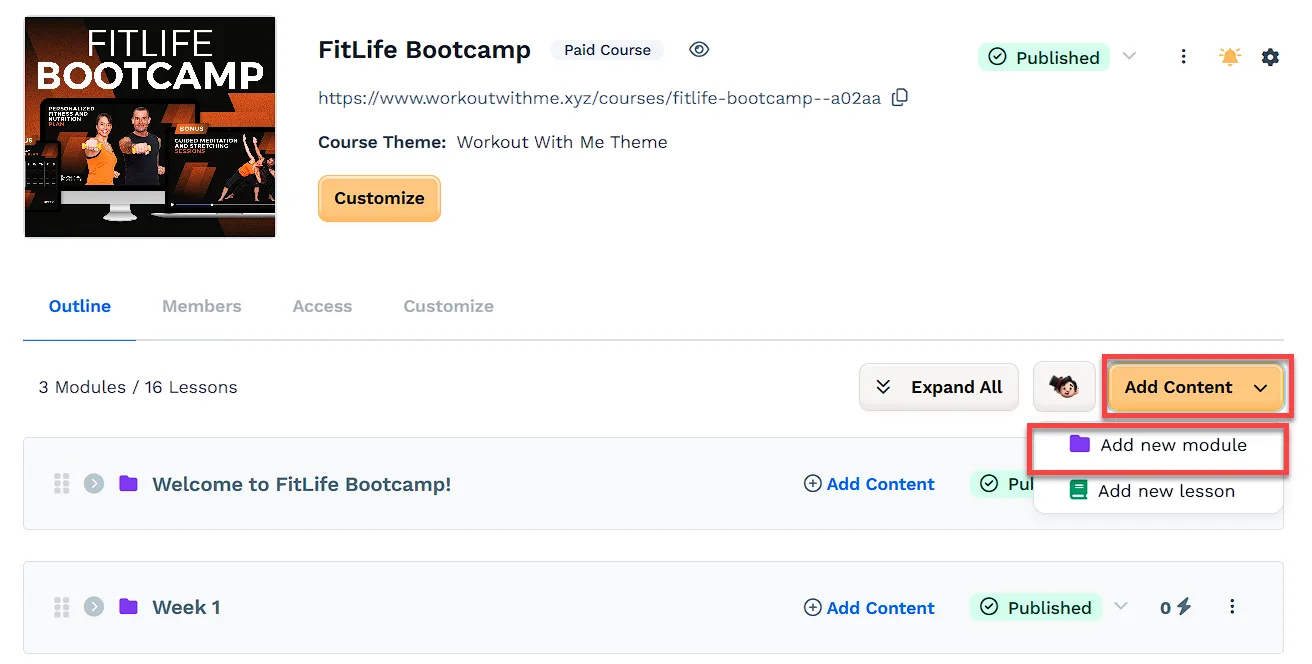
Click the Add Content button on the right-hand side, then select Add new module from the drop-down menu.
-
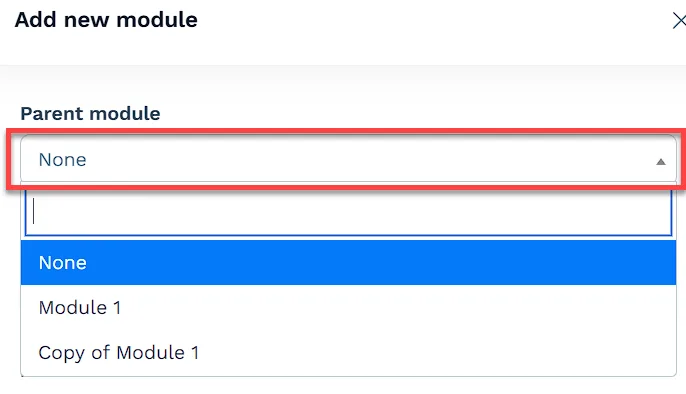
Use the Parent Module drop-down to choose where this module should live.
-
Select None if you want it to be a top-level module.
-
Choose an existing module if you want to nest it as a sub-module.
-
-
Fill out the Title and the optional Description field to name and describe the new module.
-
Click the Select Image button to choose your preferred Module Image.
-
Click the Create module button to continue or the Discard changes button to cancel the changes.
Edit the Settings of an Existing Module
Section titled “Edit the Settings of an Existing Module”-
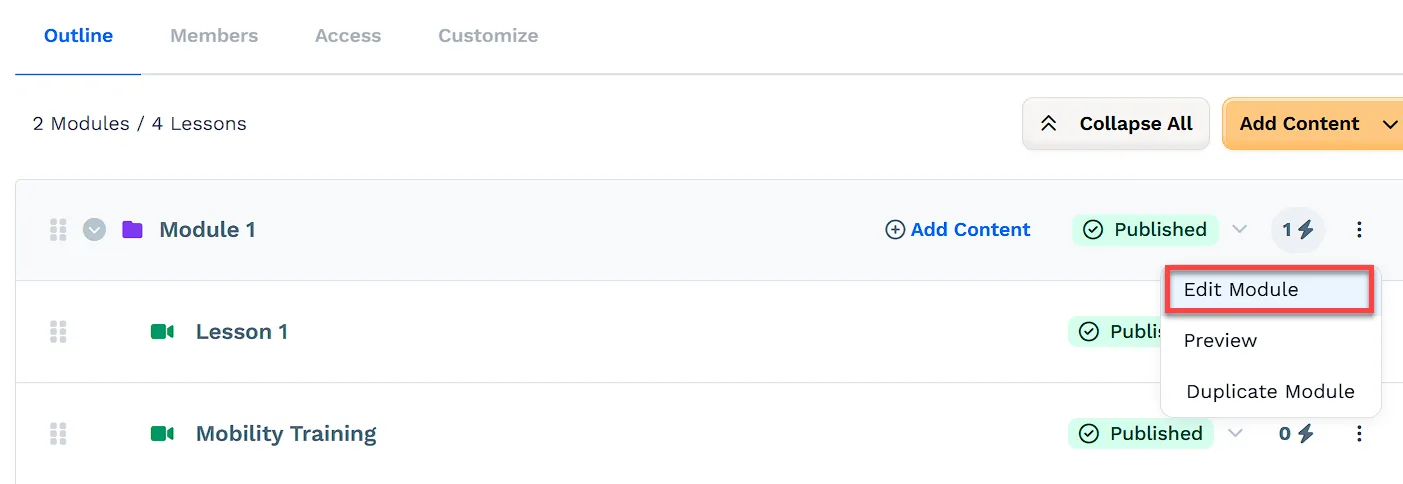
Click the three-dot icon on the right side of each module, then select Edit Module from the drop-down menu.
-
Edit the Module Settings according to your preference. Please visit our article Module Settings for more information about module settings.
-
Click the Update module button to save your changes.
Using the Page Editor to Customize Course Modules
Section titled “Using the Page Editor to Customize Course Modules”-
Navigate to the Courses app from the left-side menu.
-
Select the course you want to customize.
-
Click Customize to open the page editor.
-
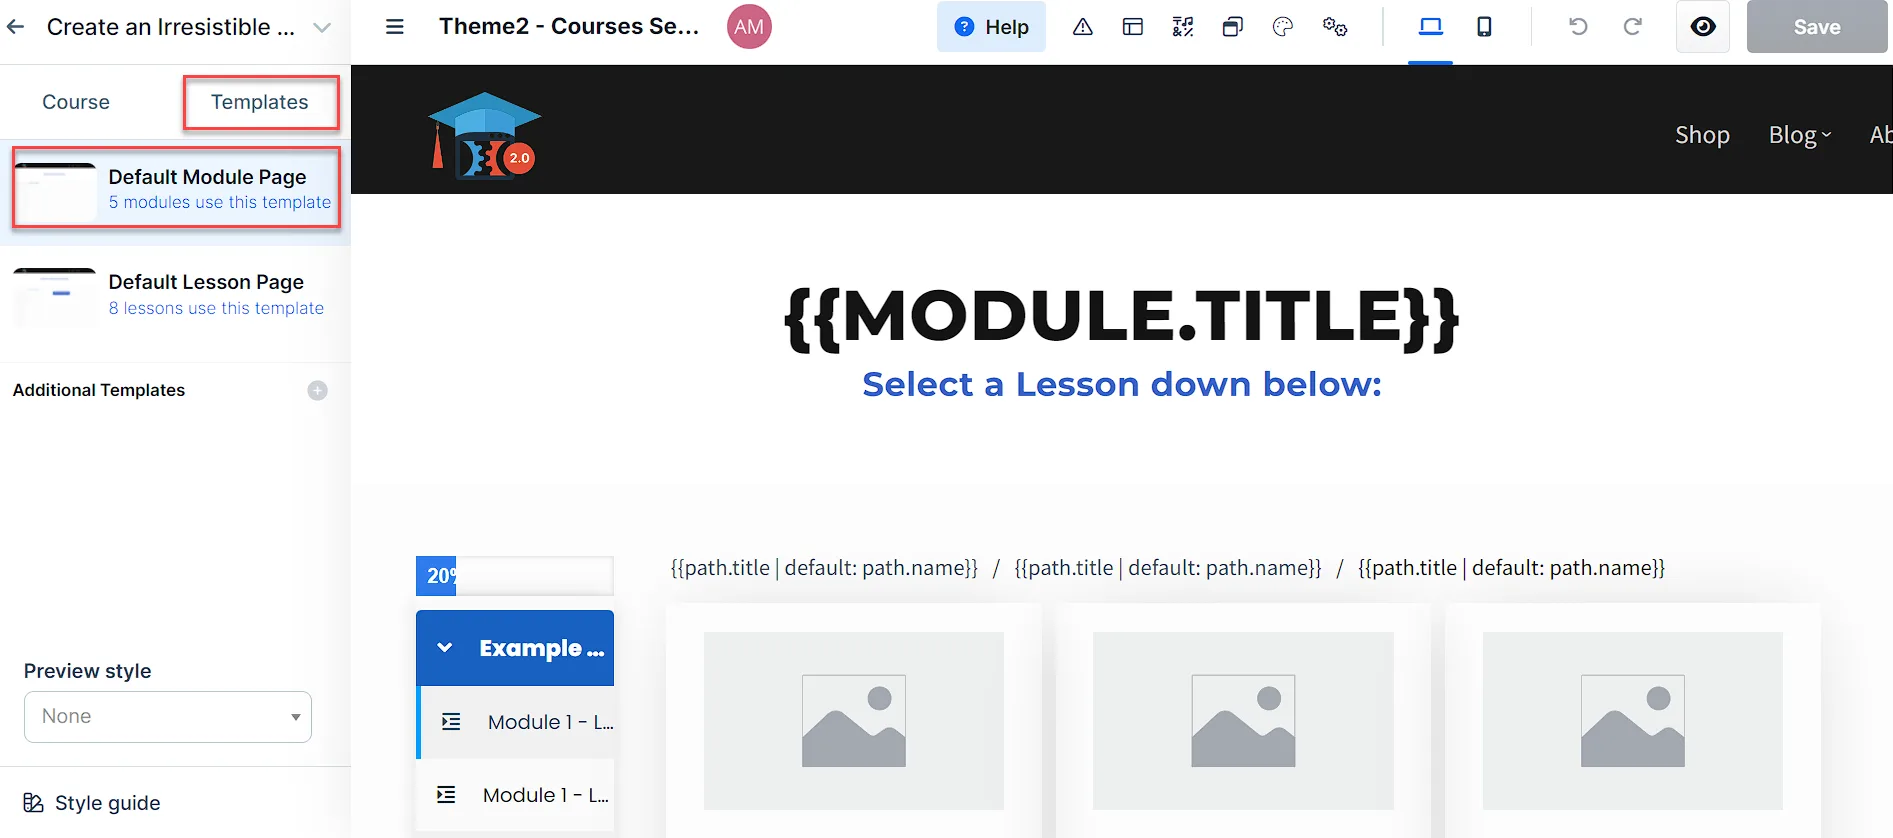
In the editor, open the Default Module Page under Templates.
-
To display lessons:
-
Add a Lesson Collection element (Collections → Lessons).
-
Include Lesson Name, Image, and Link.
-
-
To show modules:
-
Add a Module Collection element (Collections → Modules).
-
Include Module Name, Image, and Link.
-
-
Click Save when you’re done.
Publish an Existing Module
Section titled “Publish an Existing Module”-
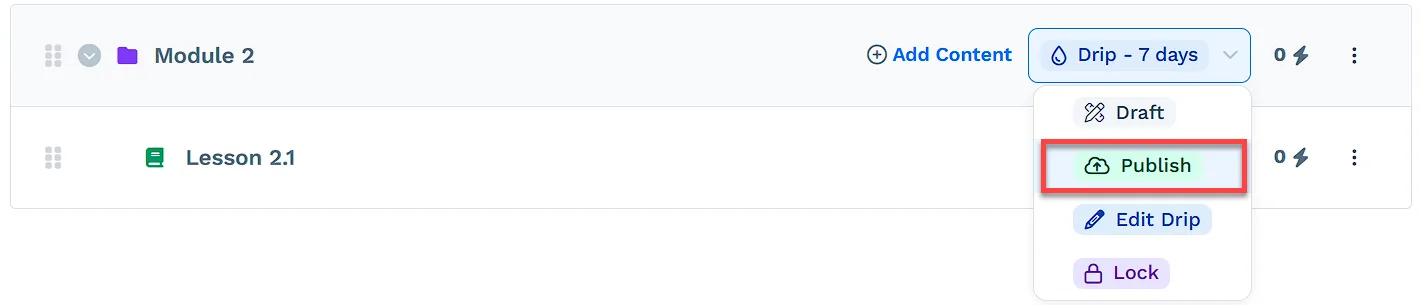
Click the three-dot button to the right of the module status, then select Publish from the drop-down menu.
-
The app displays a pop-up asking when the module should be published, if existing course students should be enrolled, and if existing unpublished lessons should be published at the same time as the module.
-
Click the Update module button to save the changes.
Adding a Drip Delay to a Module
Section titled “Adding a Drip Delay to a Module”Drip modules allow you to control when specific course content becomes available to your students. This feature is useful for pacing your course, preventing overwhelm, and keeping students engaged over time. Here’s how to set up drip modules in your ClickFunnels course:
-
On the Course page, Find the module you want to drip.
-
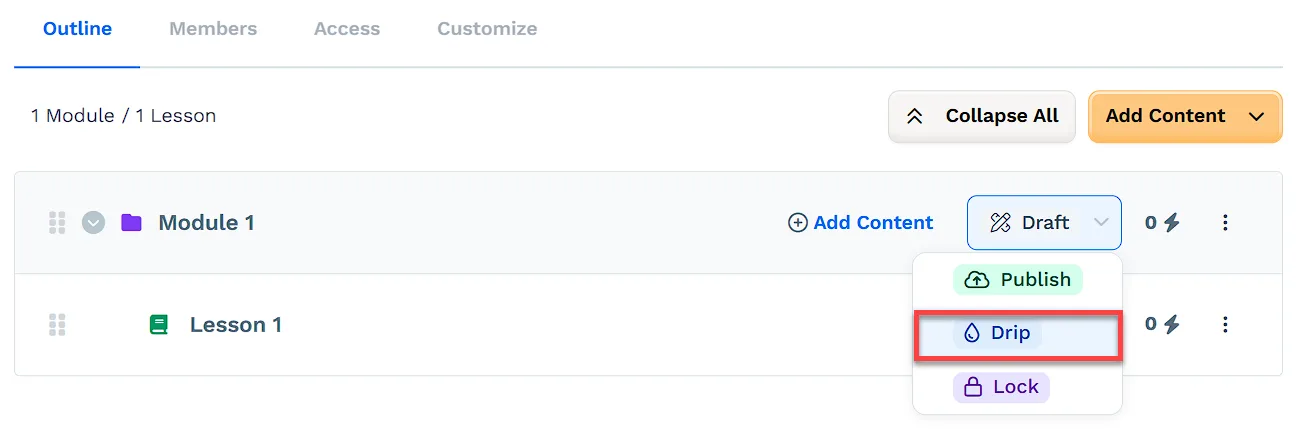
Select Drip from the dropdown menu.
-
In the Edit publishing window, enter the number of days to wait before the module is available.
-
Click Update module to save.
Hiding Dripped Modules
Section titled “Hiding Dripped Modules”ClickFunnels offers settings to hide dripped modules in different parts of your course interface. This feature creates a cleaner, more focused learning environment by only showing content that’s currently accessible to students. Here’s how to manage these settings:
Hiding Dripped Modules on the Course Page
Section titled “Hiding Dripped Modules on the Course Page”-
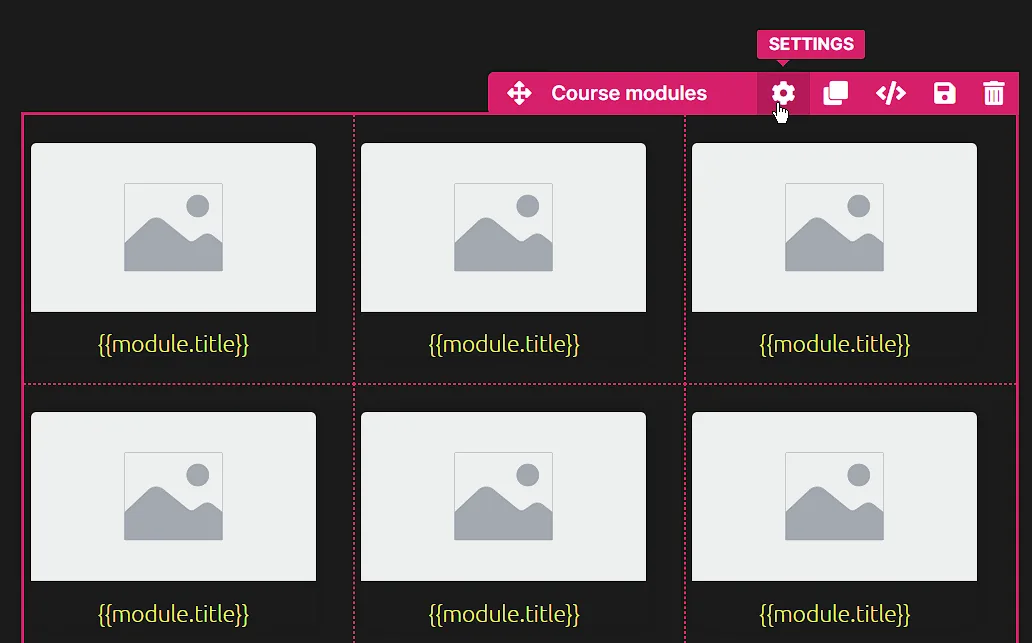
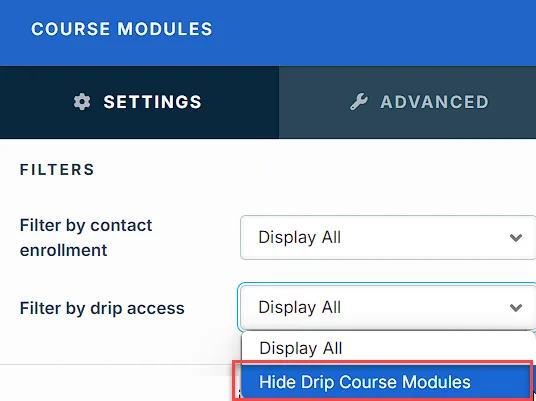
In the course editor, locate the Course Modules element.
-
Click on the Settings ⚙ icon to display its settings.
-
In the Settings sidebar, find the Filters area.
-
Locate the Filter by drip access dropdown.
-
Select Hide Drip Course Modules to hide inaccessible modules on the main course page.
Hiding Dripped Modules in the Course Sidebar
Section titled “Hiding Dripped Modules in the Course Sidebar”-
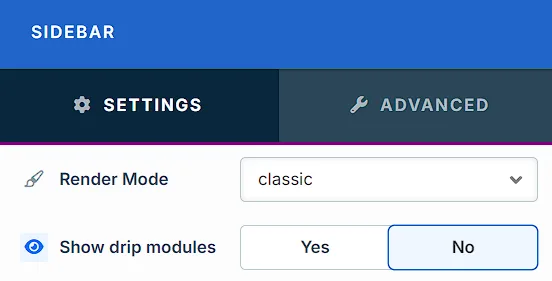
In the course editor, locate or add the Sidebar element.
-
Click on the Settings ⚙ icon to display its settings.
-
In the right Settings sidebar, locate the Show drip modules toggle.
-
Switch it to No to hide dripped modules in the course sidebar.
Locking a course Module
Section titled “Locking a course Module”Lock modules allow you to control access to course content based on the completion of other lessons. Here’s how to set it up:
-
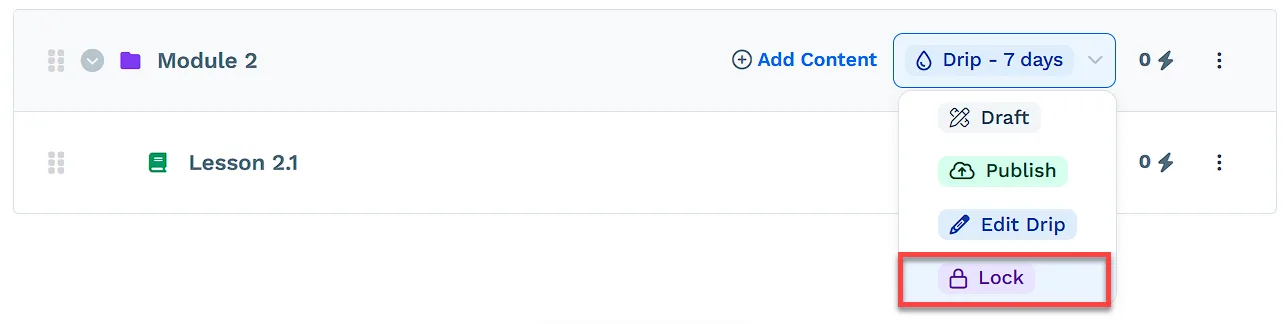
On the Course page, Find the module you want to lock.
-
Select Lock from the dropdown menu.
-
In the Edit publishing window, choose a “Blocker lesson” from the dropdown menu. This is the lesson that must be completed 1. before the locked module becomes available.
-
Click Update module to save.
Duplicating a Module
Section titled “Duplicating a Module”-
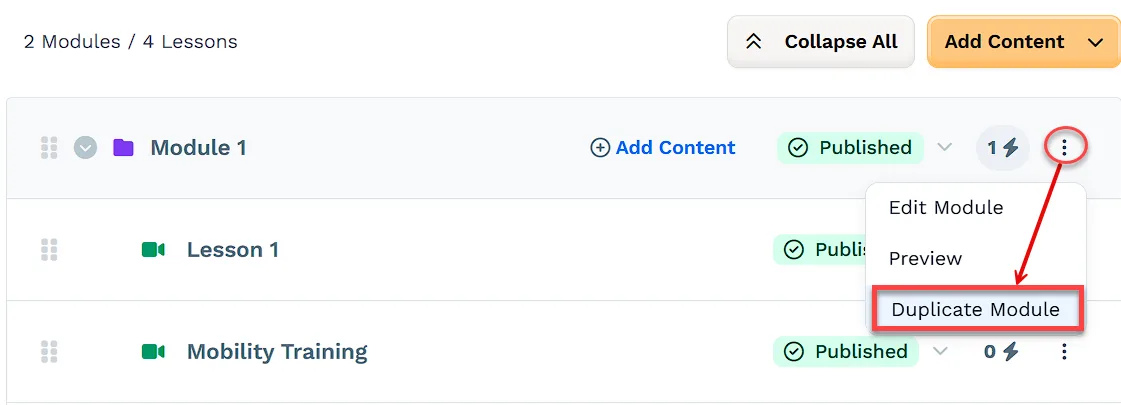
Click the three-dot button to the right of the module status, then select Duplicate Module from the drop-down menu.
-
Click the Proceed button on the pop-up to duplicate the selected module.
-
The page will display a banner at the upper-right of the page explaining that the module is being duplicated. The site will also display the duplicated module under the original module in Draft status.
Adding an Upgrade Offer
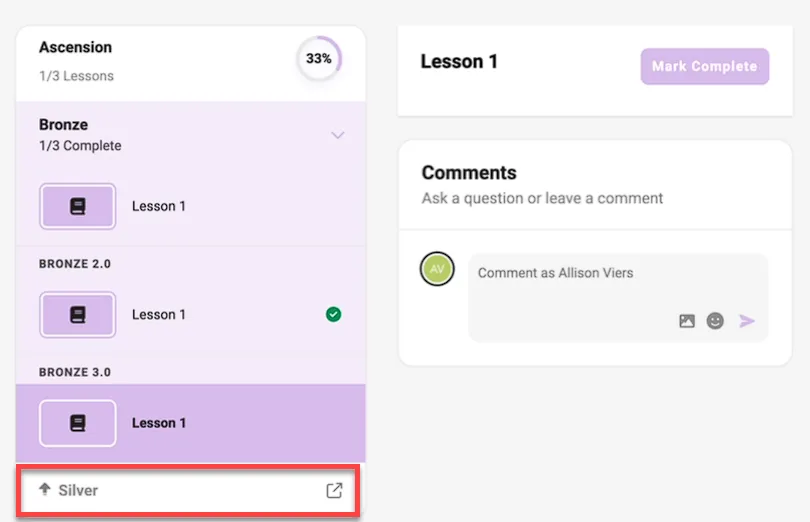
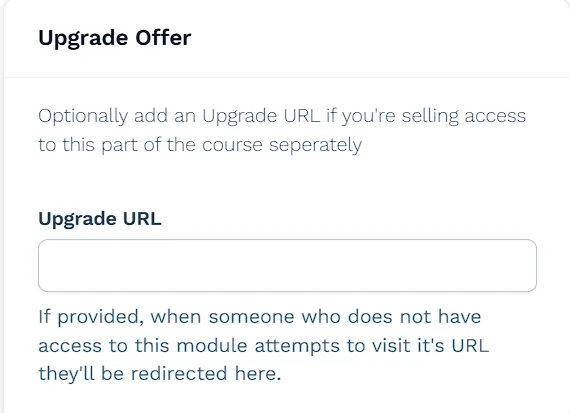
Section titled “Adding an Upgrade Offer”The Upgrade Offer setting allows you to sell access to specific modules. Enter the URL of your payment or checkout page. When a user views the course outline and doesn’t have access to a module, the module title will appear as a clickable link if an Upgrade URL has been set. Clicking this link opens the checkout or order page in a new tab, allowing users to purchase access directly. This feature helps you monetize individual sections of your course or offer tiered pricing options for your content.
-
Click the three-dot icon on the right side of each module, then select Edit Module from the drop-down menu.
-
In the Upgrade URL field, enter the full URL of your checkout (order form) page.
-
Click Update module to save your changes.
-
Click Update module to save.
When Upgrade URLs Are Shown
Section titled “When Upgrade URLs Are Shown”Upgrade URLs will only display the upsell link in the sidebar if all of the following conditions are met:
| Condition | Requirement |
|---|---|
| Module is Published | Draft or scheduled modules are never shown. |
| Not Dripped | Drip-delayed modules are hidden unless the user is enrolled and the delay has passed. |
| Unlocked | Locked modules only appear once the required content is completed. |
| User Not Enrolled | Upsell links appear only for modules the user does not already have access to. |
Deleting a Module
Section titled “Deleting a Module”-
Click the three-dot menu, then select Edit Module to open the module settings.
-
Scroll down to the bottom of the right-side menu, then click the Delete module button. Otherwise, click the Discard changes button to cancel any changes.
-
Click the Proceed button inside of the Popup. Otherwise, click the Cancel button to cancel any changes. The app will display a confirmation banner at the upper-right corner of the page stating that the module has been deleted.