
How to Add Quick Actions to Products
Published: Updated:
Products Quick Actions lets you automate tasks that activate when specific product events occur, such as purchases, subscription changes, or cancellations. By setting up Quick Actions, you can streamline your workflow and enhance your customers’ experience. In this article, you’ll learn how to set up, manage, and effectively use Products Quick Actions to optimize your product sales and management.
Requirements
Section titled “Requirements”-
An active ClickFunnels account
-
The Automations app added to your workspace
-
An existing Product
Adding Quick Actions to Products
Section titled “Adding Quick Actions to Products”-
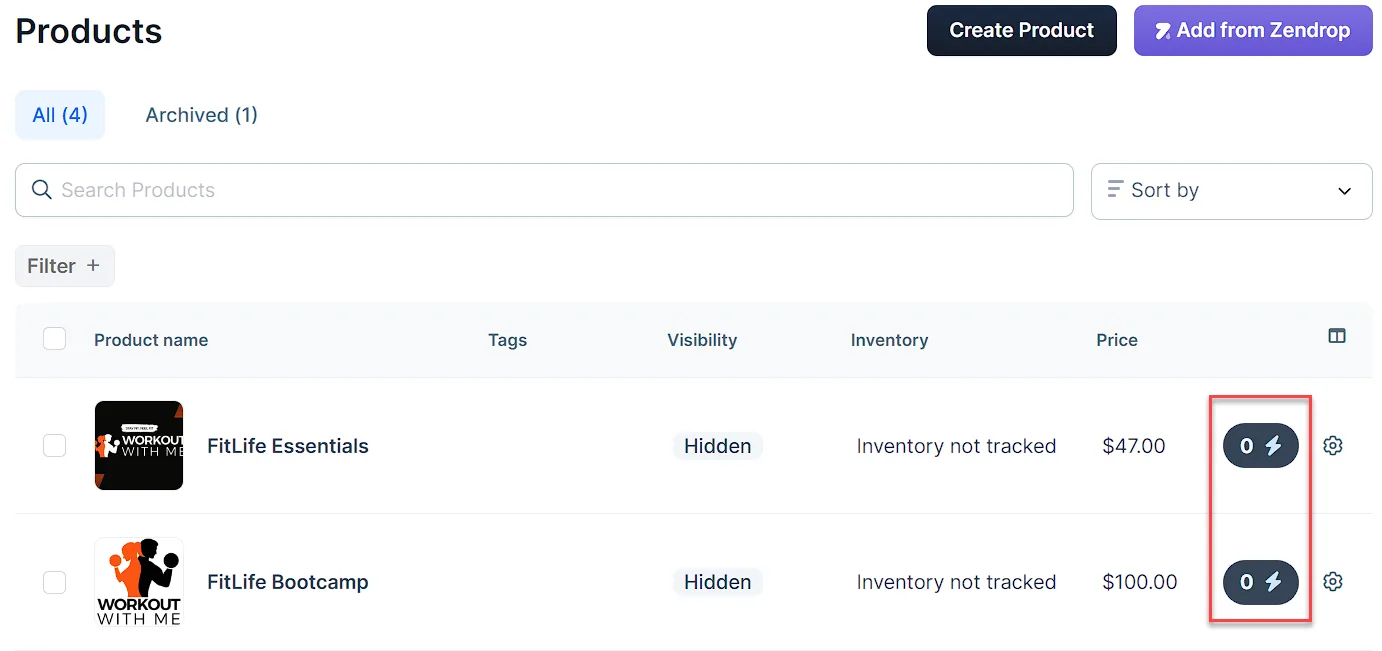
Navigate to Products > All Products from the left menu.
-
click the lightning bolt (⚡) icon next to the product name to open Quick Actions.
-
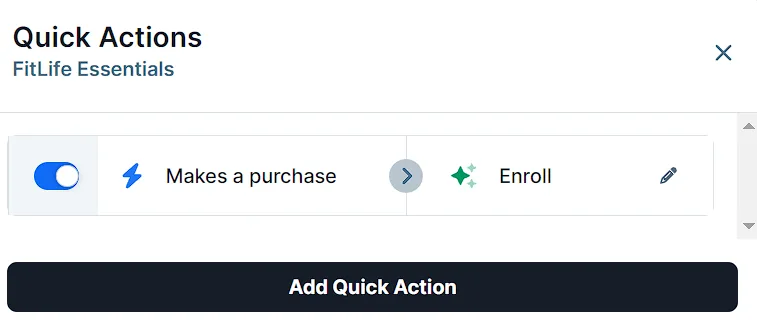
Select Add Quick Action from the popup.
-
Choose a trigger for your Quick Action:
-
“Makes a purchase”
-
“Cancels an order”
-
“Upgrades subscription”
-
“Downgrades subscription”
-
“Churns an order”
-
-
Select an effect that will occur when the trigger is activated.
-
Use the toggle switch to activate your Quick Action.
To learn more about effects and triggers, refer to the How to Manage Quick Actions article.
Managing Quick Actions
Section titled “Managing Quick Actions”Changing the Trigger or Effect
Section titled “Changing the Trigger or Effect”-
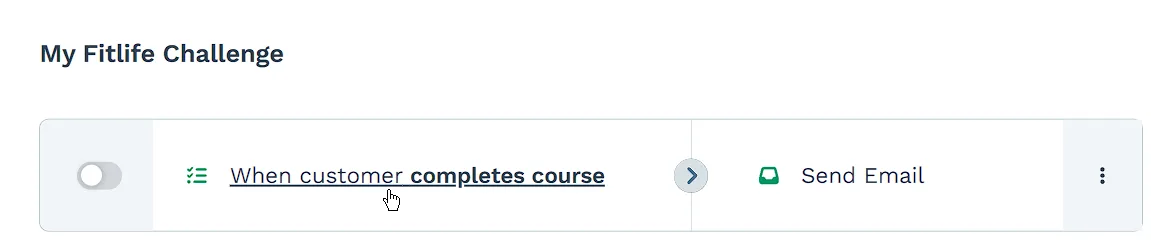
Click the lightning bolt icon to locate the Quick Action you wish to update.
-
Click on the trigger or effect you want to change.
-
Make the necessary updates to the selected option.
Changing the Effect
Section titled “Changing the Effect”-
Click the lightning bolt icon again to locate the Quick Action you wish to edit.
-
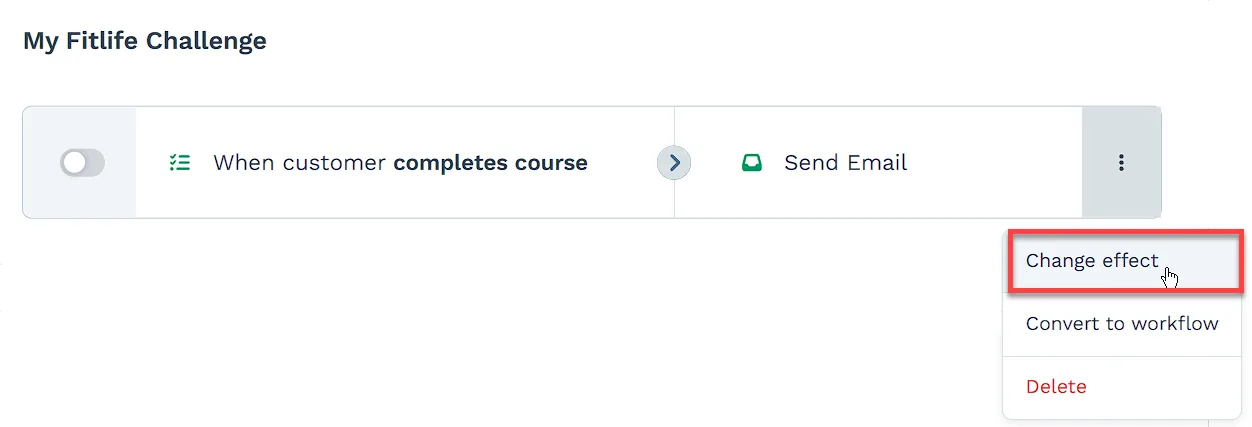
Click on the three dots icon next to the selected effect.
-
From the dropdown menu, select Change effect.
Adding Multiple Quick Actions
Section titled “Adding Multiple Quick Actions”-
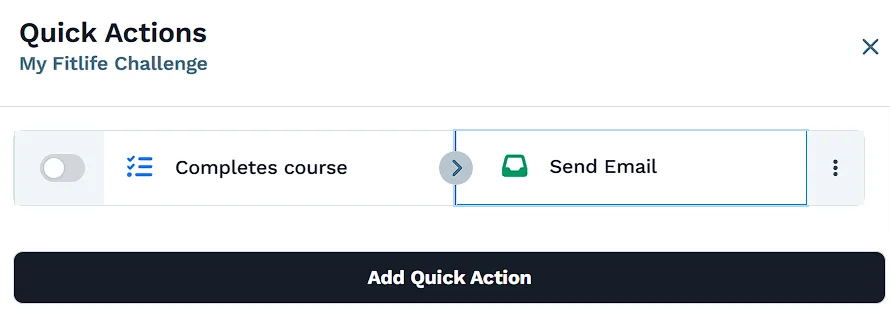
Click the lightning bolt icon again.
-
Select Add Quick Action.
-
Set up the new trigger and effect.
-
Repeat for each additional Quick Action you want to create.
Removing a Quick Action
Section titled “Removing a Quick Action”-
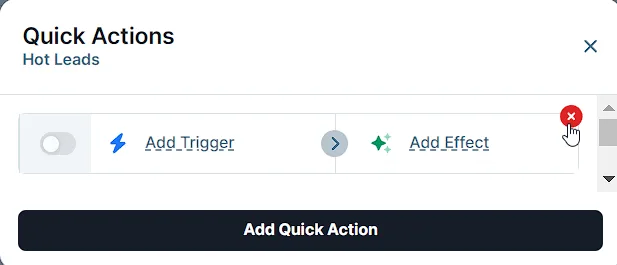
Open Quick Actions by clicking the lightning bolt icon.
-
Hover over the Quick Action you want to remove.
-
Click the red cross (X) icon that appears on the right side.
Managing Quick Actions from Automations APP
Section titled “Managing Quick Actions from Automations APP”-
Navigate to Automations > Quick Actions in the left sidebar.
-
Click the Products tab in the top menu to View all product Quick Actions.
-
To edit a Quick Action:
-
Locate the Quick Action. You can filter actions by product or effect type using top-right dropdowns.
-
Modify the trigger or effect.
-
Use the toggle to enable/disable.
-
-
Delete an action by clicking the trash 🗑 icon.
