
Products - How to Add and Manage Pricing
Published: Updated:
Product pricing refers to the amount of money you charge for a product. It’s the price tag attached to your product that customers will pay to purchase it. Adding a price is a fundamental step in offering products for sale through ClickFunnels. Having clear and well-defined pricing enables you to market your products effectively, attract the right audience, and ultimately generate revenue for your business.
 In ClickFunnels, you can set a one-time price for a single purchase, offer a subscription for regular payments, or set up a payment plan for paying in installments.
In this article, you’ll learn step-by-step instructions for adding, updating, and deleting products’ prices.
Requirements
Section titled “Requirements”-
An active ClickFunnels account
Accessing Pricing In the Product Settings
Section titled “Accessing Pricing In the Product Settings”-
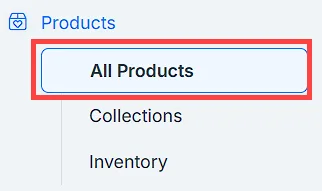
Navigate to Products in the side navigation menu.
-
Select All Products.
-
Locate your desired product on the right-hand side. To access the settings, click the product name, image, or the ⚙️ icon.
-
Scroll down to the Pricing section.
Adding a New Price
Section titled “Adding a New Price”-
In the “Pricing” section, locate and click the Add Price.

-
In the prompted widget, choose the pricing type from the options: One Time, Subscription, or Payment plan.
-
Provide the necessary price details, and in the bottom right corner, click the Set price button to insert the price.
Price Type Options
-
One-Time Payment: Select this option if customers will pay a single amount for the product.
-
In the Amount field, enter the total price of the product (e.g.,
$50.00 USD). -
Click Set Price to save your settings.
-
-
Subscription: Use this option for recurring billing (e.g., monthly memberships or annual subscriptions).
-
In the Amount per Payment field, enter the amount customers will be charged for each billing cycle.
-
Use the Charge Customer Every dropdown to select the billing frequency (e.g., Days, Weeks, Months, Quarters, or Years).
-
To offer a trial period:
-
Check the Product Has a Trial box.
-
Choose between a Free Trial or a Paid Trial, and enter the Trial Length (e.g., 7 Days).
-
If selecting Paid Trial, specify the Trial Cost.
-
-
Click Set Price to save your settings.
-
-
Payment Plan: Select this option to let customers pay in installments.
-
In the Amount per Payment field, enter the installment amount.
-
Use the Charge Customer Every dropdown to set the frequency of payments (e.g., Monthly, Quarterly).
-
In the Amount of Payments field, enter the total number of installments (e.g.,
4 paymentsfor a quarterly payment plan). -
To offer a trial period, follow the same process as in the Subscription option.
-
Click Set Price to save your settings.
-
-
Adding Additional Prices
Section titled “Adding Additional Prices”Adding a price lets you offer multiple pricing options for your product, such as running a sale, adding a payment plan (e.g., 1 payment of $997 or 3 payments of $399), or creating insider pricing for specific customer groups. This flexibility can help you cater to different needs and boost conversions.
-
Navigate to the Pricing section of your product page and click the Add Price button in the top-right corner.
-
In the Add Price window, select a Price Type:
-
One-Time Price: Single upfront payment.
-
Subscription: Recurring charges like memberships or services.
-
Payment Plan: Installments, such as 3 monthly payments.
-
-
Fill in the fields for your selected price type:
One-Time Price
-
Amount: Enter the total price customers will pay.
-
Compare at Amount (optional): Display a discount by showing the original price.
-
Product Cost (optional): Internal tracking of your costs (not visible to customers).
-
Visible Toggle: Choose whether this price will appear at checkout and in your sitemap.
Subscription
-
Amount per Payment: Enter the recurring charge (e.g., $20 per month).
-
Charge Customer Every: Select the billing frequency (e.g., monthly, quarterly).
-
Trial Options: Check Product Has a Trial and configure:
-
Free Trial: Specify the trial length (e.g., 7 days).
-
Paid Trial: Enter a cost and duration for the trial.
-
-
Customer Options: Allow customers to:
-
Cancel their subscription.
-
Upgrade to a higher tier or plan.
-
Downgrade to a lower tier or plan.
-
Payment Plan
-
Amount per Payment: Specify the amount for each installment.
-
Charge Customer Every: Define how often installments will be charged (e.g., monthly).
-
Amount of Payments: Set the total number of installments (e.g., 3 payments). On a price imported from Stripe, this is the one recurring field ClickFunnels controls — the amount and interval belong to Stripe.
-
Setup Fee (optional): Add a one-time fee for setting up the plan.
-
Customer Options: Same as subscriptions—enable Cancel, Upgrade, or Downgrade options.
-
Visible Toggle: Control whether this payment plan is shown to customers.
-
-
Once all the details are configured, click Save to add the new price.
Updating an Existing Price
Section titled “Updating an Existing Price”-
Within the pricing section, click on the desired price or settings ⚙ icon to edit the price.

-
In the open widget, modify the existing price and click the Save button.
Deleting a Price
Section titled “Deleting a Price”-
Navigate to the pricing section and locate the price you wish to delete.
-
Click on the price to edit it.
-
Within the opened widget, find and click the Delete button at the bottom-left corner.

Showing / Hiding a Price
Section titled “Showing / Hiding a Price”You can display or hide a price on the checkout page within funnels and the store. This setting determines which prices are automatically visible when adding the product to a funnel.
-
In the pricing section, click the Checkbox icon toggle the price visibility on the checkout page.

-
Alternatively, when editing a price, enable or disable the Shown at checkout option and click Save.