Enabling Scroll to Specific Content on Click
Published: Updated:
Scrolling to specific content allows users to navigate your page effortlessly without manual scrolling. ClickFunnels provides a built-in Scroll to feature triggered by buttons and text links to guide visitors to specific Sections, Rows, Flex, or Elements. In this article, you’ll learn how to prepare a target container and configure button actions and text links to enable smooth scrolling.
Requirements
Section titled “Requirements”-
An active ClickFunnels account
-
A page created in your workspace
-
A button or text element
Understanding Scroll to Content
Section titled “Understanding Scroll to Content”Scroll to Content is a feature that enables smooth navigation within a page by directing users to a specific section when they click a button or text link. Instead of manually scrolling, visitors can be instantly guided to relevant content, improving the user experience.
Example:
Consider a funnel page that comprises a Hero section, Testimonials section, About Us section, Offer section, and a Checkout section where users finalize their purchases. In the Hero section, you may incorporate an “Order Now” button and configure its action to scroll to the Checkout section. When users click this button, the page will smoothly transition to the Checkout section, making the purchasing process quicker and more seamless.
Step 1 - Select a Container and Change Its Title
Section titled “Step 1 - Select a Container and Change Its Title”Before setting up the scroll action, you must identify where the link should navigate when clicked. ClickFunnels allows you to scroll to Sections, Rows, Flex, or Elements.
Choosing a Target Container
Section titled “Choosing a Target Container”A container refers to any Section, Row, Flex, or Element on the page. When you set up a **scroll-to-**action link, the link will scroll the page to the selected container. It’s recommended that the container be given a clear title for easier selection.
Changing Container Title
Section titled “Changing Container Title”-
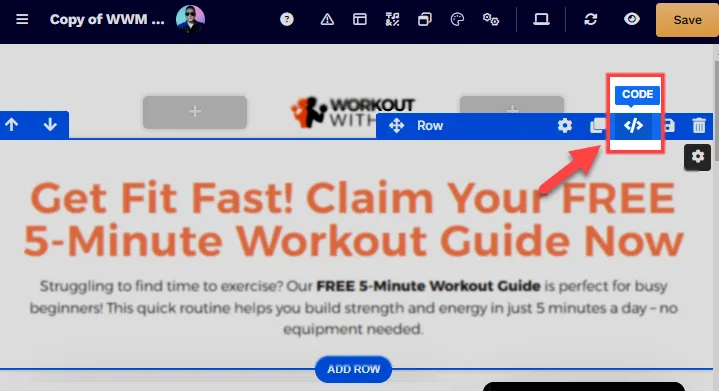
In the page editor, hover over a container (Section, Row, Flex, or Element).
-
Click the Code <> icon.
-
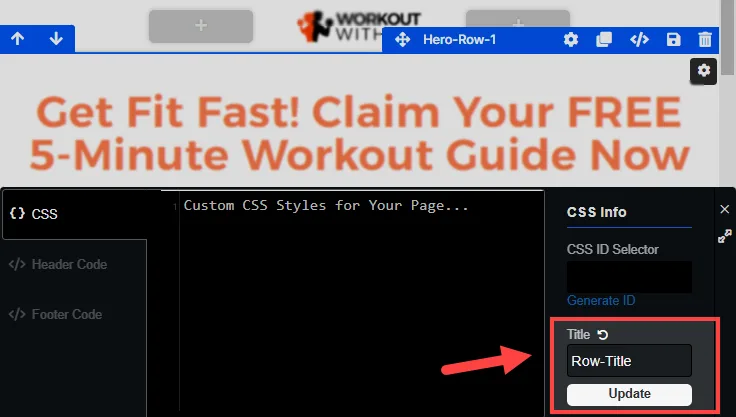
In the code editor, navigate to the CSS Info section
-
In the Title field, add the container’s Title.
-
Click Update to save changes.
Step 2: Set the Link Action
Section titled “Step 2: Set the Link Action”Setting the Button Action to "Scroll To"
Once the container is ready, follow these steps to configure a button to scroll to it:
-
In the page editor, click the orange + Plus or Add New Element button inside the row to insert a new element.
-
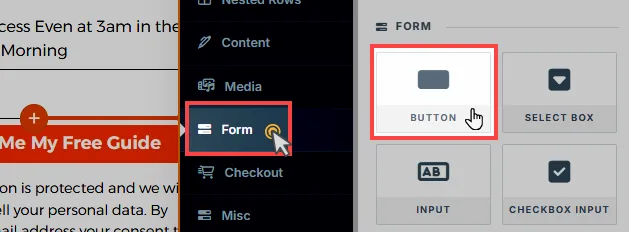
From the Form category, select the Button element.
-
Open the Button Settings and locate the Button Action section.
-
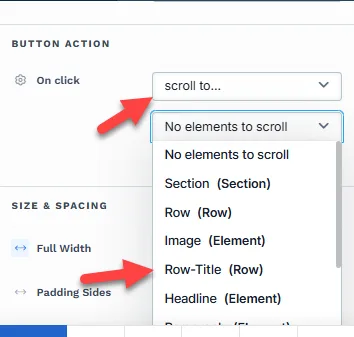
In the On Click settings, set the Button Action to “Scroll to.”
-
A drop-down menu will appear, showing available Sections, Rows, Flex, and Elements (using the titles assigned earlier).
-
Select the container you want to scroll to.
-
Click Save to save your changes.
Now, when visitors click the button, the page will automatically scroll to the designated content.
Using Text Links to Scroll to Content
You can also enable scrolling by linking text to a specific part of the page. This is useful for linking inline text, such as “Learn more” or “Go to checkout.”
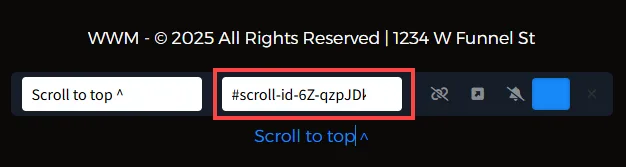
To do this, use the format: #scroll-[ID], where [ID] is the system-generated ID of the target container (Section, Row, Flex, or Element).
-
In the page editor, open the Code <> panel of the container you want to scroll to.
-
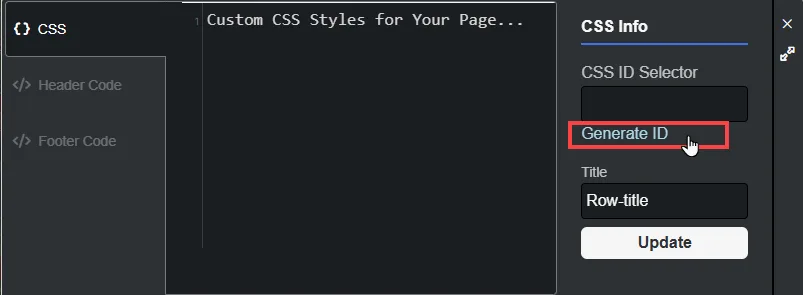
When the CSS tab is selected, find the CSS Info section.
-
Below the CSS ID Selector field, click Generate ID.
-
Copy the system-generated ID (e.g.,
#id-6Z-8oepNL-481) displayed in the CSS Info section. -
Navigate to the text where you want to link the action.
-
Link the text to
#scroll-[ID], replacing the ID (e.g.,scroll-id-6Z-8oepNL-481) with the one from your container.