
How to Update and Manage Product Inventory
Published: Updated:
The Inventory feature allows you to keep track of stock levels for products created directly within your workspace. Managing inventory effectively ensures that your product availability aligns with customer demand, reducing overselling or stockout issues. This article will guide you through updating inventory for a product and provide helpful notes about what is supported within the platform.
Requirements
Section titled “Requirements”-
An active ClickFunnels account
-
The Fulfillment required checkbox enabled in the product’s settings to activate inventory tracking.
How to Access the Inventory Page
Section titled “How to Access the Inventory Page”-
Navigate to the left-hand menu in your workspace and click on Products.
-
Select Inventory from the options under the Products tab.
-
You will see a list of all your products.
Overview of the Inventory Page
Section titled “Overview of the Inventory Page”The Inventory page acts as an index of all products in your workspace and provides key details at a glance.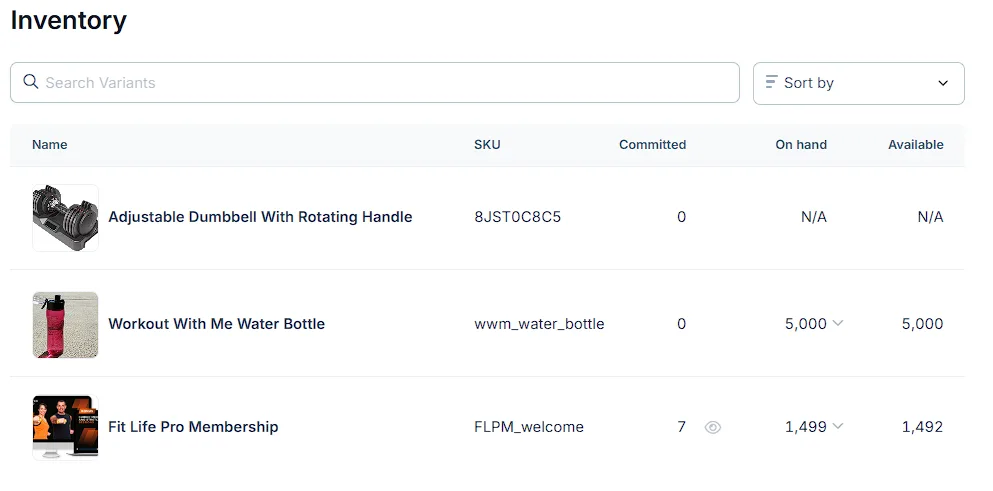
-
Search Bar: Allows you to locate specific products by name or SKU.
-
Sort By: Enables you to organize the list based on various criteria, such as name or date.
-
Product Name: Displays the name of each product in your workspace.
-
Product Image: Shows a thumbnail image of the product to help you quickly identify it.
-
SKU (Stock Keeping Unit): The unique identifier assigned to each product.
-
Committed: The number of items allocated to pending orders.
-
On Hand: The quantity of stock currently available for sale.
How to Update Inventory for a Product
Section titled “How to Update Inventory for a Product”-
Navigate to the Inventory page and locate the product you want to update. Click on the product name or image to open its Product Settings page.
-
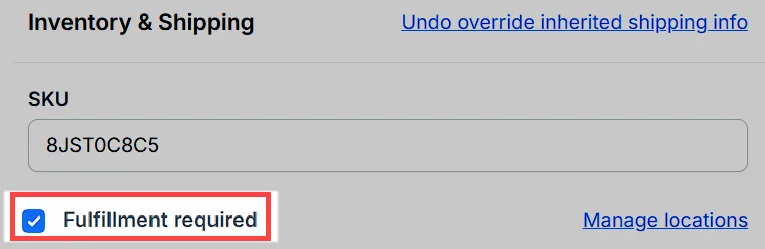
Scroll to the Inventory & Shipping section. Ensure the Fulfillment required checkbox is selected. This enables inventory tracking and displays stock levels and locations. For more details on fulfillment processes, see Managing Order Fulfillment.
-
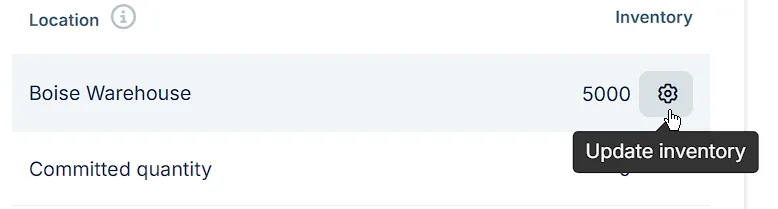
Locate the stock level next to the appropriate Location and click the Update inventory gear icon.
-
In the pop-up window, adjust inventory using one of the following options:
-
Adjust by: Add or subtract a specific quantity from the current stock level.
-
New: Set the inventory level to a specific number.
-
-
Select a Reason for the update:
-
Correction for manual stock adjustments.
-
Received for newly received inventory.
-
-
Click Save to confirm your changes.