
Image: Adding and Managing Images
Published: Updated:
Images are crucial in enhancing your page’s design and engaging visitors. With the ClickFunnels Page Editor, you can easily add and customize images using the Image element to align with your content. This article will guide you through adding, customizing, and managing images to fit your page design and branding.
Requirements
Section titled “Requirements”-
An active ClickFunnels account
-
A page created in your workspace
Adding an Image Element in the Page Editor
Section titled “Adding an Image Element in the Page Editor”-
Inside the page editor, add a Section where you want to place the element.
-
Add a Row within that section.
-
Click the orange + Plus or Add New Element button inside the row to insert a new element.
-
From the Media category, select the Image element.

Once the Image element is added, you can customize its appearance to fit your page design.
Customizing the Image Element
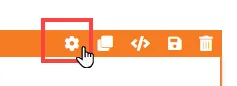
Section titled “Customizing the Image Element”When you hover over an element, its border will be highlighted in orange. To access an element’s settings, click on the gear ⚙️ icon or click directly on the element.
Top Margin
 The Top Margin setting lets you control the space between the current container (section, row, flex, and element) and the container directly above it. If no previous container exists, the margin will be applied relative to the parent container. If no preceding container is added, the Body will be the parent.
You can set top margin values independently for desktop and mobile by using the device icons (🖥️ & 📱 ). If no mobile value is specified, it will inherit the desktop setting by default. Use the slider or manually enter a value in pixels (px) or percentage (%) to create consistent spacing across screen sizes.
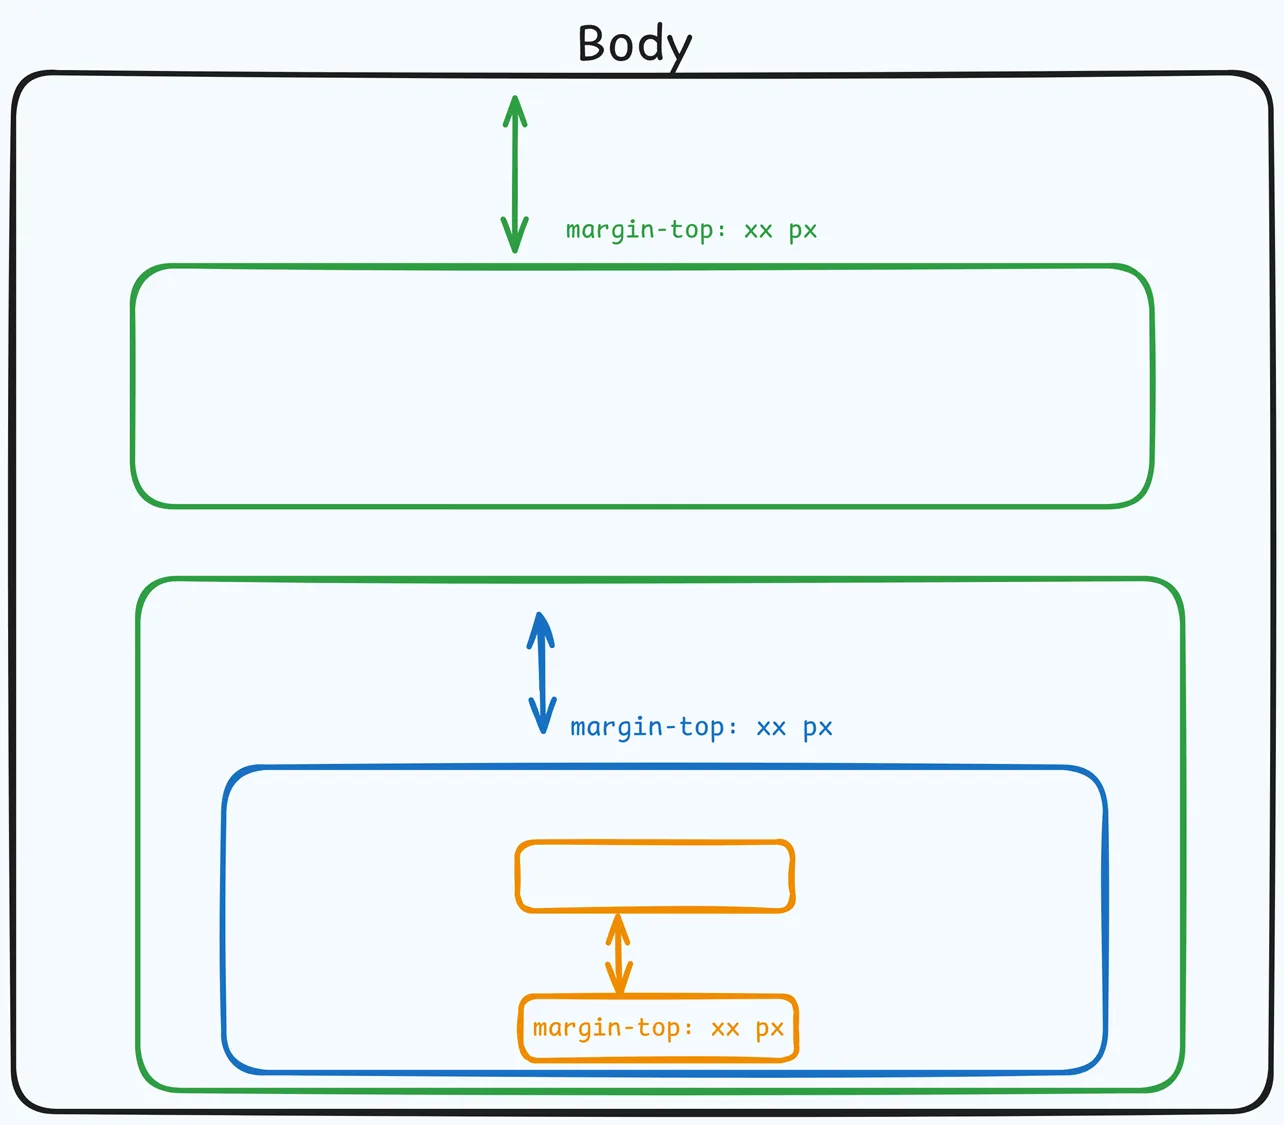
Image Source
When adding an image element in ClickFunnels, the Source section provides options for managing your image. Here’s how each part works:

-
Source:
-
Upload: Select this option to upload an image from your device or previously uploaded images in your image library.
-
Dynamic: Select this option to use your site logo. The image always shows your current site logo, so it updates automatically wherever it’s used when you change the logo.
-
-
Image / Image URL:
-
Image (when Dynamic is selected): Select Site Logo, the only dynamic image available. Using a dynamic image ensures consistency, as it updates automatically when you change your site logo.
-
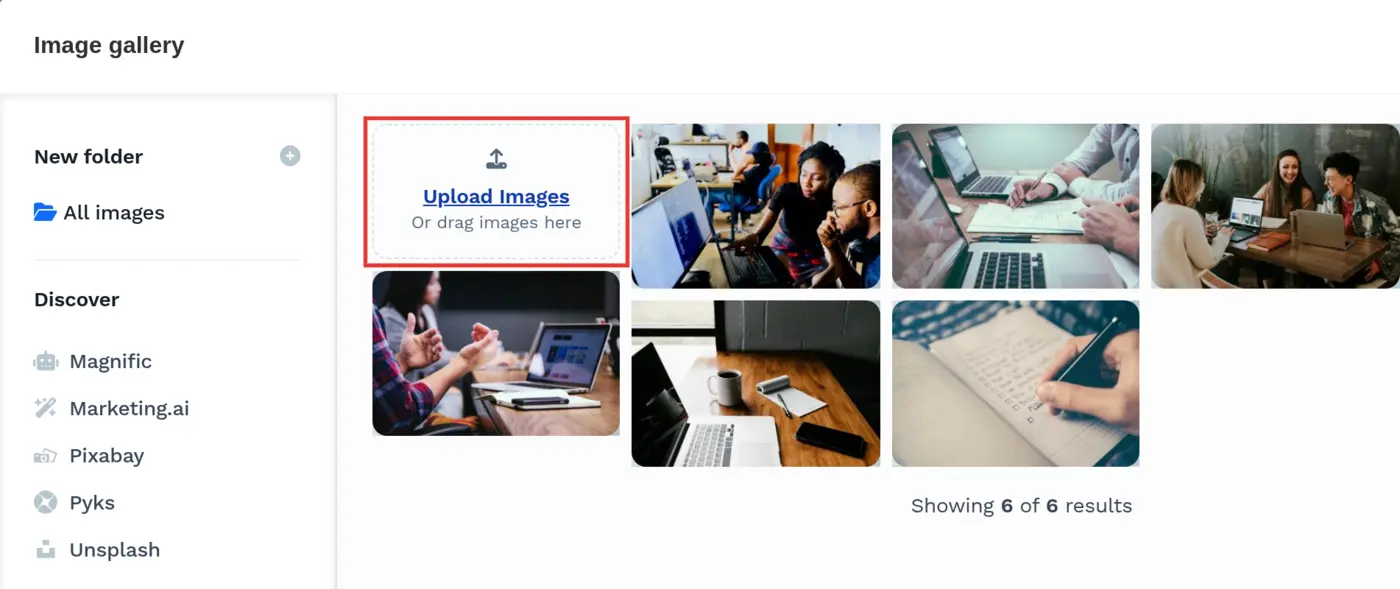
Image URL (when Upload is selected): This field appears when you choose to upload. You can also click the image icon to open the Image Gallery, where you can:
-
Select images from the ClickFunnels image gallery. Or
-
You can upload new images directly from your device by clicking the “Upload Images” option and organizing them into folders for better management.
-
-
Discover Section:
In the Discover section, you can import images directly from Magnific, Pixabay, and Unsplash. This lets you quickly find and use royalty-free images without leaving the page editor. The section also lists Marketing.ai (described below) and Pyks, which opens in a new browser tab. -
Marketing.ai: Additionally, ClickFunnels provides an AI-powered tool called Marketing.ai, which can generate custom images based on your instructions. For example, you could ask it to “Generate a transparent image of a download icon with a gradient blue and purple color.” This is a great way to create unique images tailored to your content.
-
-
Alt Text: This short description shows up if the image can’t be loaded, either due to a missing image or issues like a slow connection. It also helps search engines understand the image, improving SEO.
Size & Position
The Size & Position settings allow you to control your image’s dimensions, aspect ratio, fit, and alignment within its container.

-
Ratio: Choose a predefined aspect ratio for the image, such as square, landscape, or portrait, to maintain a specific proportion between the width and height. Clicking the three-dot icon allows custom width and height settings, enabling independent adjustments.
-
Image Width & Height: Control the image’s size using
px,%, orauto. Use the desktop and mobile toggle to apply different values per device for responsive design.-
px (pixels) – Sets a fixed size for precise control.
-
% (percentage) – Makes the image responsive relative to its container.
-
auto – Automatically adjusts based on the image’s natural dimensions or the available space.
-
-
Fit: Defines how the image is displayed within its container:
-
Fill: Expands the image to fill the entire container, potentially cropping parts of the image.
-
Contain: Scales the image to fit within the container without cropping, maintaining the full image visibility.
-
Cover: Enlarges the image to cover the entire container, possibly cropping edges to fill.
-
Scale-down: Shows the image at its original size, scaling down only if it exceeds the container dimensions.
-
-
Position: When Contain or Scale-down is selected under Fit, the Position option becomes available. This setting allows you to control the image’s placement within the container (e.g., center, top-left, bottom-right) for precise alignment within the available space.
-
Align: You can align the image left, center, or right. Using the desktop and mobile icons, you can also set different alignments for desktop or mobile views.
Image Settings
These options allow you to control how your image loads, appears and interacts within your page.

-
Lazy Loading?: This setting is On by default for new images. Lazy loading improves page performance by delaying loading images until they appear on the user’s screen. When enabled, only images in the visible area of the page load initially, while images further down remain unloaded until the user scrolls to them. This reduces the amount of data required to load the page, resulting in faster initial load times and a smoother user experience. Lazy loading is particularly effective for pages with multiple images or long-scroll layouts, where images below the fold don’t need to load immediately.
By optimizing when images load, lazy loading not only enhances the speed of content display but also improves overall page performance, especially for users on slower networks. This feature prioritizes essential, on-screen content, allowing critical elements to load quickly. Lazy loading can also contribute to improved SEO, as faster load times are favored by search engines and lead to better rankings. It provides users with a seamless experience by delivering visible content first and loading non-essential images only when needed.
-
Quality: The Quality setting allows you to control your images’ resolution and compression level, balancing visual clarity and page performance. By lowering the image quality, you effectively reduce its file size, which helps the page load faster. This is particularly useful for improving performance on mobile devices and for users with slower internet connections. For example, if you’re using a high-resolution image in a small space, reducing its quality won’t noticeably affect its appearance. It will make the image load faster, enhancing the overall user experience.
For example, consider keeping the image quality above 80% if you’re uploading a product image. This higher quality ensures that users can see intricate product details, which can be crucial for building trust and encouraging purchases. Clear, high-quality images allow potential customers to examine features, textures, and other specifics closely, enhancing their confidence in the product and helping drive sales.
On the other hand, if you’re adding a background or decorative image that doesn’t need to be highly detailed, you can consider reducing the quality to around 50-60%. Since these images are not the main focus, lowering their quality will not significantly impact the user experience but will help improve page load speed.
-
Link Action or URL: The setting lets you specify what happens when a user clicks the image. You can choose from several predefined actions or insert a custom URL. Here’s a breakdown of the available options:
-
#open-popup: Clicking the image will trigger the page popup to open.
-
#submit-form: This option submits an opt-in form when clicking the image.
-
?next_funnel_step=true: Clicking the image will redirect users to the next page in your funnel.
-
#close-popup: This action will close an already opened popup, functioning as the opposite of the open popup action.
-
?page_action=mark_complete: If you’re using the image in a course lesson editor, selecting this action will mark the lesson as completed when clicked.
-
-
Target: When you add a link action or URL, choose whether the link opens in the Same Window or a New Tab.
Filter
The Filter section allows you to adjust the visual appearance of the image directly in the page editor. Here are the filter options available:

-
Blur: Adds a blur effect to the image.
-
Brightness: Adjusts the overall brightness of the image.
-
Contrast: Controls the contrast between light and dark areas of the image.
-
Grayscale: Converts the image to black and white.
-
Color Invert: Inverts the colors of the image.
-
Opacity: Adjusts the transparency of the image.
-
Saturate: Controls the intensity of the image’s colors.
-
Sepia: Adds a sepia tone to the image for a vintage effect.
Padding

The Padding settings control the space between the content and the inside edge of its container (such as a section, row, column, or element). This internal spacing helps ensure your content has room to breathe and appears visually balanced. Use the slider or manually enter a value in pixels (px) or percentage (%) to create consistent spacing across screen sizes.

Padding Options:
-
Top: Add space between the top of the element container and its content.
-
Bottom: Add space between the bottom of the element container and its content.
-
Left + Right: Adjust the horizontal spacing between the element container and its content.
-
Gap: In particular elements, such as the Accordion, the gap property is added to establish spacing between the items within the container. For example, it is possible to adjust the gap between each accordion item within the Accordion element without defining padding at the top and bottom.
Desktop & Mobile (🖥️ & 📱)Customization:
The padding settings allow you to define separate values for desktop and mobile views. Use the device toggle at the top of the padding controls to switch between screen modes and adjust spacing accordingly. If no mobile value is specified, it will inherit the desktop setting by default.
This feature ensures your layout remains optimized for different screen sizes, enhancing the mobile and desktop experience.
Corner
The Corner settings let you adjust the roundness (border-radius) of an element’s corners, providing flexibility to create either rounded or sharp edges:

-
Style Presets (1, 2, 3): Choose from predefined corner styles set in your Style Guide. These presets (1, 2, or 3) offer quick styling options that align with your page’s overall design.
-
Edit Style: To modify a style directly in the Style Guide (affecting all elements using that style), click Edit Style to adjust the preset in your global settings.
-
Override: To apply custom corner settings without changing the Style Guide, click Override. This allows you to tailor the corner radius for this specific element only.
-
All Corners: Adjust the slider or enter a specific value in pixels or percentages to set a uniform border radius for all four corners.
-
Separate Edges: Enable Separate Edges to adjust each corner independently. You can set different values for the Top Left, Top Right, Bottom Left, and Bottom Right corners to achieve unique shapes.
Border
The Border settings enable you to add and style borders around an element, allowing for enhanced visual definition and separation on the page:

-
Style Presets (1, 2, 3): Choose from predefined border styles in your Style Guide. These presets provide consistent border styles across your page and can be quickly applied to elements.
-
Edit Style: To modify the preset border styles in the Style Guide (affecting all elements using that style), select Edit Style to adjust the design in your global settings.
-
Override: Use the Override option to customize the border settings specifically for this element without impacting the global Style Guide settings.
-
Borders: Select which sides of the element should display a border. Options include any combination of top, bottom, left, and right borders.
-
Border Style: To fit your design preferences, choose the border’s line style, such as solid, dashed, or dotted.
-
Color: Use the color picker to select a border color. You can choose a color from the Style Guide or select a custom color, ensuring the border color aligns with your design scheme.
-
Stroke Size: You can adjust the border’s thickness using the Stroke Size slider or by inputting a specific pixel value, creating anything from thin outlines to bold frames.
Shadow
The Shadow settings allow you to add depth and emphasis to elements by applying shadow effects, enhancing the visual appearance. Here’s how to customize shadow properties:

-
Style: Select one of the predefined shadow styles from your page’s style guide. Click on the numbered styles (1, 2, or 3) to apply preset shadow settings defined in your style guide.
-
Shadow Style: Choose between Inset (shadow within the element) and Outset (shadow outside the element) to achieve the desired shadow effect.
-
X-direction: Adjusts the horizontal positioning of the shadow. A positive value moves the shadow to the right, while a negative value shifts it to the left.
-
Y-direction: Controls the vertical placement of the shadow. Positive values push the shadow downward, while negative values pull it upward.
-
Blur: Controls the softness of the shadow edges. Higher values create a more diffused, softer shadow, while lower values keep the shadow sharp.
-
Spread: Adjust the size of the shadow. Positive values expand the shadow, while negative values make it narrower.
-
Color: Use the color picker to choose to set the shadow color.
Control Panel
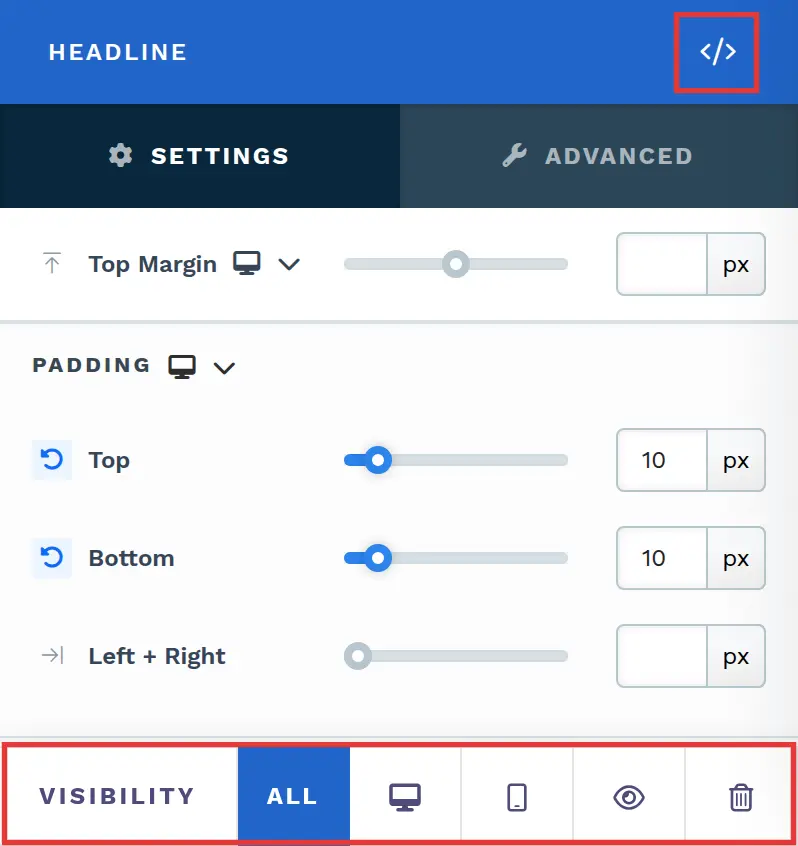
The Control Panel appears at the bottom of every container(Section, Row, Flex, and Element) in the page editor, offering quick access to essential settings and actions for that container. Here’s what each icon represents:
-
ALL: The container will be visible on all devices (desktop, tablet, and mobile).
-
Desktop (🖥️) Icon: The container will only be visible in desktop view (screens 771px and wider).
-
Mobile (📱) Icon: The container will only be visible in mobile view (screens up to 770px wide).
-
Eye (👁️) Icon: Hides the container on all devices. It isn’t deleted. To show it again, select All, Desktop, or Mobile in this panel, or open Layout in the top bar and turn the container’s desktop or mobile toggle back on.
-
Code (
</>): Opens the code editor for this container, where you can add custom CSS to change its styling. The editor shows the container’s CSS ID Selector so your CSS targets only this container. Open it from the code icon at the top of the settings panel, or hover over the container on the page and click Code in its toolbar. -
Trash (🗑️) Icon: Removes the container from the page editor entirely.
Advanced Settings
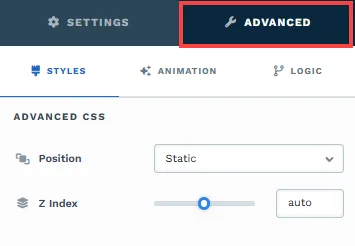
To further customize your container (section, row, column, and element), ClickFunnels provides Advanced settings that allow you to control style, advanced CSS, animation, and rendering logic. We’ve separated these advanced features into dedicated articles to avoid overwhelming you with too much content in one place and to keep our documentation concise. Explore the following resources for more details:
-
Advanced Settings - Customize Styles: Learn how to populate contents dynamically, position containers, and apply z-index.
-
Advanced Settings - Customize Animation: Learn how to add animations, control entry and exit effects, and adjust animation delay.
-
Advanced Settings - Customize Logic: Learn how to apply conditional logic to elements and add custom attributes.