
Workspace General Settings
Published: Updated:
The Workspace General Settings in ClickFunnels allow you to manage key configurations that apply across your entire workspace. These global settings include options such as the workspace name, default payment processor, default currency, and more. In this article, we’ll walk through these settings to help you customize your workspace to better align with your business needs.
Requirements
Section titled “Requirements”- An active ClickFunnels account
Accessing Workspace Settings
Section titled “Accessing Workspace Settings”-
Log in to your ClickFunnels workspace.
-
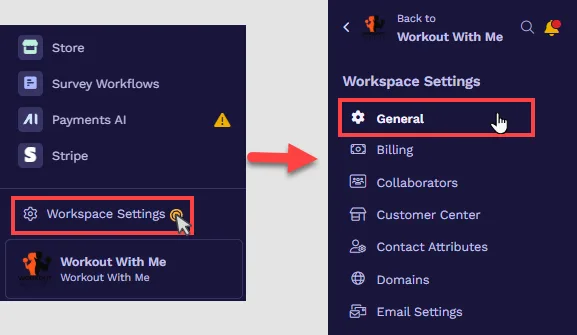
Navigate to the bottom left corner and click Workspace Settings.
-
Click General if it is not the default selection.
Edit Workspace Details
Section titled “Edit Workspace Details”-
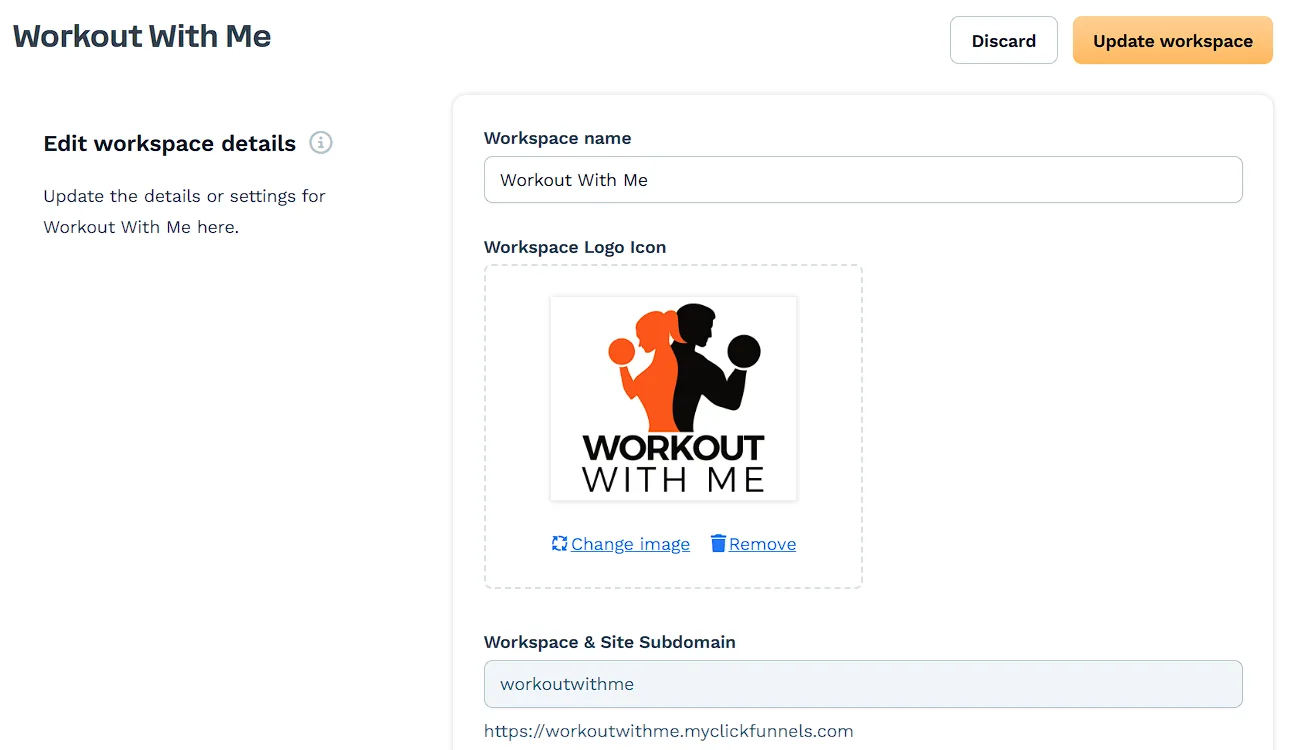
Workspace Name: Change the name of your workspace.
-
Workspace Logo Icon: Upload or change the logo icon for your workspace.
-
Workspace & Site Subdomain: When you create a new workspace, you must type a subdomain name for the workspace.
Payment Settings
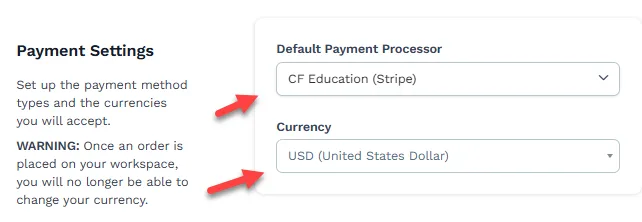
Section titled “Payment Settings”To start accepting payments in your ClickFunnels workspace, ensure the following settings are configured in the workspace settings:
-
Default Payment Processor: Select a payment processor account (e.g., Stripe, Payments AI) from the list to set it as the default processor for handling transactions.
-
Currency: Expand the Currency dropdown to select your preferred workspace currency. All products created within your workspace will adhere to the currency configured here.
Payments AI Settings
Section titled “Payments AI Settings”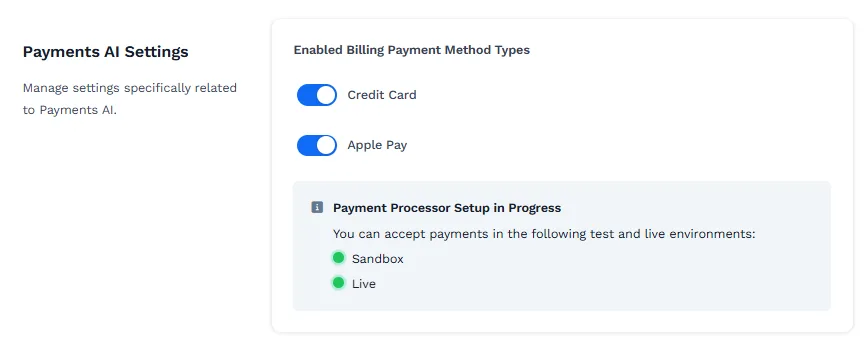
Under Payment AI Settings, enable the desired billing methods (e.g., Credit Card, Apple Pay, Paypal). This will allow payments to be collected across the entire workspace. Enabling billing methods in workspace settings ensures that payment processing is activated for all relevant areas within your workspace.
💡 Learn more: Using Payments AI within ClickFunnels.
Stripe Settings
Section titled “Stripe Settings”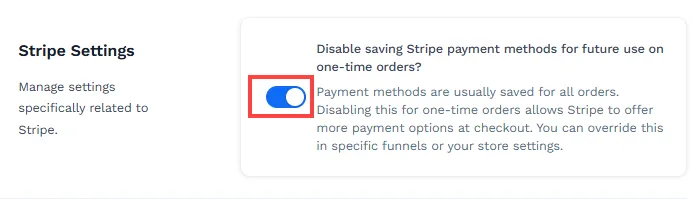
In the Stripe Settings section, toggle “Disable saving Stripe payment methods for future use on one-time orders.” Enabling this option ensures that specific dynamic payment methods are rendered correctly in the checkout process, as some require payment details not to be saved for one-time orders.
💡 Learn more: Setting Up Stripe as a Payment Gateway in ClickFunnels.
Allow User Credit Card Entry
Section titled “Allow User Credit Card Entry”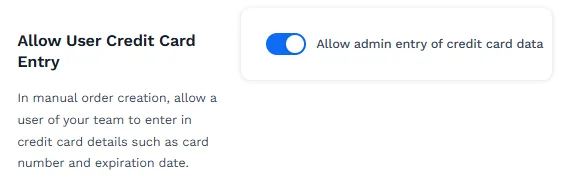
This setting controls whether workspace admins can manually enter a customer’s credit card details, such as card number and expiration date, when creating orders. It is designed to support PCI compliance by managing credit card entry permissions within your team. This setting is turned on by default for all workspaces. Disabling it will hide credit card entry components in order creation and payment method views, but admins can still place orders using previously saved credit cards.
-
Enabled: Admins can manually enter credit card information during manual order creation.
-
Disabled: The credit card entry fields will be hidden. Admins can only use existing saved cards when placing orders.
💡 Learn more: How to Create and Manage Orders.
Order Number Format
Section titled “Order Number Format”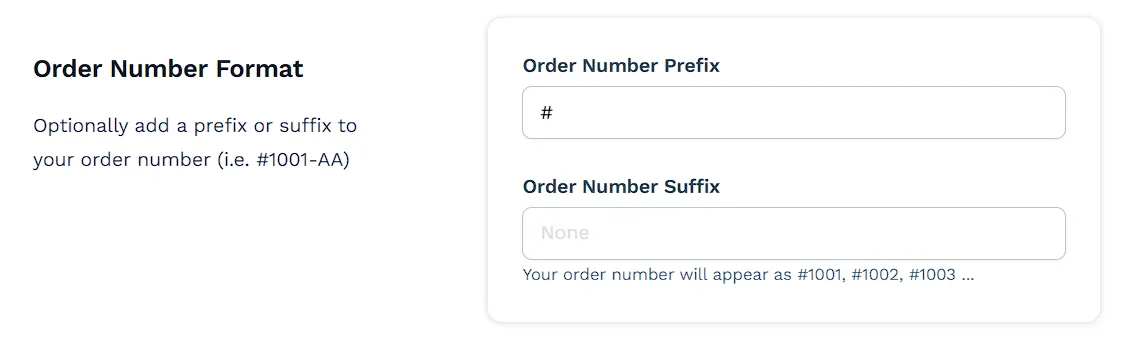
The Order Number Format section allows you to customize how order numbers appear by adding a prefix, a suffix, or both. This helps with branding, tracking, or organizing orders—especially useful when managing multiple workspaces or sales channels.
-
Order Number Prefix: Lets you define text or symbols that appear before the order number.
Example:
If you enter#as the prefix, your orders will display like:
#1001,#1002,#1003, and so on.You can also use letters or custom identifiers:
-
Prefix:
ORD-→ Order numbers appear asORD-1001,ORD-1002… -
Prefix:
CF#→ Order numbers appear asCF#1001,CF#1002…
-
-
Order Number Suffix: Lets you define text that appears after the order number.
Example:
If you enter-USas the suffix, your orders will display like:
1001-US,1002-US,1003-US, and so on.You can also combine both fields for a fully customized format:
-
Prefix:
# -
Suffix:
-AA
→ Order numbers will appear as#1001-AA,#1002-AA,#1003-AA
-
This formatting is optional but can enhance clarity when reviewing or exporting orders, especially for teams that work across multiple currencies, regions, or brands.
Delete Test Orders
Section titled “Delete Test Orders”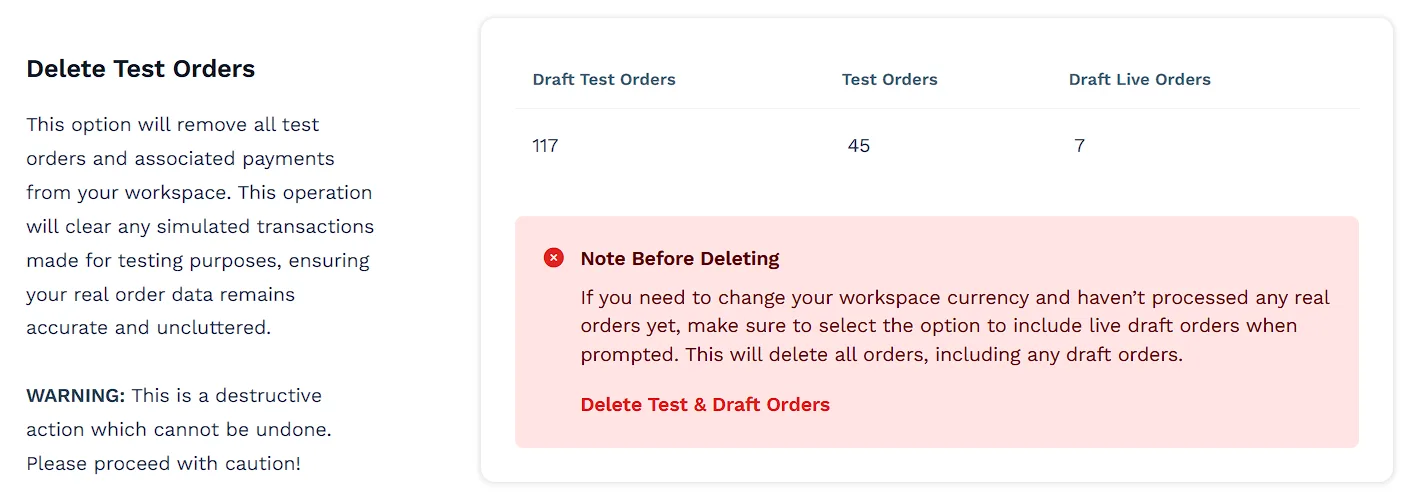
The Delete Test Orders option allows you to remove all test orders from your workspace. This is useful for clearing out simulated transactions created during testing, helping ensure your real order data remains clean and accurate.
When clicked, you will be prompted to confirm the deletion in a pop-up window. Any saved but unprocessed test or draft live orders will also be deleted if you choose to include draft orders.
Team Settings
Section titled “Team Settings”
Click on Edit Team Settings to access the team settings page directly from the general settings page.
Delete Workspace
Section titled “Delete Workspace”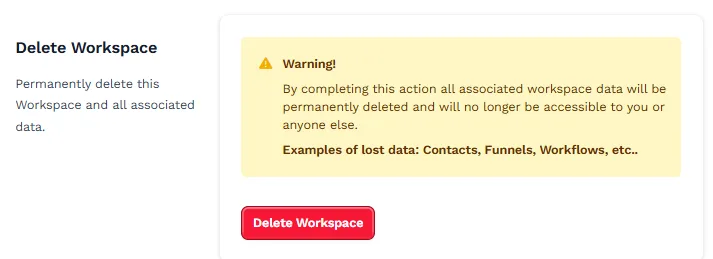
To permanently remove your workspace and all associated data, click Delete Workspace and confirm the action in the open prompt. Only the account owner can delete a workspace from a team.