Exploring the Funnel Workflow Builder
Published: Updated:
The Funnel Workflow Builder is where you can view, edit, and manage all of your funnel steps in one place. Once you create a funnel, it automatically opens in the builder, allowing you to see the full flow from start to finish.
In this article, we’ll walk through the builder layout and its main features so you can navigate confidently.
Requirements
Section titled “Requirements”-
An active ClickFunnels account
Overview of the Funnel Workflow Builder
Section titled “Overview of the Funnel Workflow Builder”The Funnel Workflow Builder is where you manage everything related to your funnel in one place. From here, you can see the full flow of your funnel, add or edit steps, attach products, connect a domain, and monitor performance with built-in stats.
When you open any funnel, it will automatically load in the Workflow Builder. You can also return to the builder at any time from your Funnels list.
How to Access the Funnel Workflow Builder
-
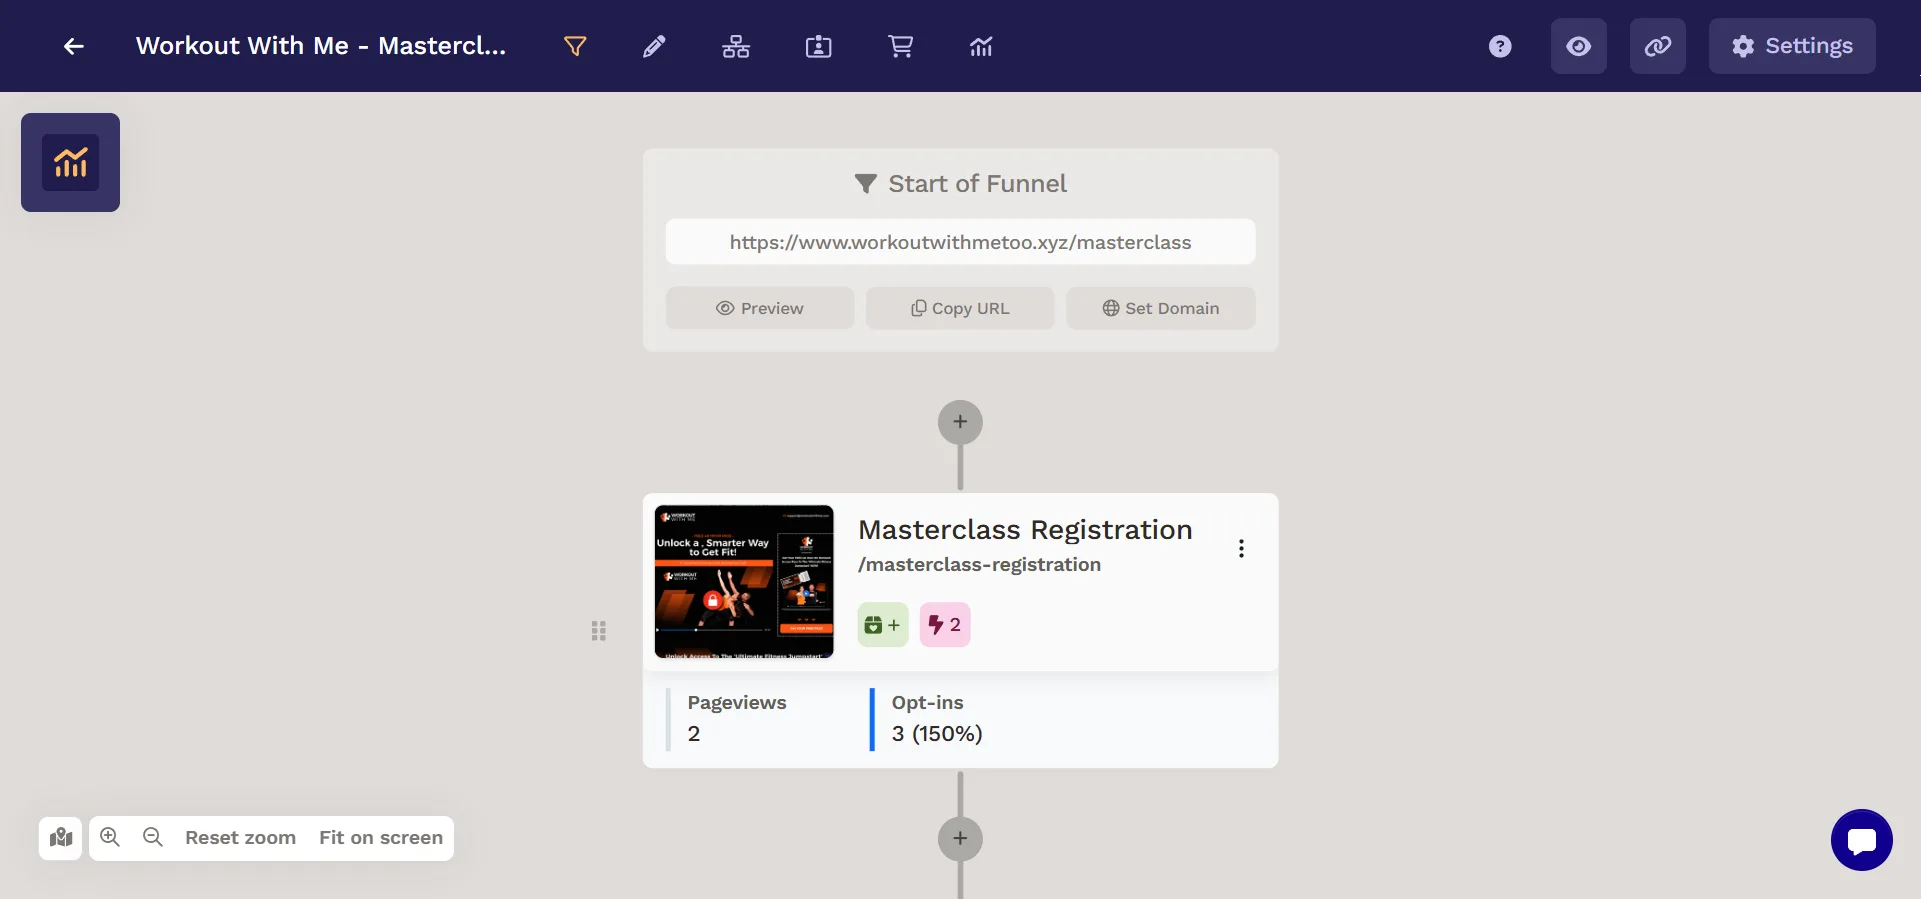
Click on Funnels from the left navigation menu.
-
Locate the funnel you want to manage.
-
Click the funnel name to open the Funnel Workflow Builder for that funnel.
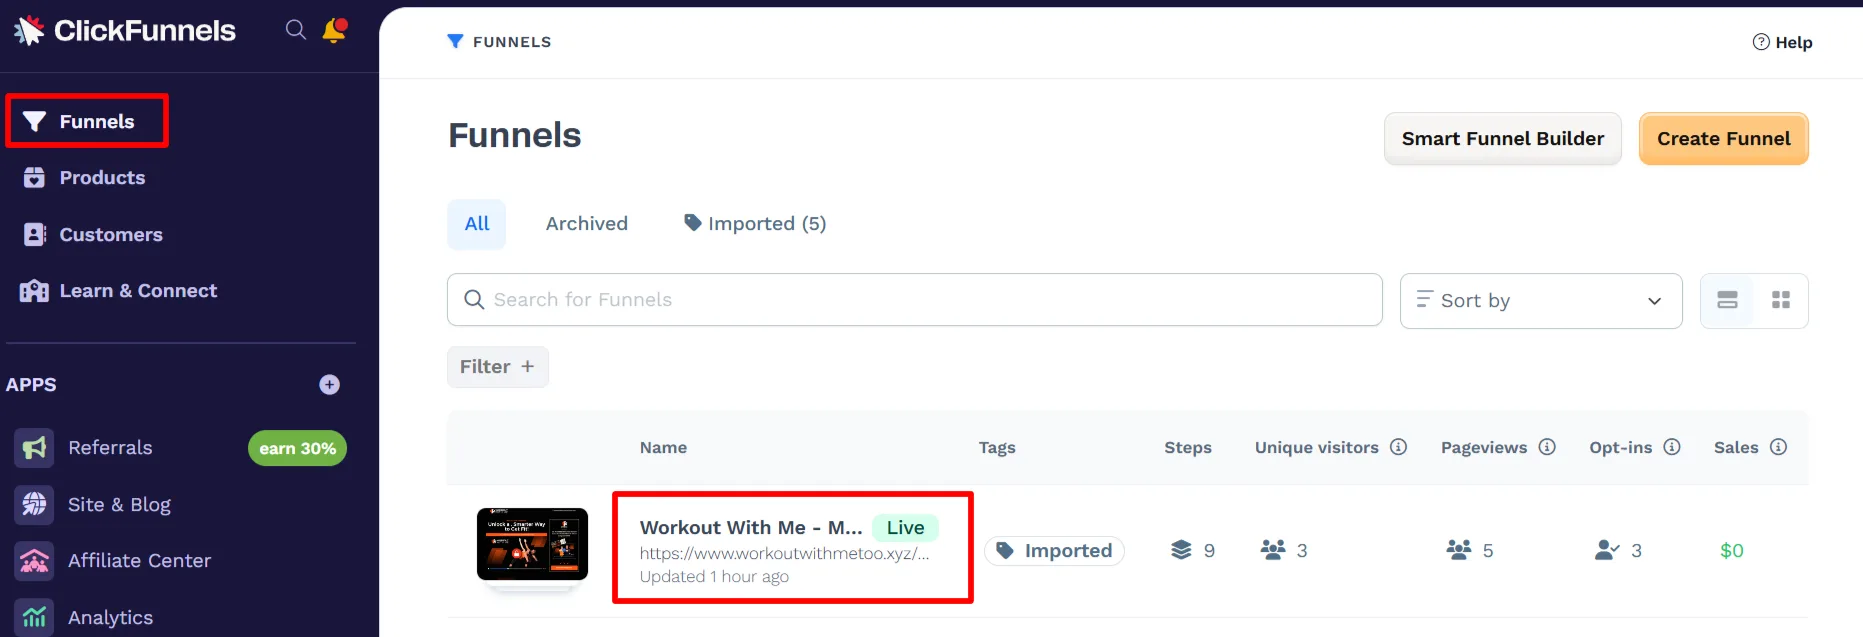
Once inside the builder, you’ll see four main areas:
-
Top Navigation Bar: access tools to edit pages, manage workflows, view opt-ins, track orders, open analytics, and manage funnel settings.
-
Start of Funnel: your funnel URL, with options to Preview, Copy, or Set Domain
-
Funnel Stats Panel (left): performance metrics including Average Cart Value, EPC, Upfront Sales, Recurring Sales, Opt-ins, and Pageviews
-
Funnel Canvas with Step Cards (center): visual layout of your funnel with step actions, product management, and quick stats
Navigating the Funnel Workflow Builder
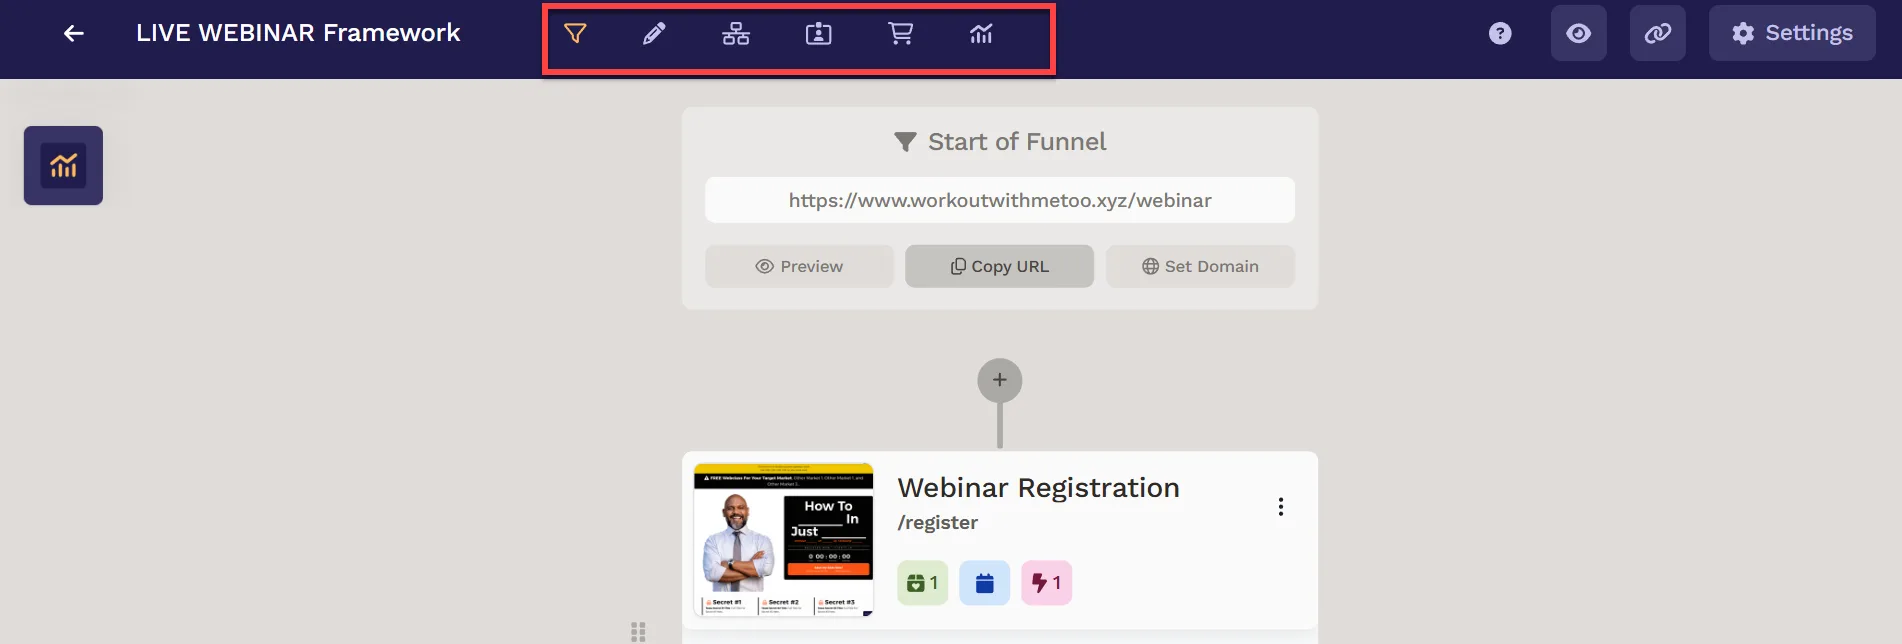
Section titled “Navigating the Funnel Workflow Builder”The Top Navigation Bar provides quick access to all key areas of your funnel without leaving the builder. Each icon opens directly in the context of the funnel you are viewing.
-
Funnel: The main Workflow Builder view.
-
Editor: The page editor for the selected step.
-
Workflows: The area for attaching and managing automation workflows.
-
Optins: The section showing contacts collected from opt-in pages.
-
Orders: The section displaying customer orders tied to the funnel.
-
Stats: The performance metrics panel and the full Funnel Analytics Dashboard.
Funnel
Section titled “Funnel”The Funnel view is the main screen of the Workflow Builder. It shows a visual map of your funnel steps and lets you manage the flow from start to finish. Each step appears as a card that displays its name, path, thumbnail, attached products or workflows, and quick stats such as pageviews, opt-ins, or orders.
At the top left, the Stats icon provides access to performance data. You can click it to open the analytics side panel or view the full Funnel Analytics Dashboard. For more details, see Funnel Analytics Dashboard Overview.
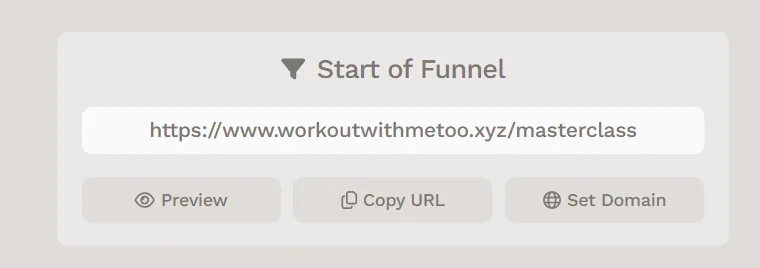
The Start of Funnel block at the top of the canvas displays your funnel URL with quick actions:
-
Preview: open the funnel in a new tab.
-
Copy URL: copy the funnel link to your clipboard.
-
Set Domain : connect the funnel to a domain. For step-by-step guidance, see Connecting a Domain to Your Funnel.
From the Funnel view, you can:
-
Use the three-dot (⋮) icon on a step card to access options like editing, previewing, cloning, adding products, attaching workflows, or managing events.
-
Drag the reorder handle on the left of a card to change the sequence of your steps.
-
Click the plus (+) button between steps to add a new page, set up a split test, or create a conditional split.
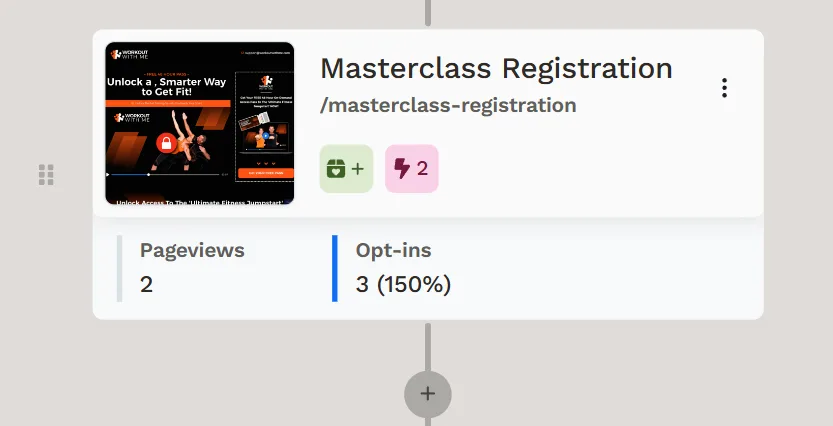
The Funnel view keeps everything connected, so you can build and organize your funnel structure without leaving the builder.
Editor
Section titled “Editor”The Editor opens the page editor starting with the first step in your funnel. You can then click any step in the left-hand panel to switch between pages without leaving the editor.
The Funnel Steps panel on the left lists all steps in your funnel. Use it to move between pages or click the hide icon at the top to collapse the panel for a full-page editing view.
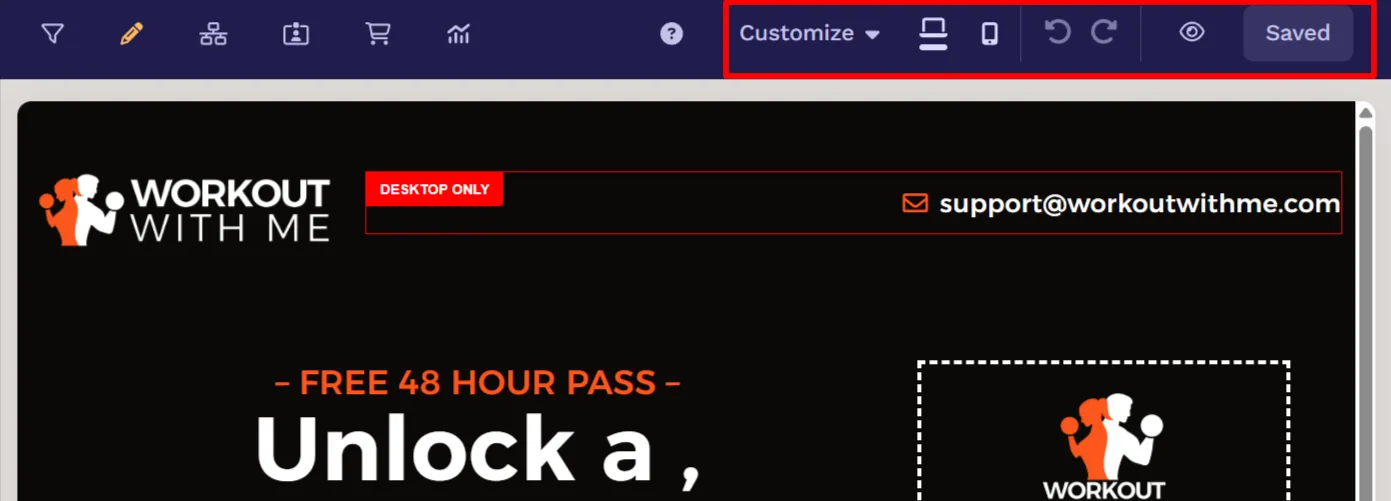
At the top of the editor, you’ll also find quick options to:
-
Switch between desktop and mobile previews
-
Open the Customize menu for typography, layout, assets, and popup settings
-
Save changes and return to the Workflow Builder
Workflows
Section titled “Workflows”The Workflows area lets you connect automation to your funnel steps. Workflows are used to send follow-up emails, apply tags, trigger delays, or launch other automated actions whenever a visitor interacts with your funnel. This makes them a key part of building a responsive and scalable funnel.
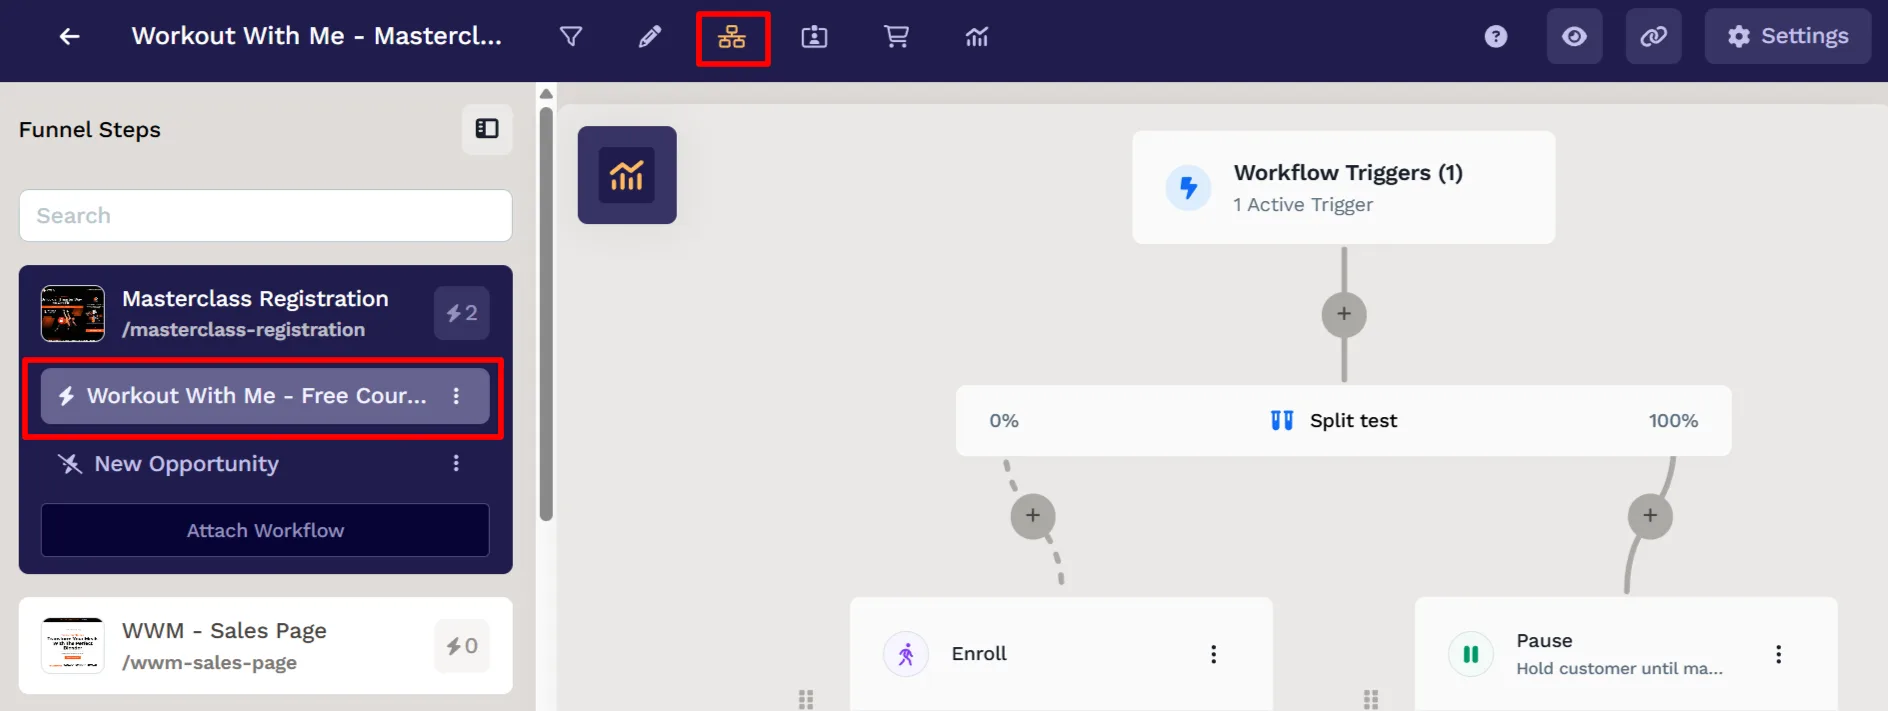
Inside the Funnel Workflow Builder, you can manage workflows directly from the funnel steps:
-
Attach a Workflow: Use the Attach Workflow button under a step to connect a new or existing workflow. This links the funnel step to automation without leaving the builder.
-
View Attached Workflows: Attached workflows are shown directly under the step card. Each workflow displays its name and the lightning bolt icon with the number of active triggers.
-
Manage Workflows: Use the three-dot (⋮) icon beside an attached workflow to open options such as:
-
Settings – adjust workflow details.
-
Disconnect – remove the workflow from the step.
-
Test workflow – run a test to ensure the automation is firing correctly.
-
View active runs – check real-time executions of the workflow.
-
Workflows are flexible: a single funnel step can trigger multiple workflows, and a workflow can span actions like tagging leads, sending campaigns, or updating customer records.
For detailed instructions on creating workflows, configuring triggers, and managing automation, see Adding Workflows to Funnel Steps.
Optins
Section titled “Optins”The Optins area shows the people who have submitted their details on a funnel step. Each entry represents a contact, making this view a quick way to see who opted in and when.
When you click the Optins icon in the top navigation:
-
You’ll see a list of contacts who opted in through the selected funnel step.
-
Each contact entry includes their email address and can be customized with additional columns such as name, tags, status, and lifetime value (LTV).
-
Use the date filter to refine the view (Last 7 days, Last 30 days, This month, Today, Yesterday, or a custom range).
-
Click the column settings icon to choose which contact fields to display.
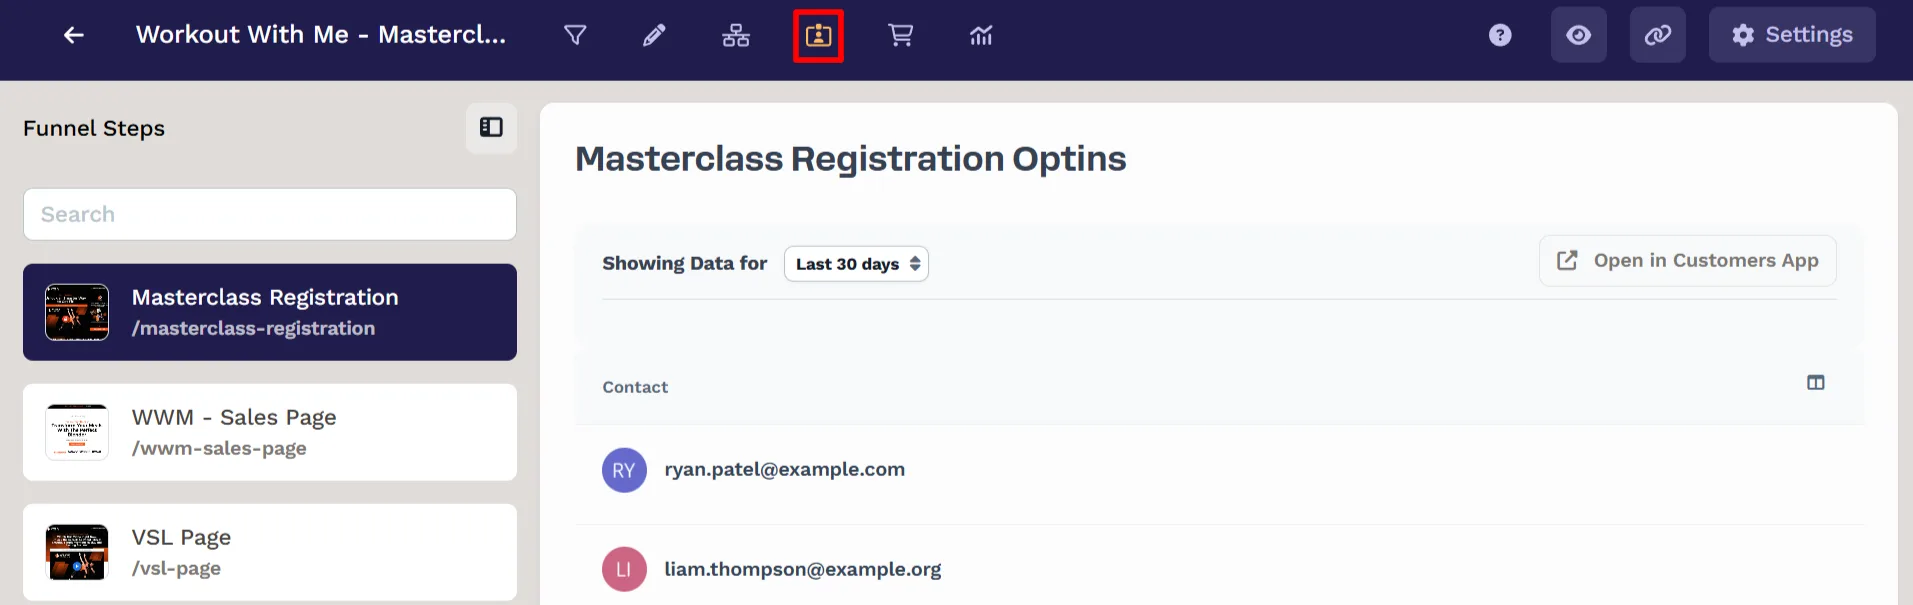
Clicking on a contact’s name opens their full profile in the Customers app, where you can view and manage details such as:
-
Email address and tags
-
Order history
-
Payment methods
-
Fulfillments and assets
-
Enrollments and opportunities
You can also click Open in Customers App to load the same list in the Customers area of ClickFunnels. When opened this way, a filter is automatically applied so you only see contacts who opted in on the specific funnel step.
This makes it easy to track contacts at the step level inside the Funnel Workflow Builder, while still having the flexibility to explore deeper records inside the Customers app.
For additional information on managing contacts across your account, see Managing Contacts in ClickFunnels.
Orders
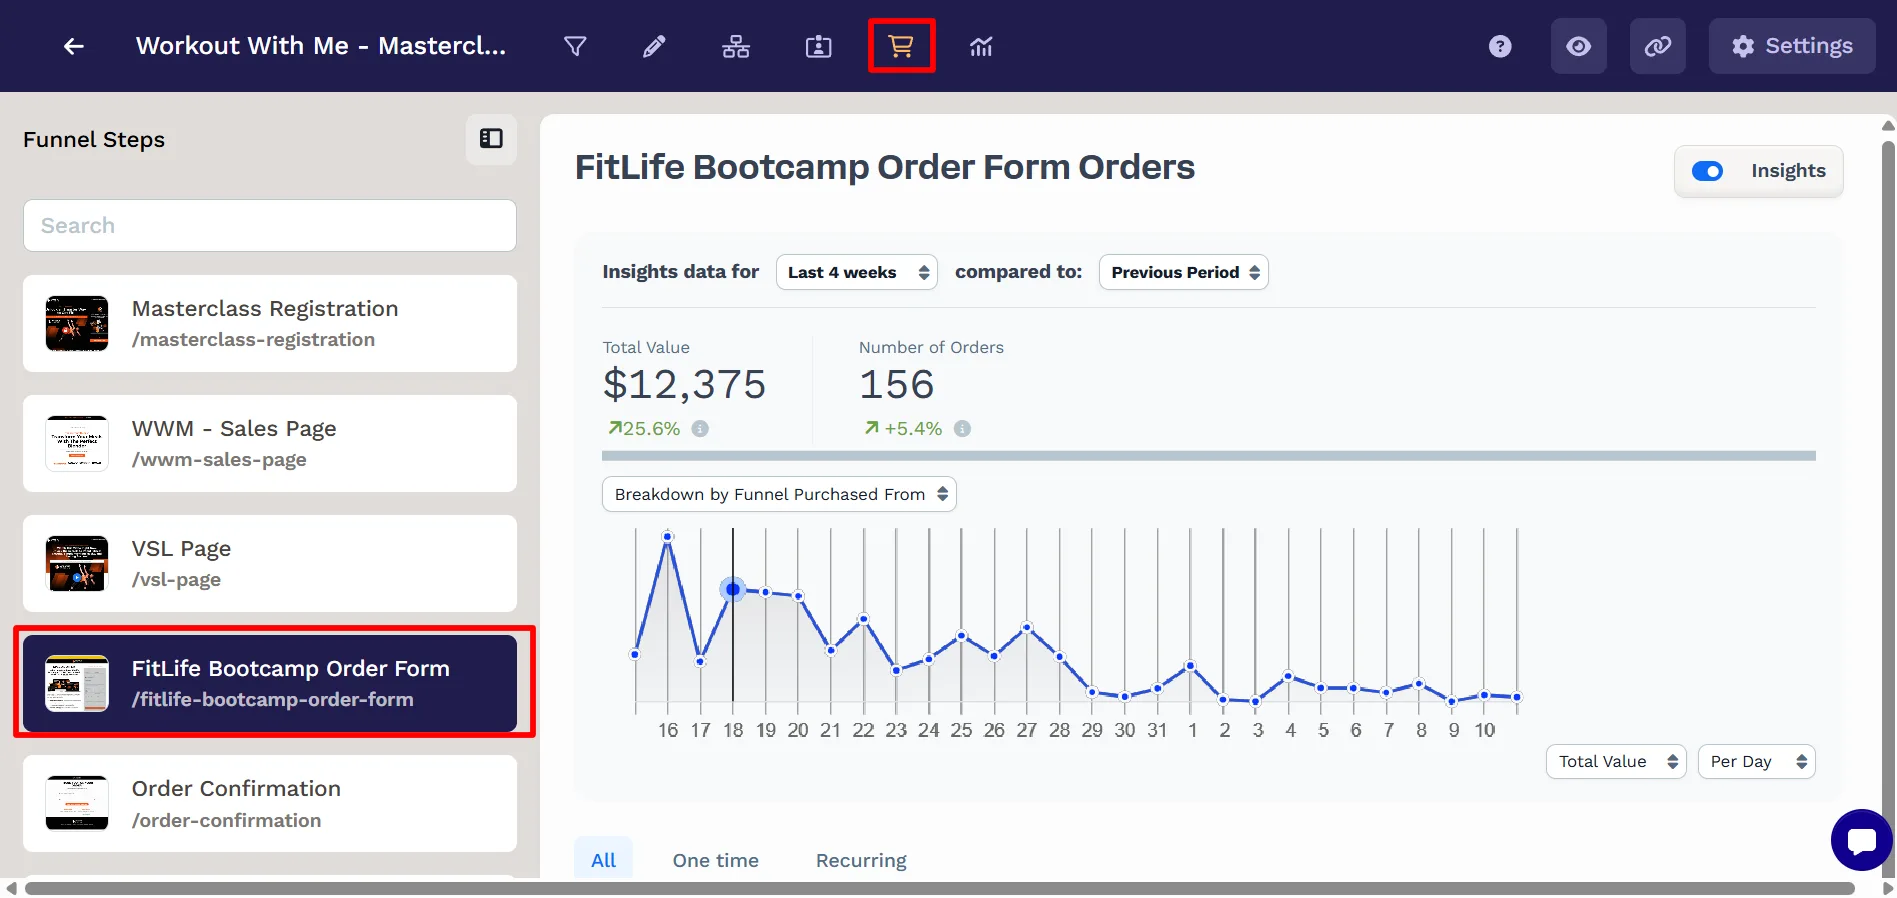
Section titled “Orders”The Orders area gives you visibility into purchases made through your funnel. It combines sales insights with detailed order management tools, allowing you to review, update, and track customer orders without leaving the Funnel Workflow Builder.
When you click the Orders icon in the top navigation:
-
You’ll see an orders dashboard for the selected funnel step.
-
At the top, you can filter insights using:
-
Date Range (Today, Yesterday, Last week, Last 4 weeks, Month-to-date, Year-to-date, or Custom).
-
Comparison Period (e.g., compare performance to the previous period).
-
Breakdown Options (by funnel purchased from or by products ordered).
-
-
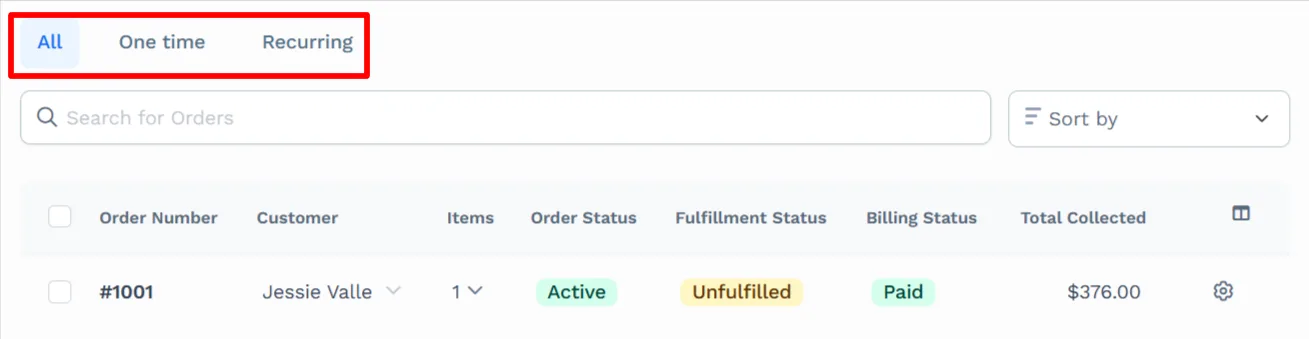
Order Tabs allow you to filter the order list by All, One-time, or Recurring purchases.
-
Each order includes details such as:
-
Order number
-
Customer name
-
Item quantity
-
Order status (e.g., Active, Cancelled)
-
Fulfillment status (e.g., Unfulfilled, Fulfilled, Partially Fulfilled)
-
Billing status (e.g., Paid, Pending, Failed)
-
Total collected
-
Managing Individual Orders
Section titled “Managing Individual Orders”-
Click the order number to open the full order record in the Customers app. This page provides complete details, including subscriptions, payment history, fulfillment, and inventory status.
-
Click the settings icon beside an order to open the Edit Order panel within the Funnel Workflow Builder. From here, you can:
-
Add or update tags
-
Edit shipping and billing addresses
-
Update contact information
-
Modify fulfillment details
-
-
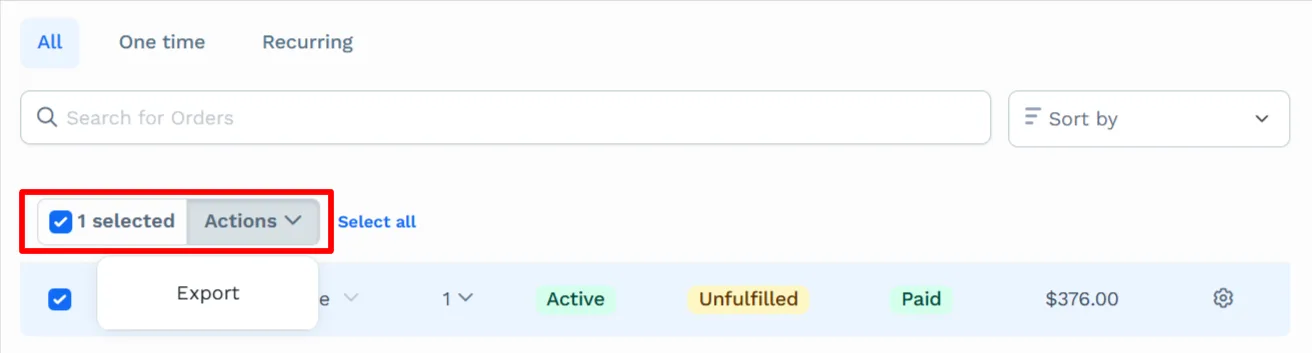
Use the Actions dropdown to export selected orders for reporting or backup.
For more details on advanced order management, see Managing Orders in ClickFunnels.
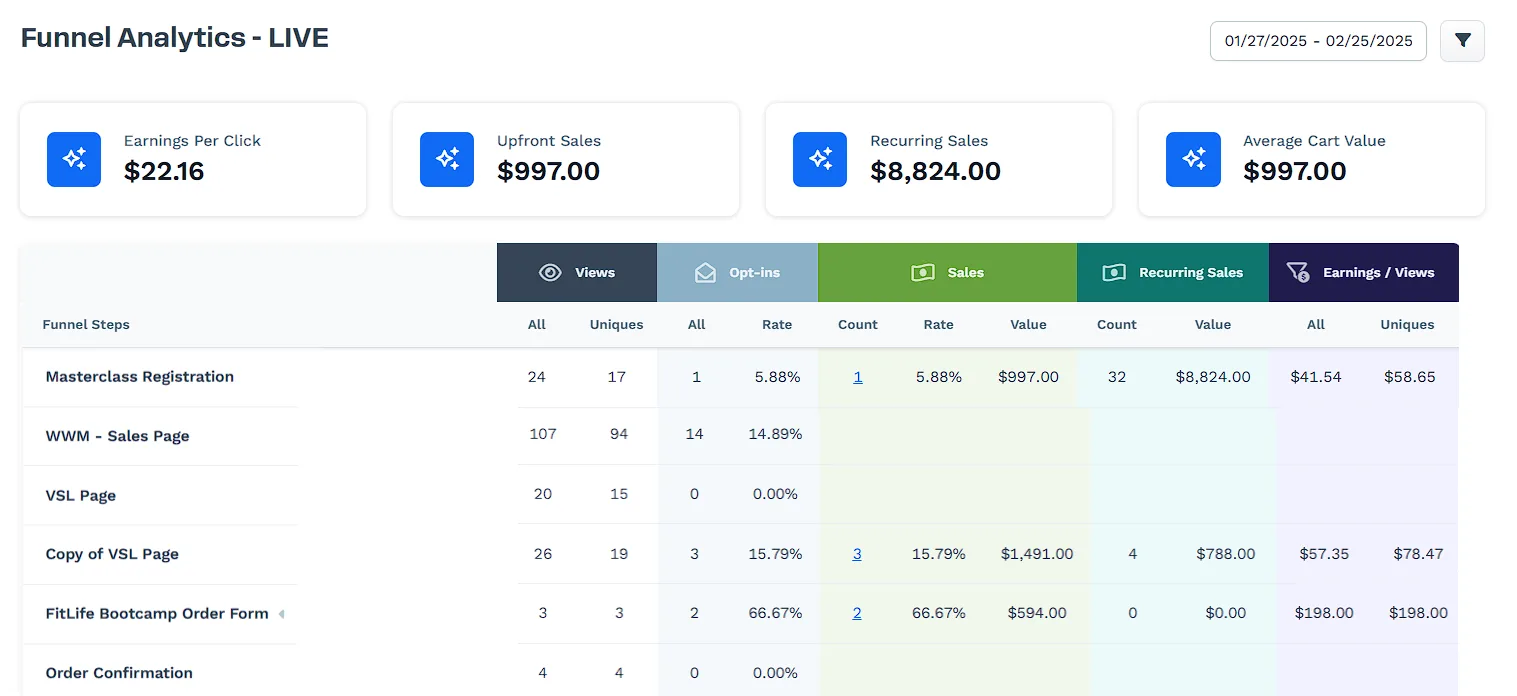
The Stats area provides detailed analytics for your funnel performance. While each step in the Funnel Workflow Builder already displays high-level metrics, clicking the Stats icon in the top navigation bar opens the full Funnel Analytics Dashboard. This view is designed to give you a deeper understanding of how visitors interact with your funnel and where conversions are happening.
When you open Stats from a funnel:
-
You’ll see key metrics cards at the top, including:
-
Earnings Per Click (EPC): Average amount earned per visitor who clicked into the funnel.
-
Upfront Sales: Total amount of upfront, one-time sales.
-
Recurring Sales: Total amount of recurring sales collected from subscriptions or payment plans.
-
Average Cart Value: The average revenue generated per checkout session.
-
-
The performance table below shows stats for each funnel step, such as:
-
Views
-
Opt-ins
-
Sales
-
Recurring Sales
-
Earnings / Views
-
For a complete breakdown of all metrics and advanced usage, see Funnel Analytics Dashboard Overview.