
External Purchases - How To Set Up ClickBank Integration for Vendors
Published: Updated:
With the integration of ClickBank, ClickFunnels allows you to manage tracking, automations and fulfillment of purchases made on the ClickBank platform. This powerful integration allows you to increase your distribution channels when your products can be purchased in both ClickFunnels and ClickBank. In this article, you’ll discover how to connect your ClickBank Vendor account with your ClickFunnels account, map ClickBank and ClickFunnels products, and how to handle orders, ensuring a smooth integration with the external platform.
Requirements
Section titled “Requirements”-
An active ClickFunnels account
-
A vendor account with ClickBank
-
The External Purchasers app connected to the workspace
-
A product created in the Products section of your ClickFunnels Account
What is ClickBank
Section titled “What is ClickBank”ClickBank is a global e-commerce platform and affiliate marketplace that connects product creators and vendors with affiliate marketers, handles payment processing and affiliate tracking, and supports selling digital and physical products online.
When you integrate ClickBank with ClickFunnels, you connect products you’ve set up in ClickBank into your ClickFunnels account so purchases made via ClickBank can be fulfilled, tracked, and run with all the automations you are used to (webhooks, workflows, etc.) inside ClickFunnels.
Benefits of ClickBank Integration with ClickFunnels:
-
Lets ClickFunnels fulfill products sold on ClickBank through your funnel workflows.
-
Provides unified order tracking and processing across both platforms.
-
Enables you to build advanced funnel features (upsells, downsells, membership access) around ClickBank products.
-
Uses ClickBank’s affiliate tracking and commission systems while still controlling the customer experience in ClickFunnels.
-
Centralizes commerce data and reporting for sales and conversions.
-
Reduces technical overhead by combining ClickBank’s commerce engine with ClickFunnels’ marketing and fulfillment logic.
Step 1 – Creating A New External Purchase Endpoint Listener
Section titled “Step 1 – Creating A New External Purchase Endpoint Listener”-
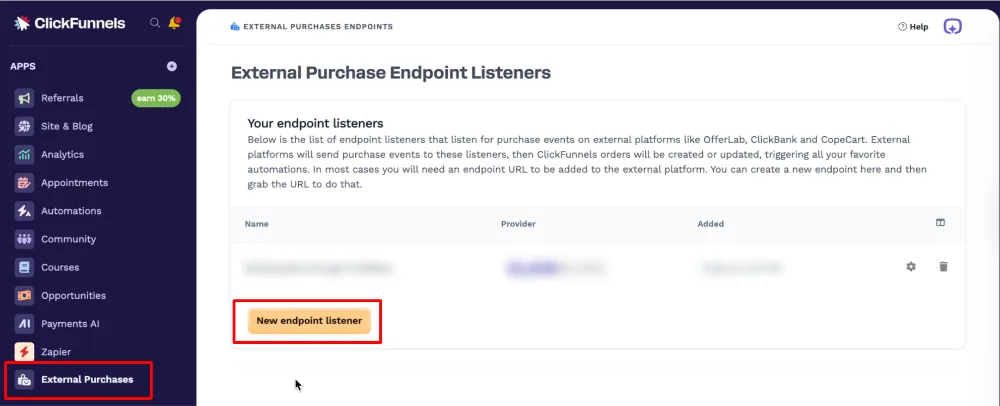
In your ClickFunnels workspace, navigate to the External Purchases app.
-
Click the New endpoint listener button to create a new endpoint listener.
- Name your endpoint listener and select ClickBank as the Provider.
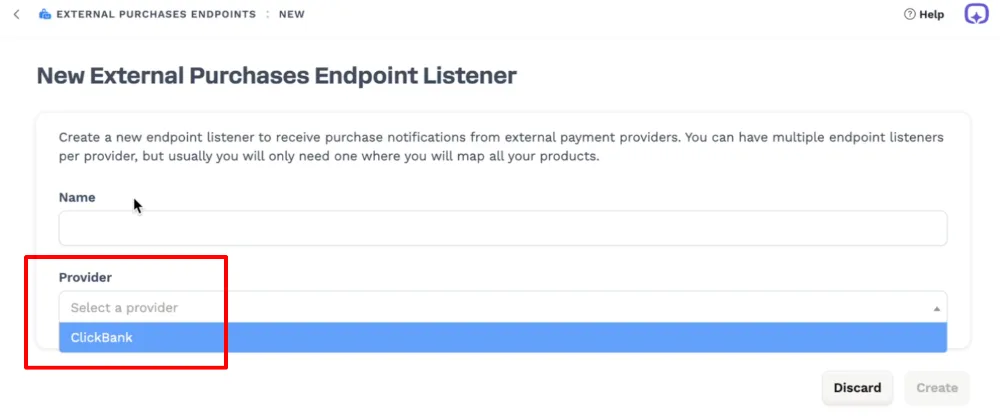
NOTE: Only one listener is required for most setups.
Step 2 – Configure ClickBank Account Settings
Section titled “Step 2 – Configure ClickBank Account Settings”-
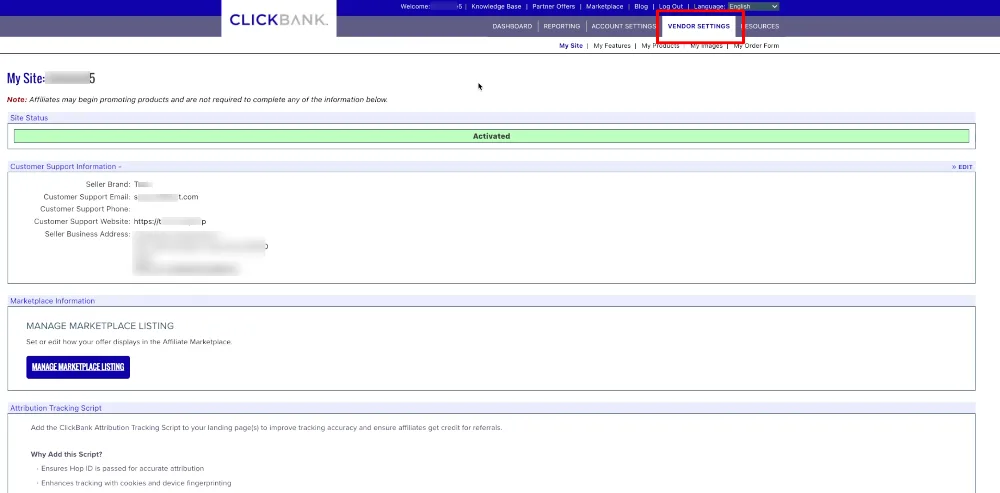
Log into your ClickBank Vendor account.
-
Navigate to Vendor Settings.
-
Scroll to Advanced Settings and click Edit on the right-hand side.

-
In the advanced settings, if you’ve never set up a secret key before, navigate back to ClickFunnels and copy the secret key provided.
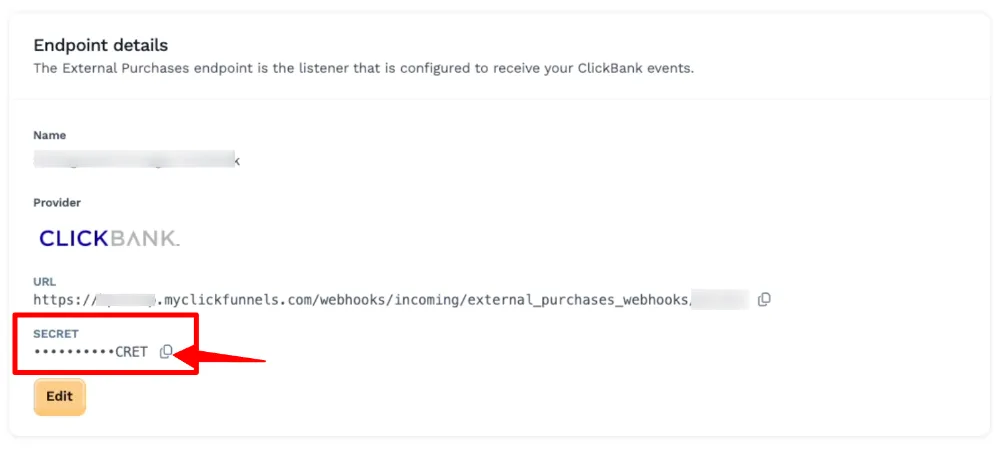
Paste the Secret Key in your ClickBank settings.
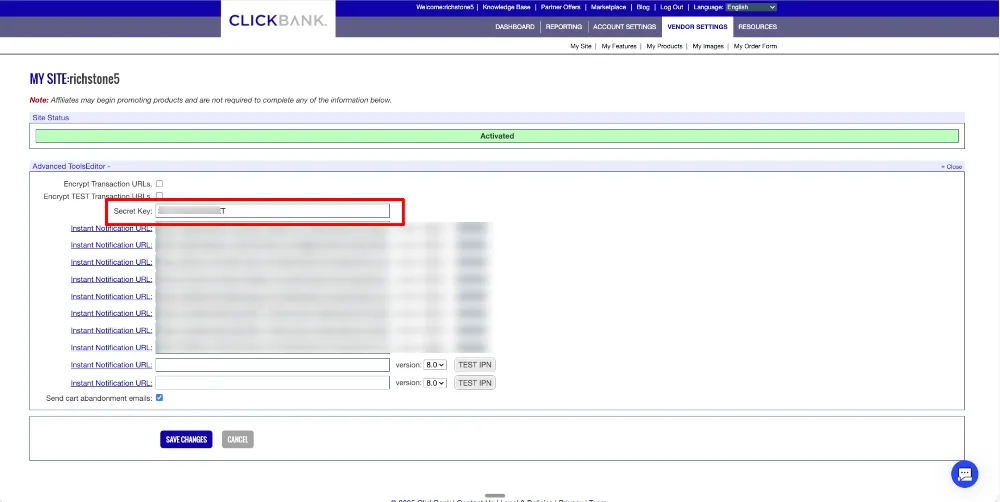
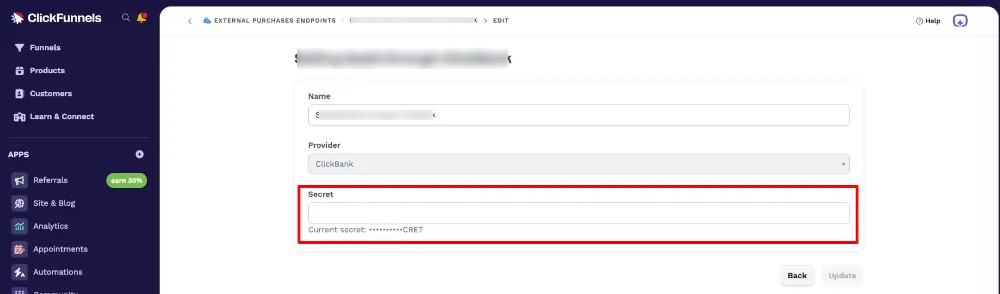
If you’ve set up a Secret Key in the past, copy the existing Secret Key from ClickBank and return to ClickFunnels. Edit the Endpoint Details and paste the existing Secret Key into the Secret setting. Click the Update button.
-
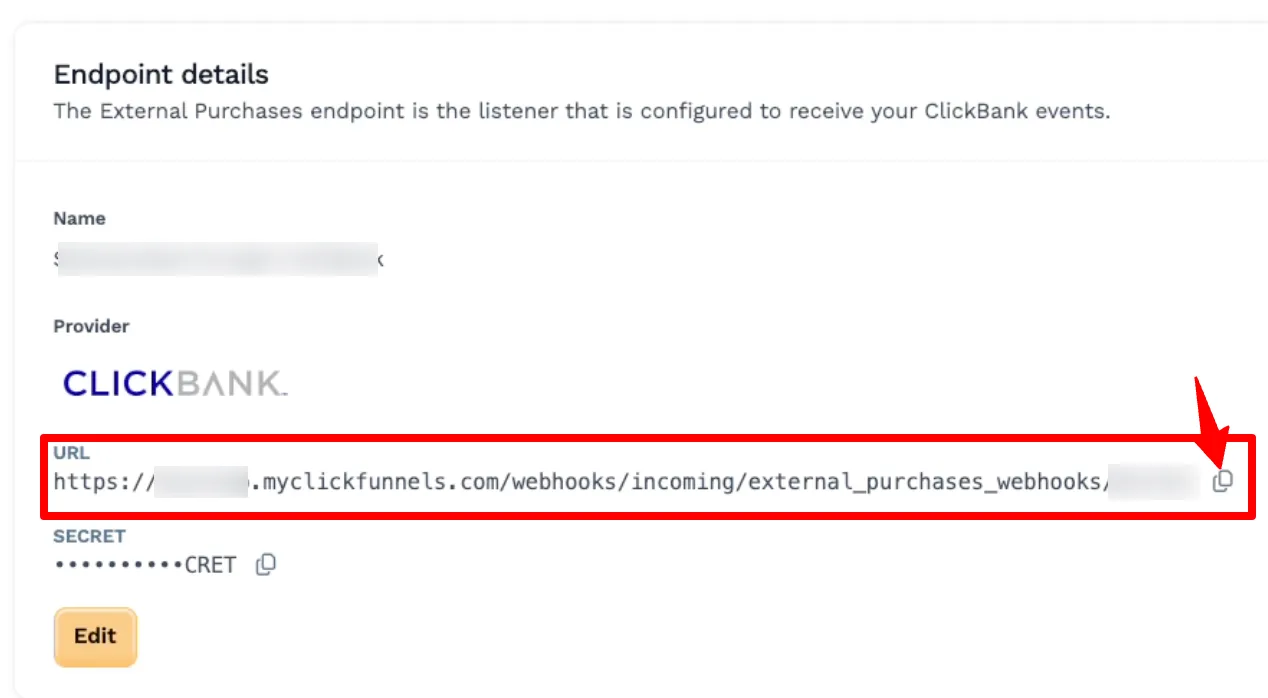
Next, navigate to ClickFunnels and copy the Endpoint URL.
-
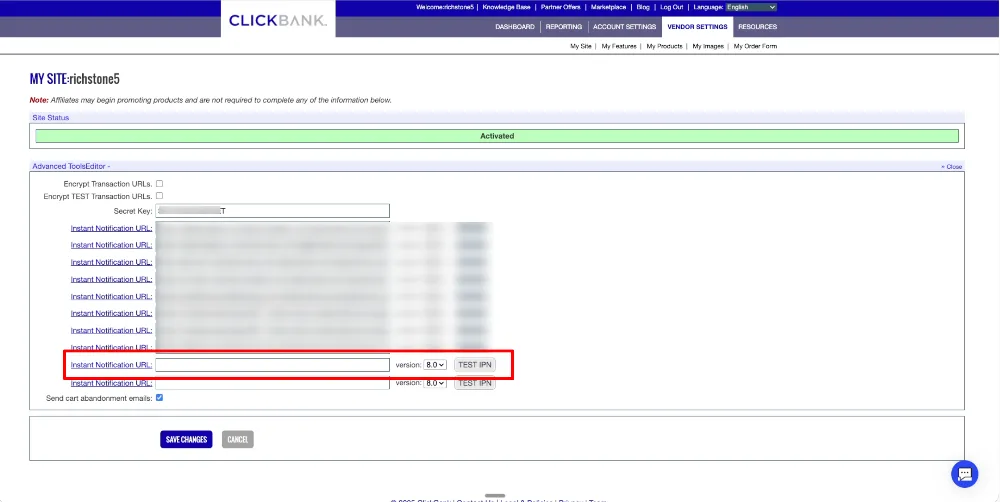
Navigate to ClickBank and paste the Endpoint URL in an available Instant Notification URL space.
-
Click the Test IPN button to test the connection. Once verified, click Save Changes.
Step 3 – Setting Up A Test Credit Card In ClickBank
Section titled “Step 3 – Setting Up A Test Credit Card In ClickBank”-
Navigate to the Testing Your Products section in your ClickBank settings and click Edit.

-
Select Generate New Card Number to create a new test card number. Note: test credit card numbers are only valid for a limited time, so review the expiration. You can generate a new number after expiration of your current test number.

Step 4 – Configure Mapped Products
Section titled “Step 4 – Configure Mapped Products”-
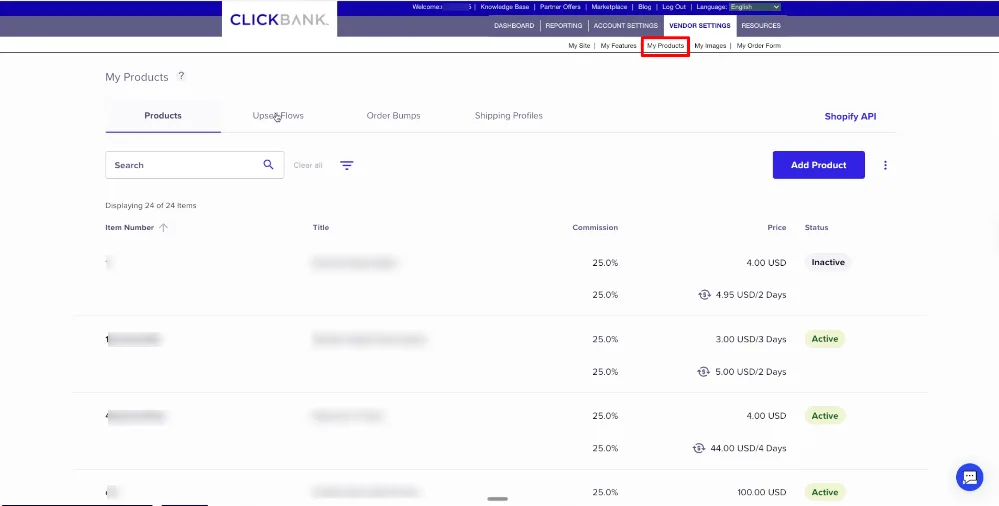
In your ClickBank Vendor Settings, select My Products.
-
Navigate to the ClickBank product you’d like to map to your ClickFunnels product and click the link icon to copy your ClickBank product Item Number, also called SKU.

-
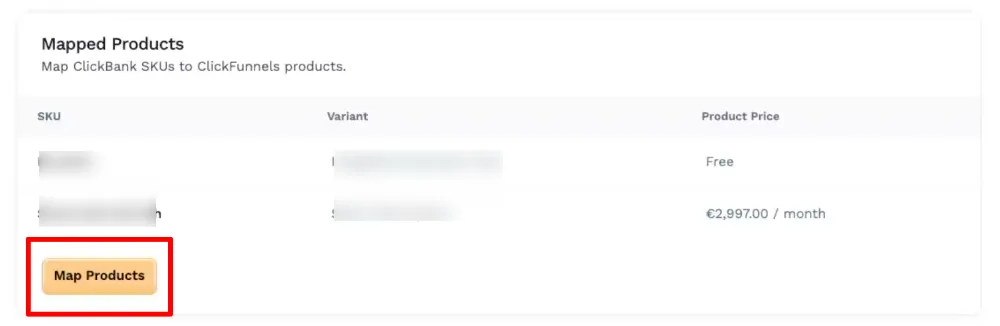
Navigate to your ClickFunnels External Purchases Endpoint and scroll to Mapped Products. Click the Map Products button.
-
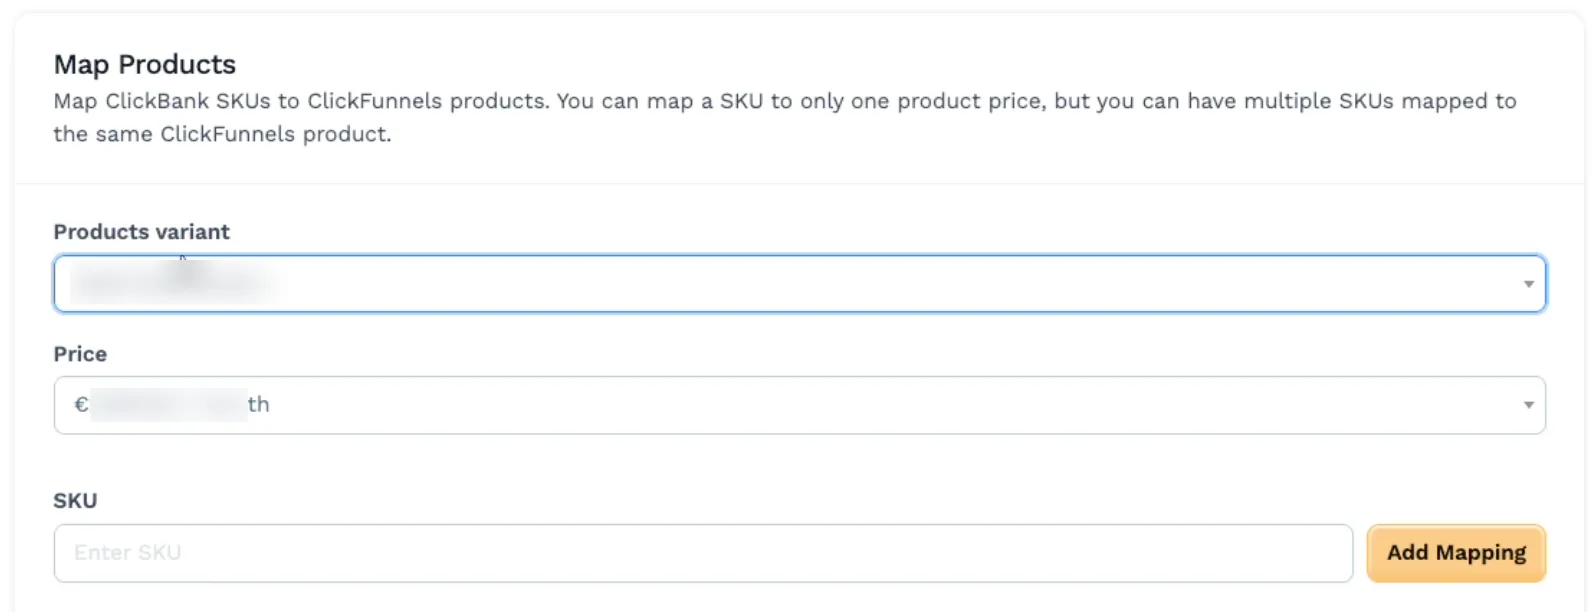
In the Map Products setting, use the dropdowns to select the existing ClickFunnels product you’d like to map your ClickBank product to, along with Price. Paste the SKU/Item Number you copied from ClickBank in Step 2.
-
Click Add Mapping button when complete.
Step 5 – Complete A Test Purchase
Section titled “Step 5 – Complete A Test Purchase”-
Open a new browser tab. Type in the URL to your ClickBank checkout using your ClickBank Vendor ID and ClickBank product SKU/Item Number in the following format:
https://YOURCLICKBANKID.pay.clickbank.net/?cbitems=SKUITEMNUMBERTo test purchasing multiple products, use an underscore in between Product SKU/Item Numbers:
https://YOURCLICKBANKID.pay.clickbank.net/?cbitems=SKUITEMNUMBER1_SKUITEMNUMBER2_SKUITEMNUMBER3 -
Using the test credit card you created in Step 3, complete a test purchase.
-
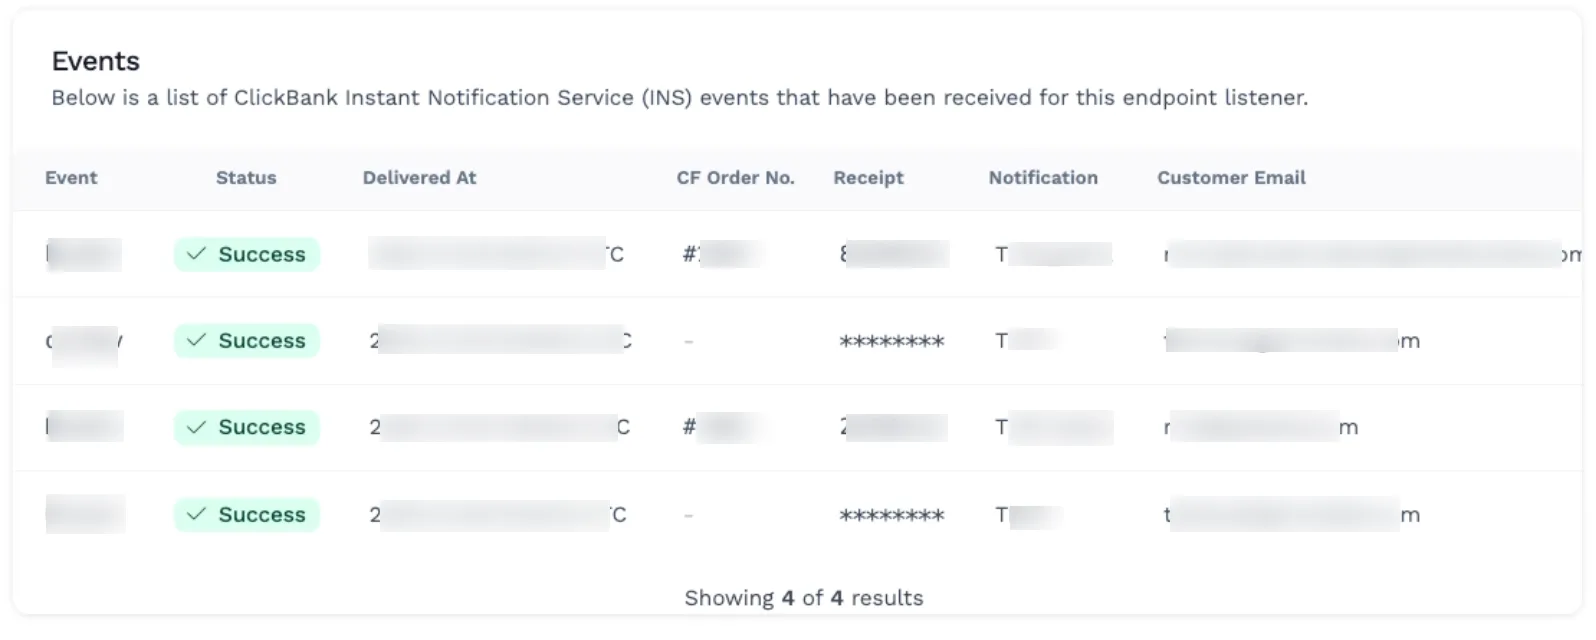
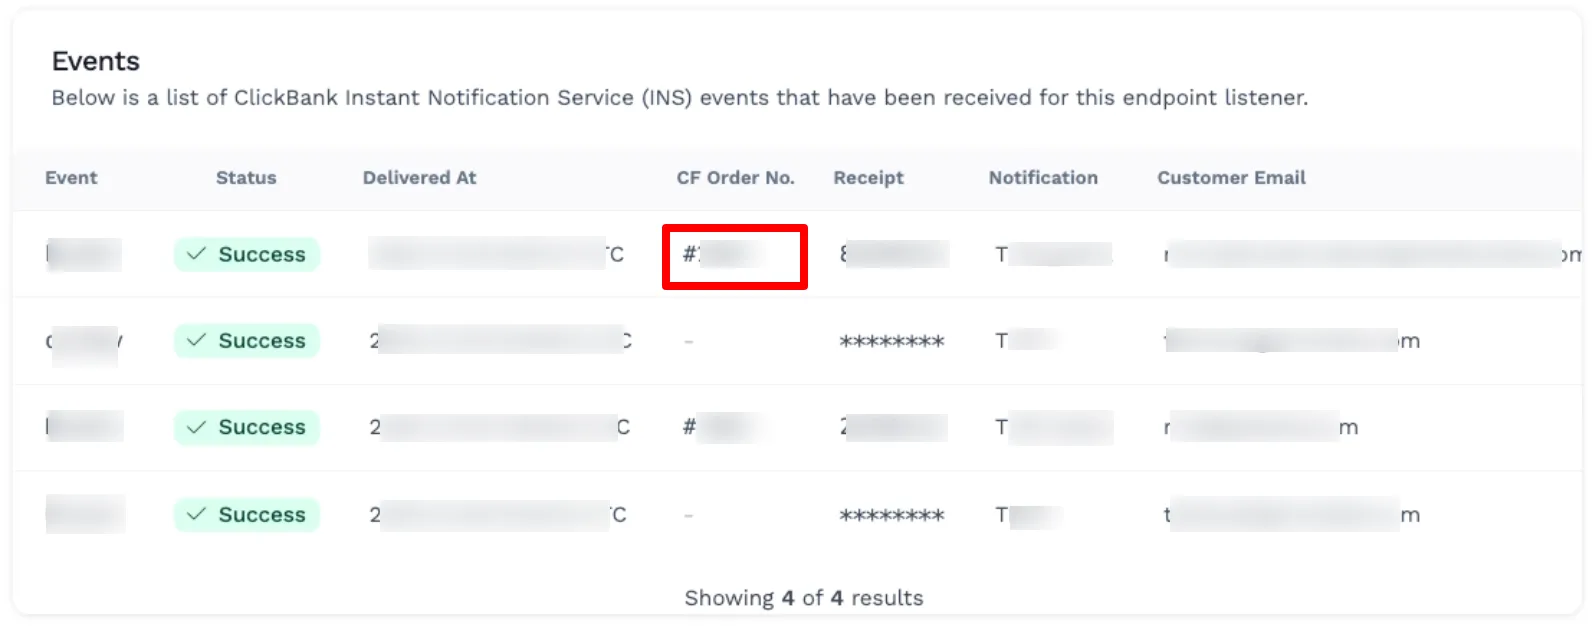
To validate the purchase in ClickFunnels, navigate to and refresh the page for your ClickFunnels External Purchases Endpoint and review the ClickBank Instant Notification (INS) events.
-
Click the Order Number to review more details about the order.
NOTE: Subscription renewal dates reflect the date provided by ClickBank. Customers (and you as an admin) manage their orders and subscriptions via ClickBank. Any cancellations, refund, or chargeback information will be reflected in the ClickFunnels order, but managed via ClickBank.