
How to Create and Embed a Countdown Timer
Published: Updated:
Countdown Timers in ClickFunnels allow you to create a sense of urgency and encourage your audience to take immediate action. This documentation will guide you through creating and embedding a Countdown Timer in your email campaigns.
Requirements
Section titled “Requirements”Overview of Countdown Timers
Section titled “Overview of Countdown Timers”Countdown Timers are customizable elements that display a live countdown to a specific date or time. They can be used to count down to events, deadlines, or any key moments relevant to your campaigns.
You can use Countdown Timers on funnel pages or in emails to provide real-time updates, ensuring that your audience always sees the remaining time until an important milestone.
Creating a New Countdown Timer
Section titled “Creating a New Countdown Timer”-
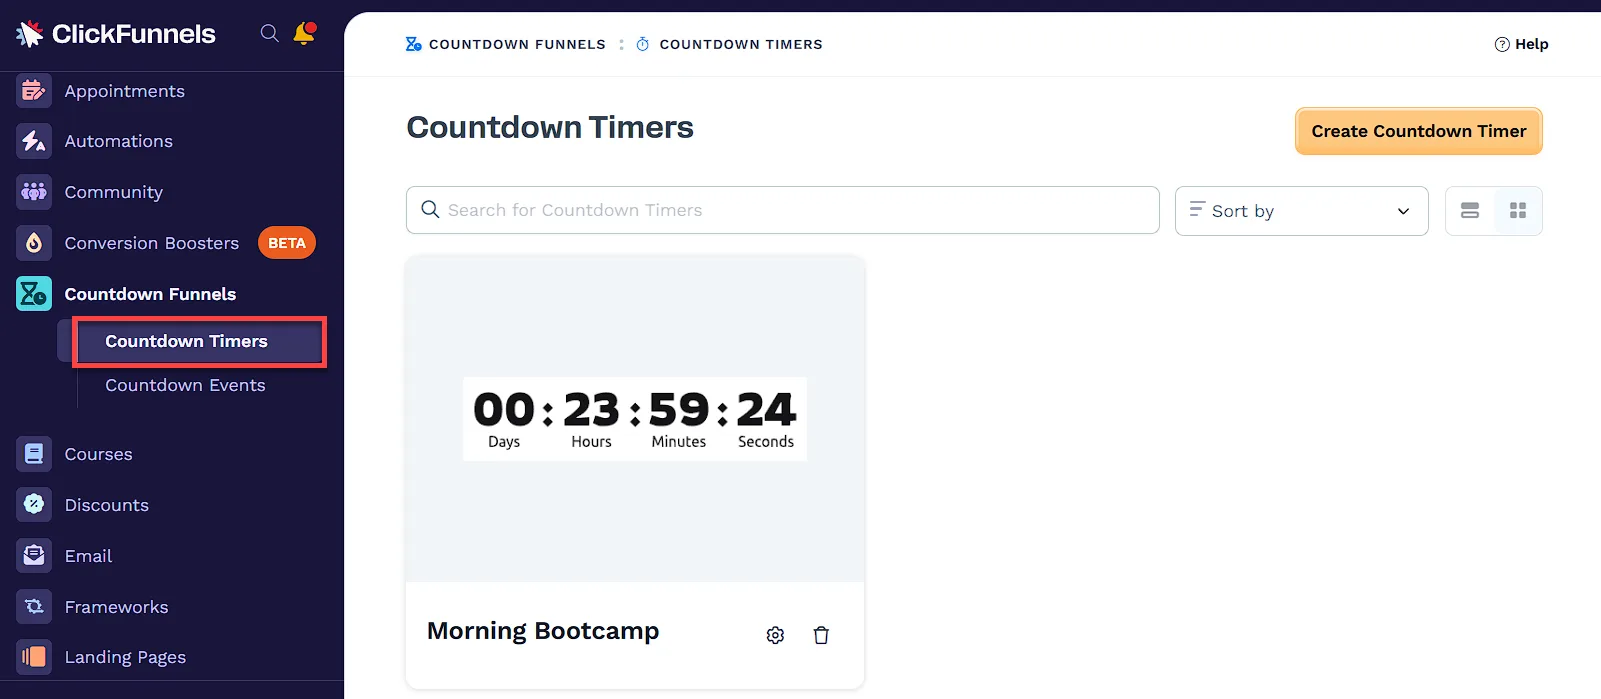
Navigate to Apps on the left-hand menu and select Countdown Funnels.
-
Under the Countdown Funnels menu, click Countdown Timers.
-
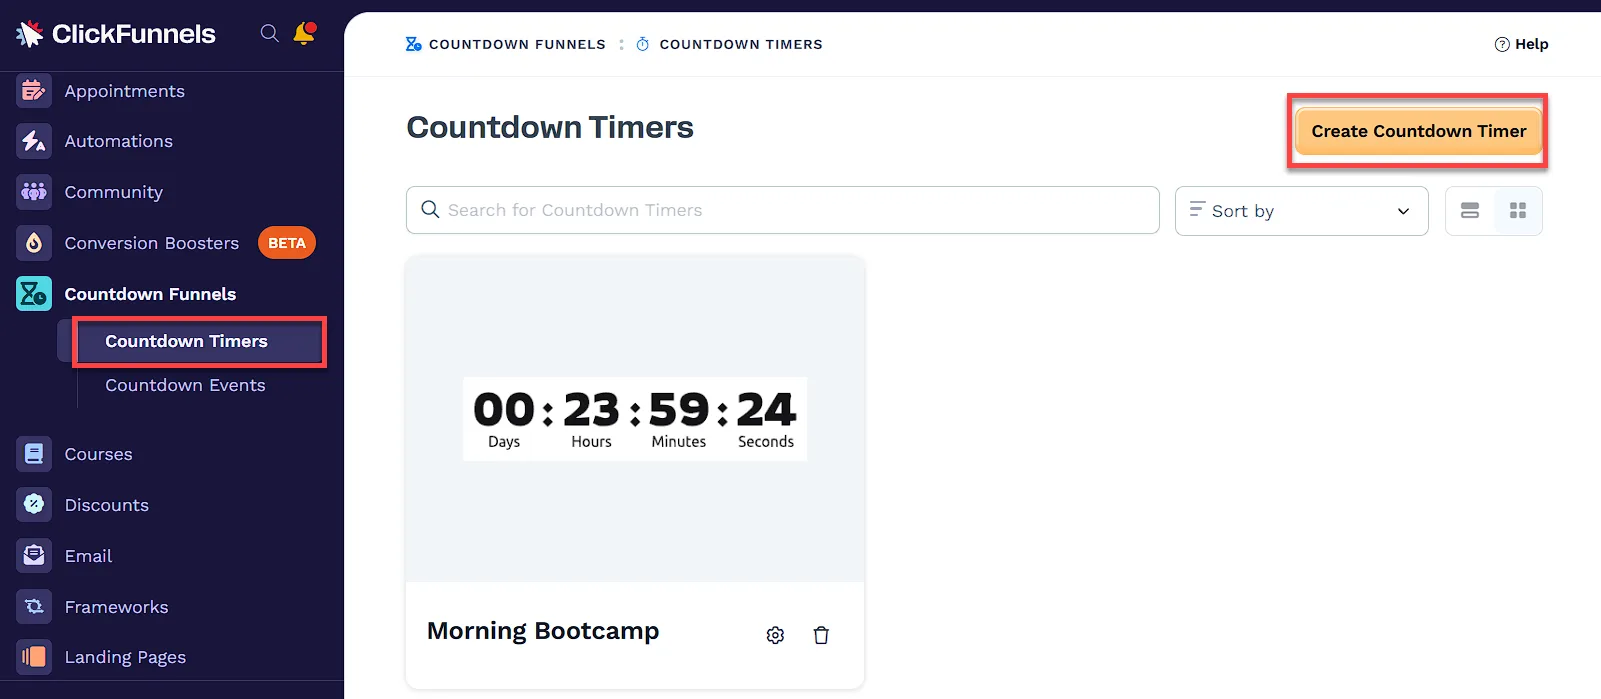
Click the Create Countdown Timer button in the top-right corner.
-
After creating the event, adjust its settings, such as event type and details. For a detailed explanation, refer to the Setting Up the Countdown Event section.
Setting Up the Countdown Timer
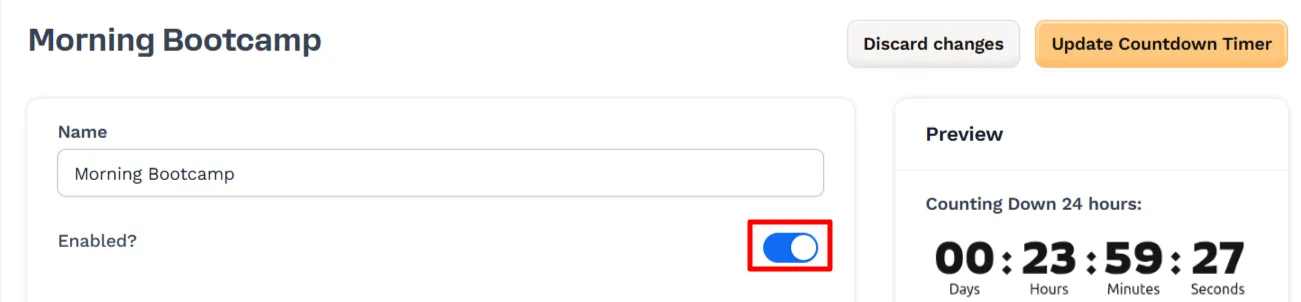
Section titled “Setting Up the Countdown Timer”Provide a unique name for your Countdown Timer so you can easily identify it later.
Enabled
Section titled “Enabled”Toggle this option to enable or disable the timer. When disabled, the timer will not appear in your funnel or emails.
General
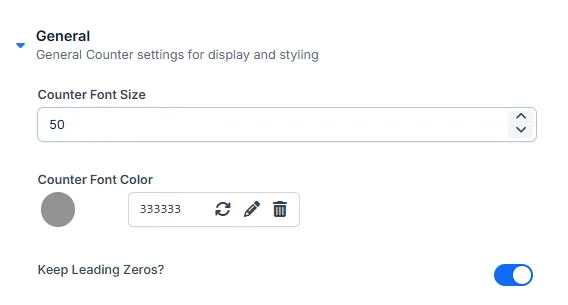
Section titled “General”Use this section to configure the core appearance of your timer:
-
Adjust the Counter Font Size and Font Color to customize the timer’s appearance.
-
Enable or disable Leading Zeros (e.g., show “03” vs “3”).
Labels
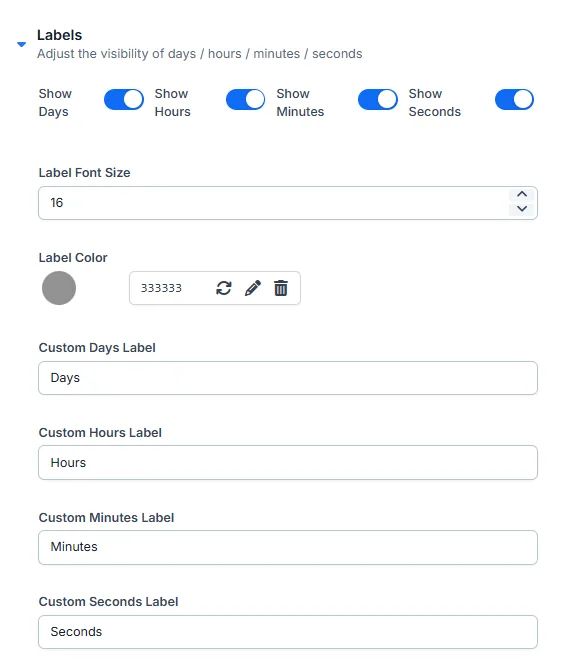
Section titled “Labels”This section helps you adjust the visibility and styling of time labels:
-
Show or hide labels for Days, Hours, Minutes, and Seconds.
-
Customize the Font Size and Label Color.
-
Optionally, define custom labels for each time unit (e.g., “Days” or “Hours”).
Background
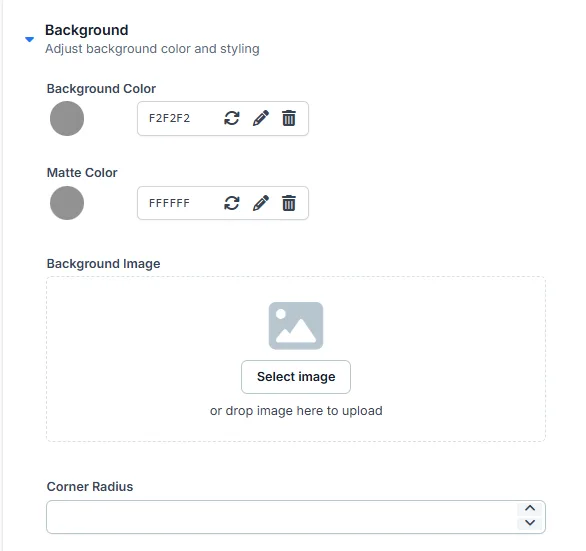
Section titled “Background”Customize the timer’s background for better visual alignment with your page design:
-
Set the Background Color and Matte Color.
-
Upload a Background Image if desired.
-
Adjust the Corner Radius to round the timer’s edges.
Expiration
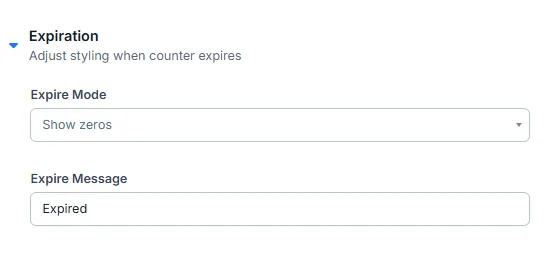
Section titled “Expiration”Use this section to control what happens when the timer reaches zero:
-
Select an Expire Mode to either show zeros, hide the timer, or display a message.
-
Add a custom Expire Message to display when the countdown ends.
Preview
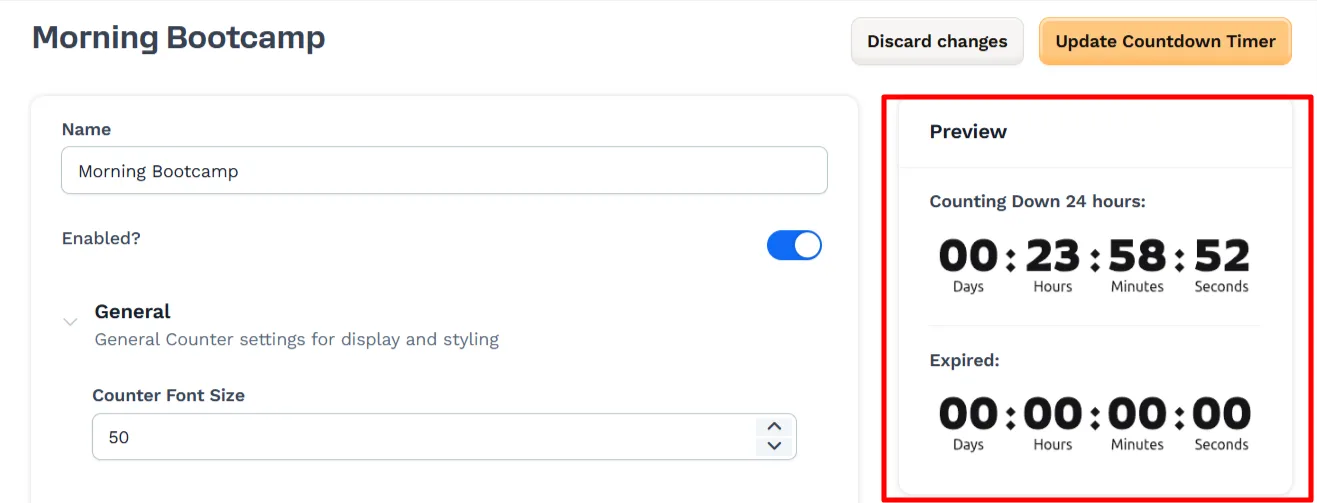
Section titled “Preview”The Preview panel provides a live view of how your timer will appear both during the countdown and after expiration.
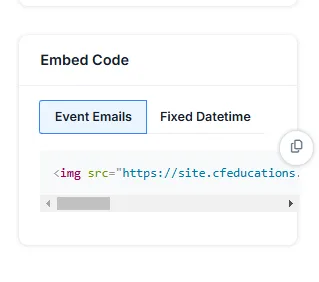
Embed Code
Section titled “Embed Code”Generate the HTML code for embedding your timer:
-
Event Emails: This option synchronizes the timer with a countdown event for email workflows.
-
Fixed DateTime: Use this option to set a specific expiration date and time for embedding on pages.
Once you have completed setting up the timer, click Create Countdown Timer to save your changes.
Embedding A Countdown Timer
Section titled “Embedding A Countdown Timer”Once your timer is created, you can embed it in emails or on pages.
Email Embedding
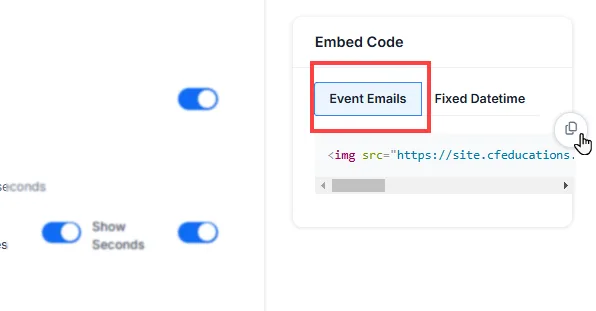
Section titled “Email Embedding”The Event Email Embed Code allows you to include a live countdown timer in your emails. This feature ensures that registrants see a real-time countdown to the event start time, helping them stay informed and prepared for the event. When contacts are triggered through a workflow based on event registration, the countdown timer dynamically adjusts to display the remaining time for the event.
To set up the email embedding:
-
Create a Funnel: Ensure your funnel includes a page with a Calendar Event attached.
Learn more about attaching a countdown calendar event in a funnel step in our article How to Add a Countdown Calendar Event in a Funnel Step. -
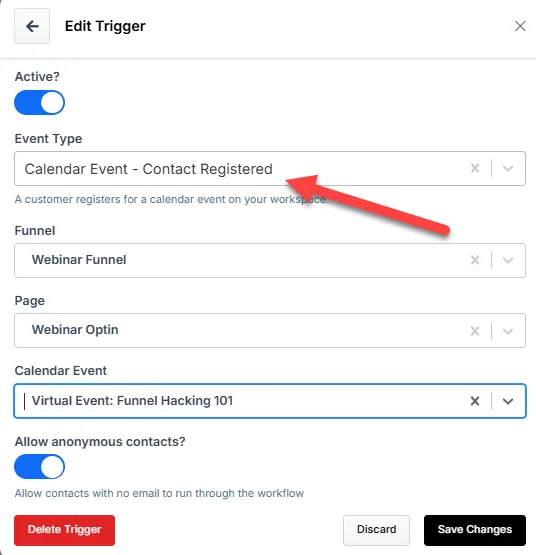
Set Up a Workflow: Create a workflow that triggers with the event “Calendar Event - Contact Registered.”
Learn more about workflow triggers in the article How to Manage Workflow Triggers.
-
Select the Funnel: Choose the funnel where the contact registers for the event.
-
Edit the Email: Open the email editor within the workflow.
-
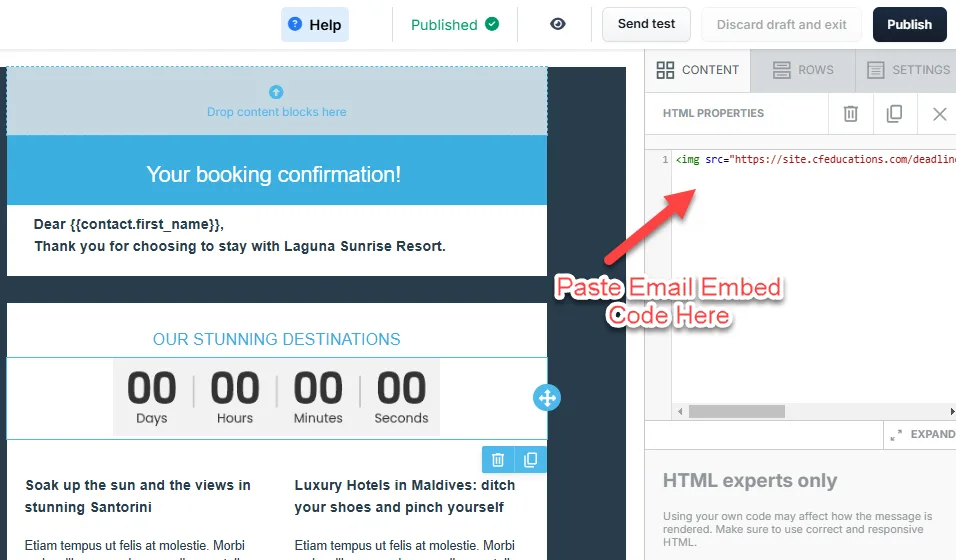
Insert the HTML Element: Drag and drop an HTML block into the email editor.
-
Paste the Embed Code: Copy the embed code from the Countdown Event settings and paste it into the HTML editor.
-
Save and Publish: Save the email and publish the workflow.
When the email is sent, the Event Embed Code will automatically display the remaining time until the event. This approach ensures a personalized and accurate countdown for each recipient, increasing the likelihood of action.
Embedding on Pages
Section titled “Embedding on Pages”-
Go to the Embed Code section in the Timer editor.
-
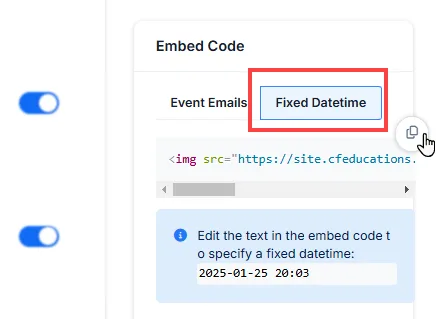
Select Fixed Datetime to set a specific expiration date and time for the timer. This option allows the timer to be displayed on your page.
-
Copy the provided HTML code snippet.
-
Navigate to your page editor and open the desired page.
-
Add an HTML/Custom JS Element to your page.
-
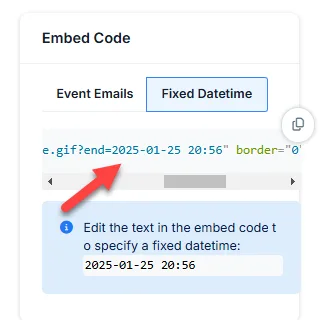
Paste the embed code into the editor. Edit the text
?end=2025-01-25 20:56"in the embed code to adjust the countdown date and time.
-
Save and preview your page to verify the timer is displaying correctly.
You can learn more about embedding code in the page editor in the article Embedding Third Party Embed Code.
Editing an Existing Countdown Timer
Section titled “Editing an Existing Countdown Timer”-
Navigate to the Countdown Timers menu in the Countdown Funnels app.
-
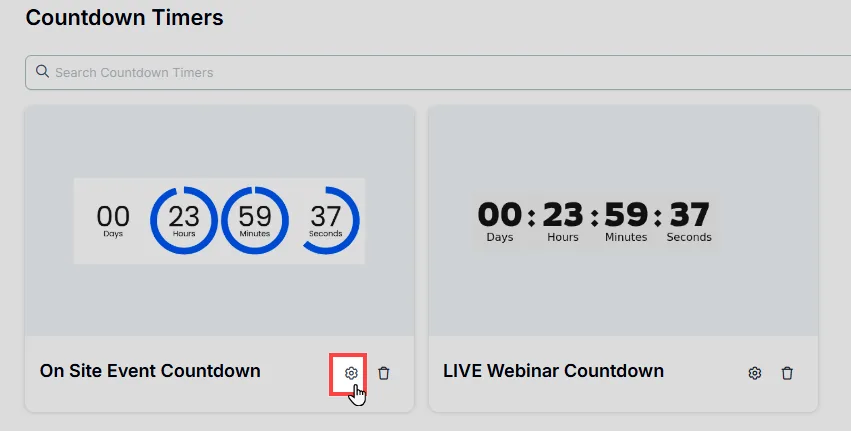
Locate the timer you want to edit and click the Gear ⚙️ icon.
-
Make the necessary changes to the timer details.
-
Click Update Countdown Timer to save your changes.
Deleting a Countdown Timer
Section titled “Deleting a Countdown Timer”-
Navigate to the Countdown Timers menu in the Countdown Funnels app.
-
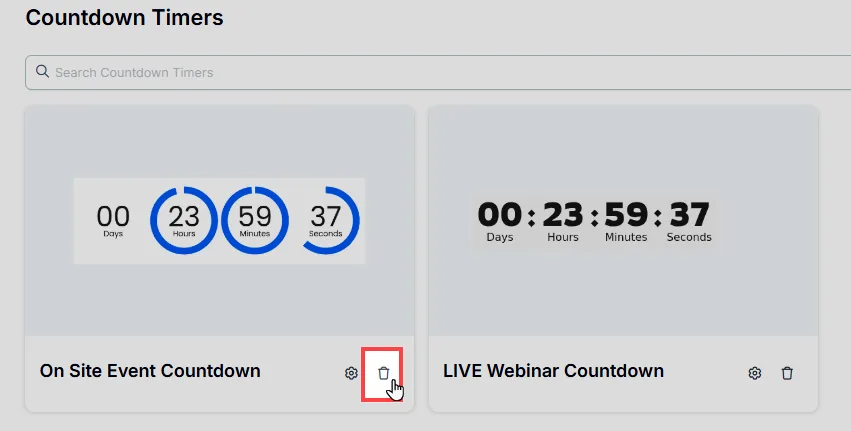
Locate the timer you want to delete and click the Trash🗑️ icon.
-
Confirm the deletion in the pop-up dialog.