
Product Settings Overview
Published: Updated:
This article gives an overview of the ClickFunnels product editor, where you manage everything about a product after you create it. The details you provide affect how the product is displayed to customers, where it can be bought, and what customers get when they buy it.
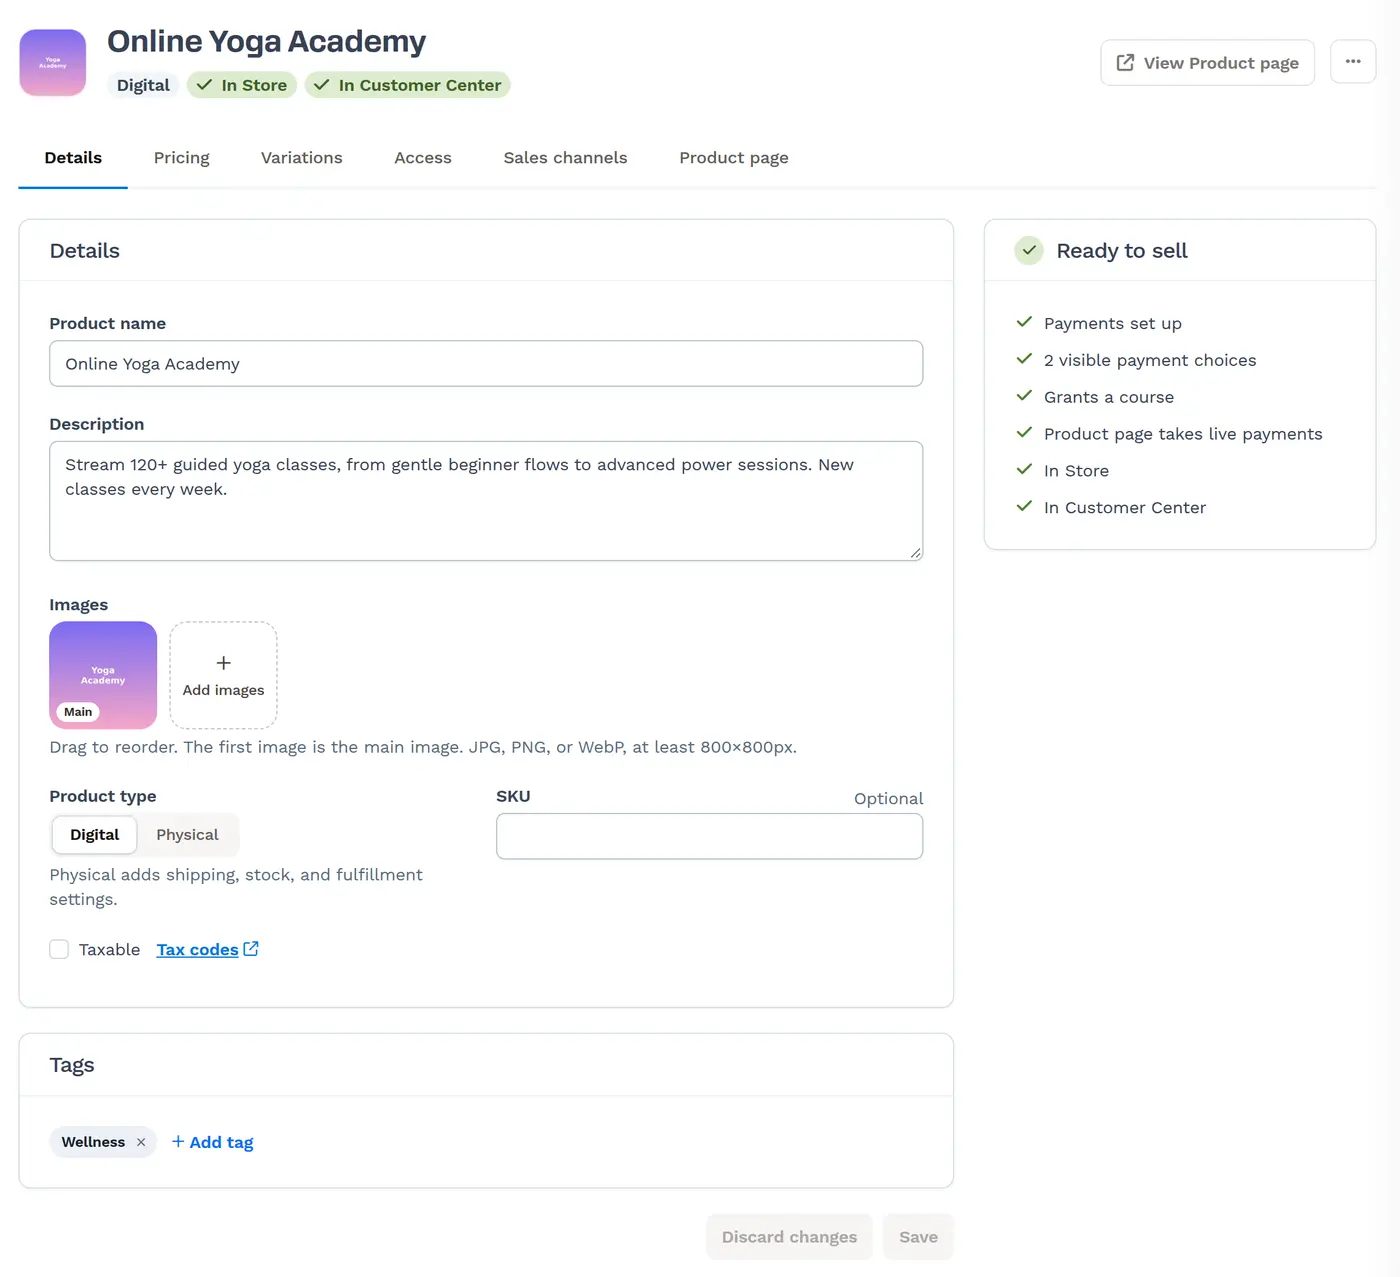
The product editor is organized into tabs, and each tab has its own URL. Any link to a product’s settings, including the product name, image and settings ⚙ icon on the Products page, opens the editor on the Details tab.
Requirements
Section titled “Requirements”-
An active ClickFunnels account
The Product Header
Section titled “The Product Header”The top of the product editor shows the product’s main image and name, plus badges that summarize its status:
-
The product type (Digital or Physical).
-
Not ready to sell, when something still stops customers from buying it. See Ready to Sell below.
-
Test mode, when the product page only takes test payments.
-
In Store or Not in Store, and In Customer Center or Not in Customer Center.
-
Archived and Imported from Stripe, when they apply.
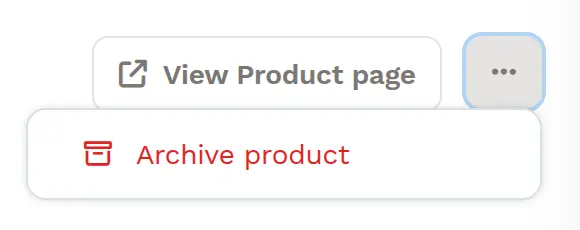
On the right, View Product page opens the product’s page in a new tab, and the ⋯ (More product actions) button opens a menu with Archive product (or Unarchive product) and, when sharing is available in your workspace, Share product.
The Tabs
Section titled “The Tabs”| Tab | What you manage there |
|---|---|
| Details | Name, description, images, product type (Digital or Physical), SKU, tax settings and tags. |
| Pricing | Every price customers can pick, variant pricing, upgrade and downgrade paths, and the Cancellation Funnel for subscriptions. |
| Variations | Options such as size or color, and the variants they create. Each variant can override the product’s settings. |
| Access | The courses, community and downloads that buyers get automatically. |
| Inventory & shipping | Fulfillment, stock by location, weight, dimensions and country of manufacture. For Digital products, the tab is called Inventory and has only the fulfillment and stock settings. |
| Sales channels | Whether the product is listed in your Store and Customer Center, everywhere it’s used, and affiliate commissions. |
| Product page | Live or test payments, the page URL, page template, redirect funnel, search engine settings and social sharing image. |
Details
Section titled “Details”The Details tab holds the product’s Name, Description and Images. Drag images to reorder them; the first image is the main image. Here you also choose the Product type, enter a SKU (only while the product has no variants; after that, each variant has its own SKU), mark the product Taxable and pick its tax category, and add Tags to organize your products. Tags can be used to filter products on the Products page.
Learn more about tax settings in the Products - Product Settings - Taxes article.
Pricing
Section titled “Pricing”The Pricing tab lists every price for the product, with its type, whether it’s Visible or Hidden, and its terms written out in a sentence, for example “7-day free trial, then $29.00 every month until canceled.” Click Add Price or a price’s Edit button to add or change a price in a drawer. This tab also holds the Upgrades & downgrades card, which appears once the product has variants with subscription prices, and, when the product has subscription prices, the Cancellation Funnel card.
Learn more in the Products - How to Manage Pricing, How to Set Up a Payment Plan, How to Set Up Upgrade and Downgrade Options for Subscription Products and Products - Cancellation Funnel articles.
Variations
Section titled “Variations”On the Variations tab you add options, such as Size or Color, and their values. Each combination of values becomes a variant. Before you save, a summary shows exactly which variants will be created, renamed or deleted. Each variant can be opened in a drawer to override the product’s settings, such as its SKU, images, pricing, weight, stock and extra access. Products imported from Stripe can’t have variations.
Learn more in the Products - How to Manage Product Variants article.
Access
Section titled “Access”The Access tab sets the courses, community and downloads that buyers unlock automatically when they purchase the product. Access set here applies to every variant; you can add extra access for a single variant from the Variations tab.
Learn more in the Products - How to Manage Product Purchase Actions article.
Inventory & Shipping
Section titled “Inventory & Shipping”Use the Inventory & shipping tab to require fulfillment, track inventory, allow selling past 0, and choose the locations that stock the product and see their stock. For Physical products, you also set the product’s Weight, Dimensions and Country of manufacture here; shipping rates come from your shipping profiles. For Digital products, the tab is called Inventory and has no shipping settings. Tracking inventory lets you cap sales of a digital product, such as event tickets or seats. When the product has variants, this tab summarizes stock across variants, and each variant’s fulfillment and stock settings are on the Variations tab.
Learn more in the How to Update and Manage Product Inventory and How to Create and Manage Locations articles.
Sales Channels
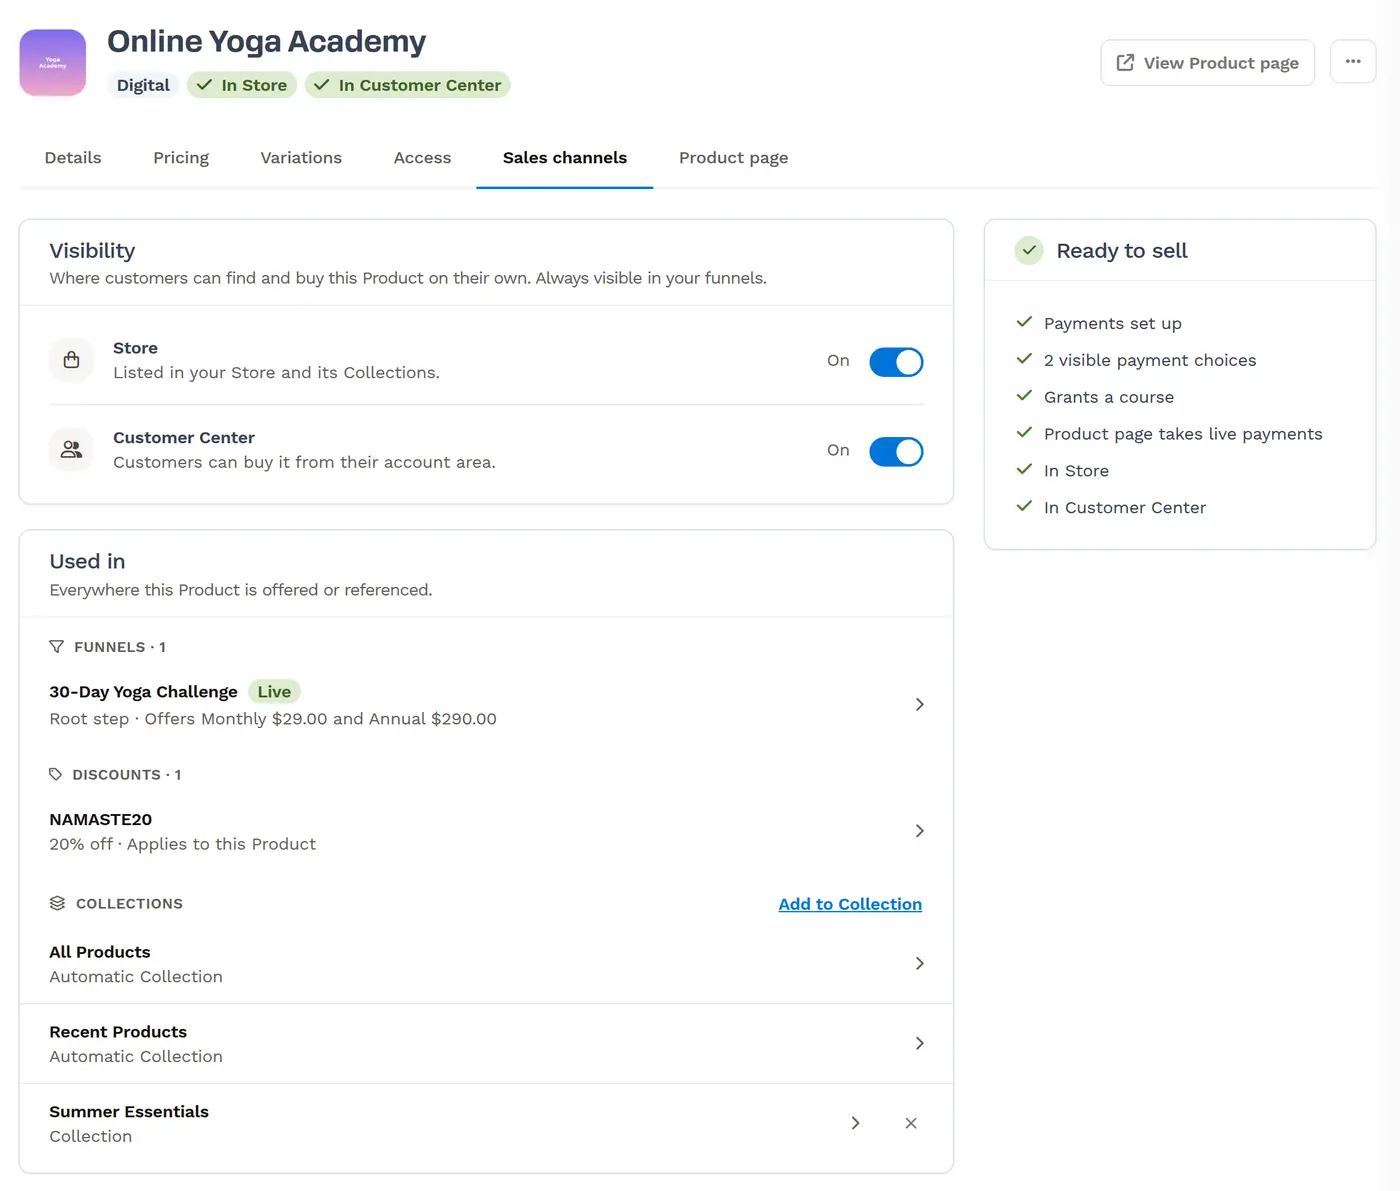
Section titled “Sales Channels”The Sales channels tab has three cards:
-
Visibility: The Store and Customer Center switches choose where customers can find and buy the product on their own. The product is always available in your funnels. The switches save as soon as you change them. They can only be turned on once the product has a visible price and its product page takes live payments.
Products that are visible only in the Customer Center (and not in the Store) aren’t listed on your public collection pages or in product lists on custom pages.
-
Used in: Everywhere the product is offered or referenced, with links: the funnels and funnel steps that sell it (including order bumps), paid appointment event types, discounts, and collections. Click Add to Collection to add the product to one or more manual collections, or remove it from one. Automatic collections pick their products with a filter, so they can’t be changed here.
-
Affiliates: Shown when the Affiliate Center app is installed. Turn on Commissionable and set the product’s commission settings, which override the default campaign settings. Learn more in the How to Make Products Commissionable article.
Product Page
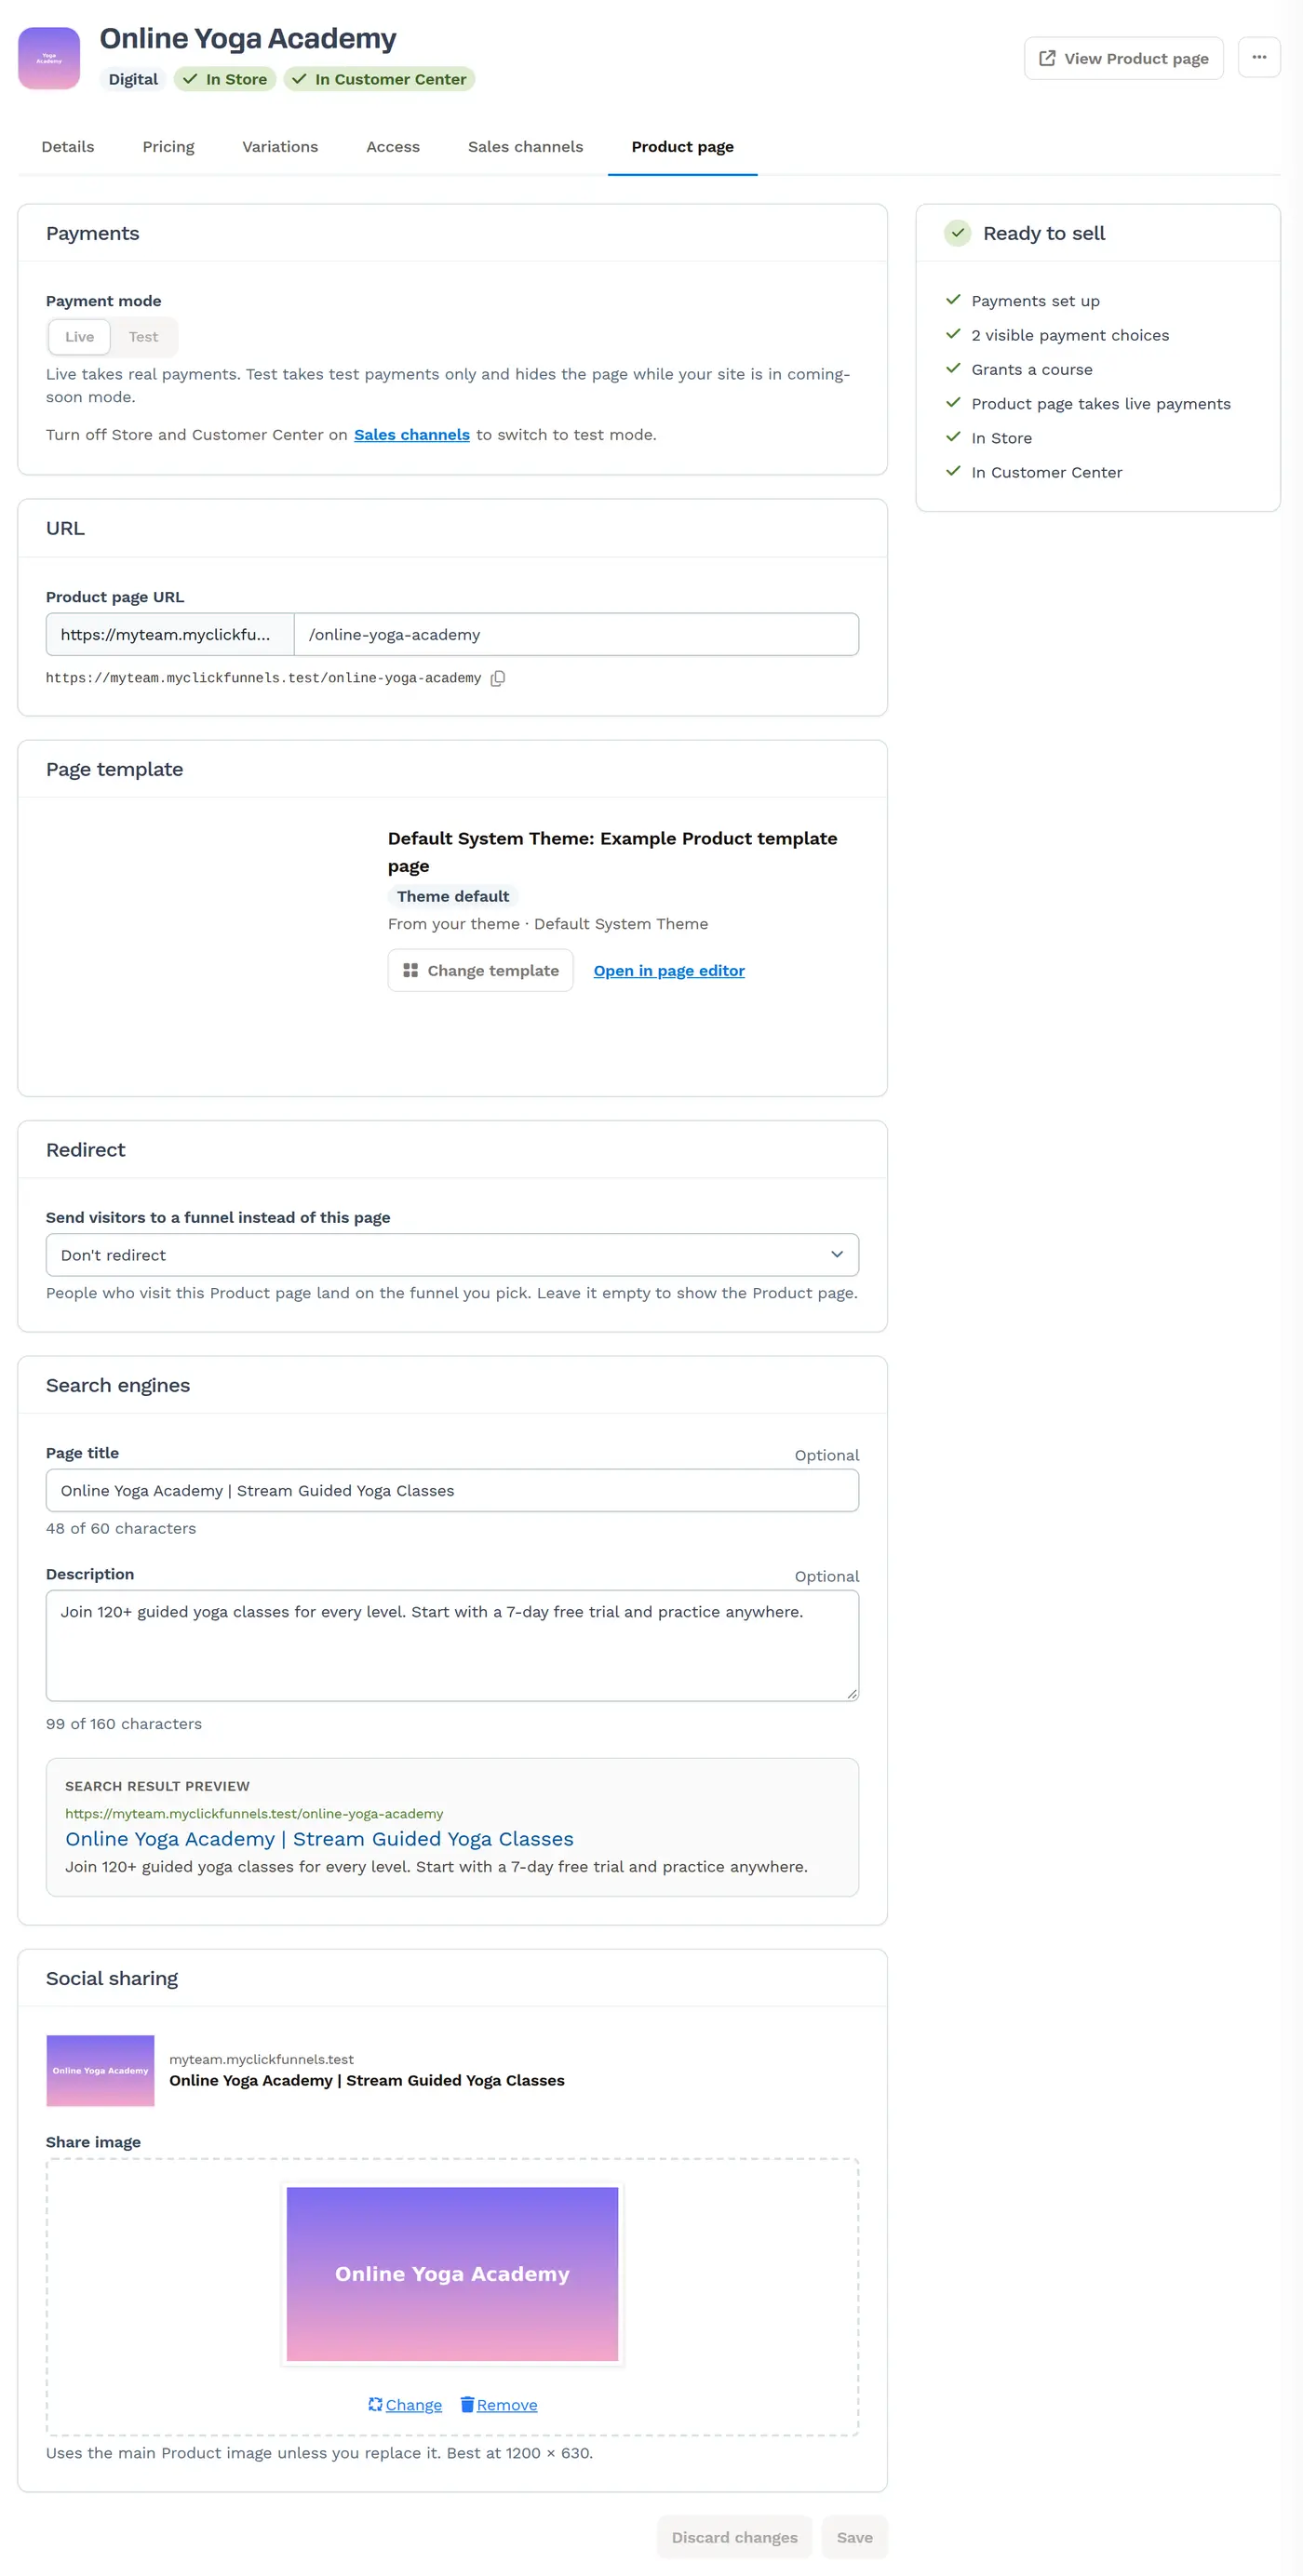
Section titled “Product Page”The Product page tab holds the settings for the product’s own page in your Store:
-
Payments: Set the Payment mode to Live or Test. Live takes real payments. Test takes test payments only and hides the page while your site is in coming-soon mode. You can’t switch to Test while the product is turned on in your Store or Customer Center.
-
URL: The Product page URL path. Use the copy icon to copy the full URL.
-
Page template: The template the page uses. By default it’s your theme’s product template. Click Change template to use a different one for this product only, Open in page editor to edit it, or Use theme default to go back to the theme’s template.
-
Redirect: Optionally send visitors to a funnel instead of the product page. While a redirect funnel is set, the page template and live or test mode don’t apply.
-
Search engines: The Page title and Description used by search engines, with character counters and a Search result preview.
-
Social sharing: The Share image shown when the page is shared. It uses the main product image unless you replace it; the best size is 1200 × 630.
Learn more in the How to Customize the Store Product Page article.
Ready to Sell
Section titled “Ready to Sell”A panel on the right of every tab shows whether the product is Ready to sell or Not ready to sell, and links you to the tab where you can fix each item.
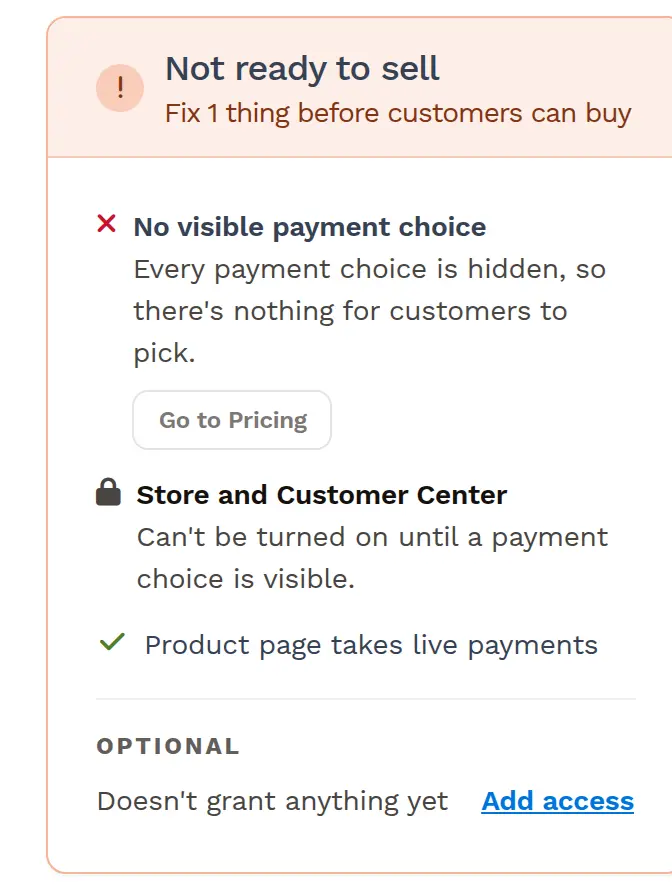
Two things stop customers from buying a product:
-
No payment processor connected: Connect a payments provider so that you can accept payments from customers.
-
No visible payment choice: The product has no prices, or all of its prices are hidden. Click Go to Pricing to add a price or make one visible. Until then, the product can’t be turned on in your Store or Customer Center.
When these are done, the panel lists what’s in place, such as Payments set up, the number of visible payment choices, the access the product grants, and Product page takes live payments.
Items under Optional never block a sale, but are worth checking:
-
Doesn’t grant anything yet, with an Add access link to the Access tab.
-
Product page is in test mode, with a Go live link to the Product page tab.
-
Not in Store and Not in Customer Center, each with a Turn on link to the Sales channels tab.
Saving Your Changes
Section titled “Saving Your Changes”Each tab has a Save button at the bottom. To throw away the changes you haven’t saved, click Discard changes and confirm “Discard your unsaved changes?”. Save each tab before you switch to another one. If a tab has unsaved changes when you switch tabs or leave the page, you’re asked to confirm: “You’ve made changes that haven’t been saved. Clicking ‘OK’ will discard them. Do you want to continue?” Click Cancel to stay on the tab and keep your changes, or OK to discard them.
Some settings save on their own: prices are saved from the price drawer, variants from the variant drawer, access from its dialog, and the Store and Customer Center switches as soon as you change them.
Product Type Lock
Section titled “Product Type Lock”You can switch a product between Digital and Physical on the Details tab until it has live orders: a paid live order or an active live subscription. After that, the Product type control is locked with the message “This product has live orders, so its type can’t change. Switching would change shipping on past orders and active subscriptions.” Test orders don’t lock the type.
Sharing
Section titled “Sharing”If sharing is available in your workspace, click the ⋯ (More product actions) button and select Share product to let other users copy your product and use it in their own funnels and pages. If the product was copied from another user’s share and its author doesn’t allow resharing, Share product is disabled and explains why. To share several items together, refer to the How to Create and Manage Frameworks in ClickFunnels article.