
Courses Module Settings
Published: Updated:
The Courses Module Settings control how your course Modules look and function for both you and your learners. These settings let you customize your modules to fit your teaching style and your students’ needs. This article walks you through the key settings, helping you create the best possible learning environment for your online courses.

Requirements
Section titled “Requirements”-
An active ClickFunnels account
-
The Courses app added to workspace
Accessing Module Settings
Section titled “Accessing Module Settings”-
Click on the Courses app from the left navigation menu.
-
Click on the Title of the course you wish to manage its modules.
-
Find the module you want to edit.
-
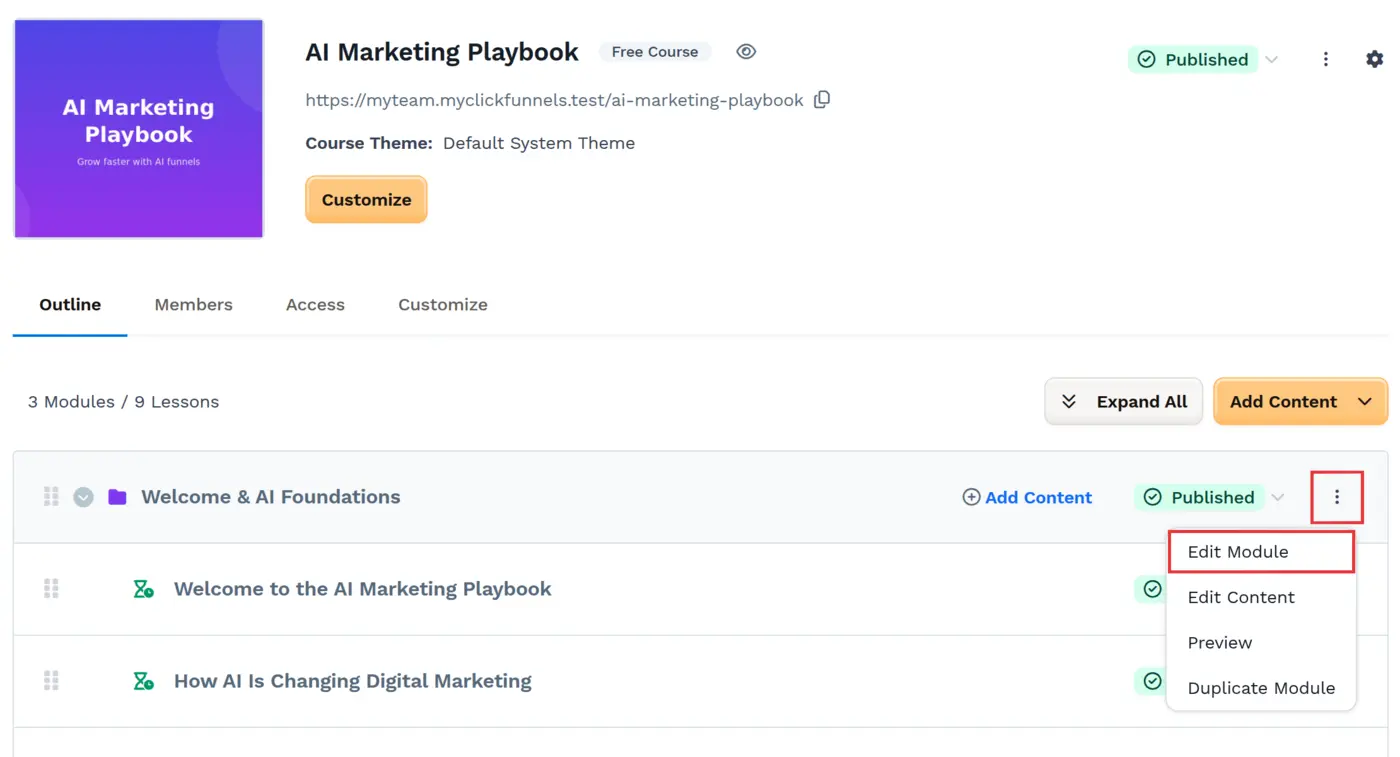
Click the three dots ⋮ next to the module name.
-
Select Edit Module from the dropdown menu. This will open the Edit module details panel in a side window.
Basic Information
Section titled “Basic Information”-
Enter the module Title.
-
Write a brief Description.
-
Adjust the Current Path if needed.
-
Click Edit content to access the course editor. This button appears only when the course uses a course theme (Advanced Customization).

-
Click Update module to save.
Publishing
Section titled “Publishing”-
Click the module’s status badge to open its menu. Most options open a pop-up. If a change is already scheduled, Draft or Publish cancels it right away.
-
Publish: makes the module live, now or at a scheduled time. See How to Manage Course Modules for the options.
-
Draft: takes the module back to draft so students can’t see it.
-
Drip: makes the module available a set number of days after enrollment (Days until drip access).
-
Lock: makes the module available only after a chosen Blocker lesson is completed.

-
-
If a pop-up opens, click Update module to save.
Thumbnail Image
Section titled “Thumbnail Image”-
Click Expand image settings:
-
Select Change to upload a new image.
-
Choose Remove to delete the current image.

-
-
Click Update module to save.
Upgrade Offer
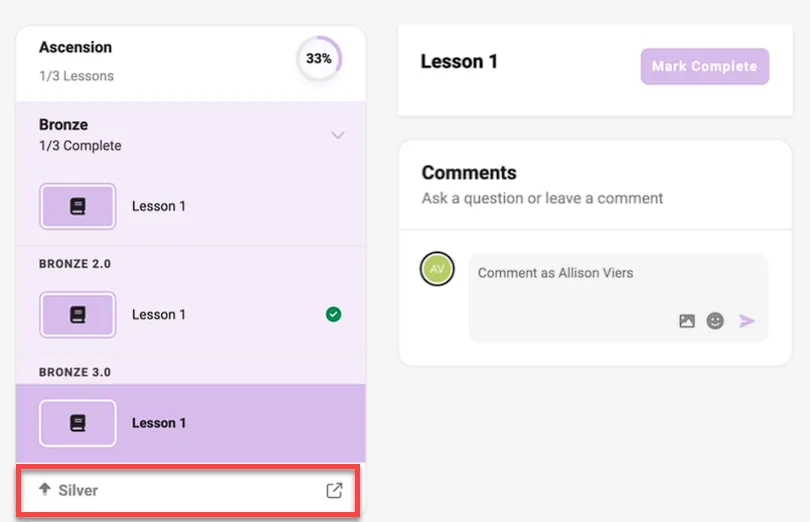
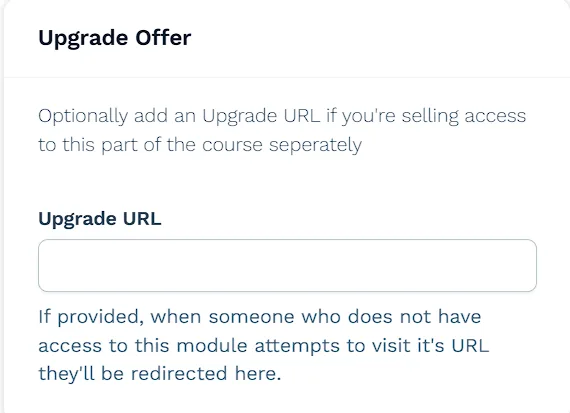
Section titled “Upgrade Offer”The Upgrade Offer setting allows you to sell access to specific modules. Enter the URL of your payment or checkout page. When a user views the course outline and doesn’t have access to a module, the module title will appear as a clickable link if an Upgrade URL has been set. Clicking this link opens the checkout or order page in a new tab, allowing users to purchase access directly. This feature helps you monetize individual sections of your course or offer tiered pricing options for your content.
-
In the Upgrade URL field, enter the full URL of your checkout (order form) page.
-
Click Update module to save your changes.
When Upgrade URLs Are Shown
Section titled “When Upgrade URLs Are Shown”Upgrade URLs will only display the upsell link in the sidebar if all of the following conditions are met:
| Condition | Requirement |
|---|---|
| Module is Published | Draft or scheduled modules are never shown. |
| Not Dripped | Drip modules never show an upgrade link. |
| Unlocked | Locked modules only appear once the required content is completed. |
| User Not Enrolled | Upsell links appear only for modules the user does not already have access to. |
Advanced Settings
Section titled “Advanced Settings”-
Click Expand Settings.
-
Choose a Style from the dropdown menu.
-
Select a Template Page if desired.

-
Click Update module to save.
To learn more about creating and customizing style guides, refer to the Getting Started with Styles article.