
How to Add and Manage Site Pages
Published: Updated:
Site Pages in ClickFunnels allow you to create additional pages for your site, such as About Us, Contact Us, or Testimonials, beyond the default templates like Home Page, 404 Page, and Coming Soon Page. These pages are essential for building a complete website and providing visitors with the necessary information. In this article, you’ll learn how to add new site pages, customize them, and link them effectively within your site.
Requirements
Section titled “Requirements”-
An active ClickFunnels account
Adding a New Site Page
Section titled “Adding a New Site Page”To add a new site page, follow these steps:
-
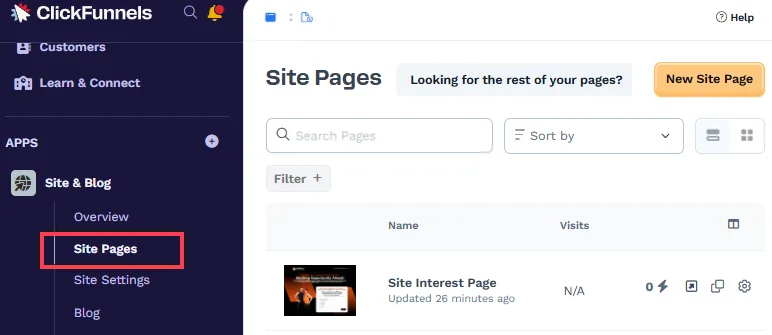
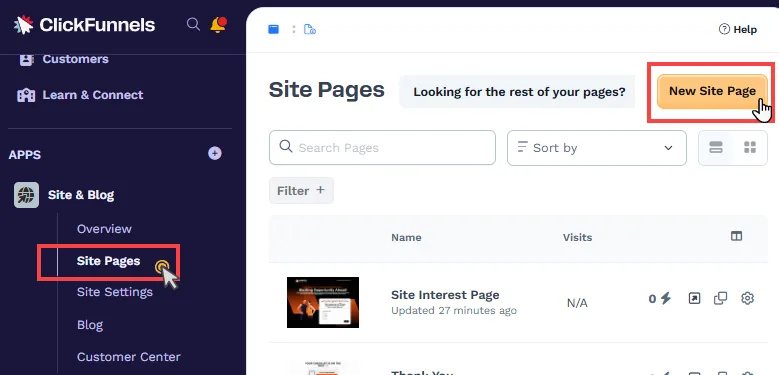
Navigate to the Site & Blog app in your workspace.
-
Select Site Pages from the menu.
-
Click the New Site Page button at the top-right corner of the page.
-
You can choose a page template from the available options or select Start from Blank to create a new page from scratch.
-
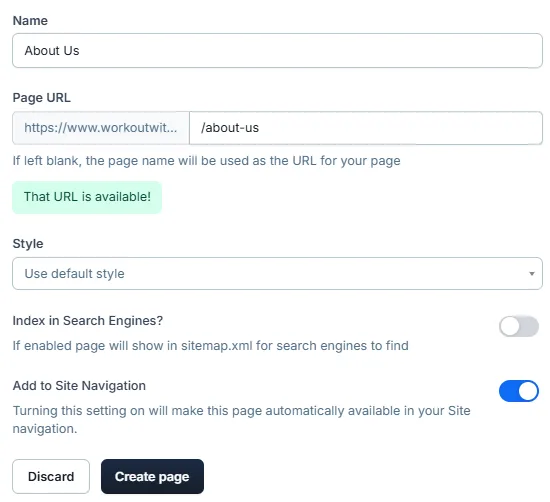
Complete the page details by providing the following information:
-
Name: Enter a descriptive name for the page to easily identify it in your workspace (e.g., “About Us”).
-
Page URL: Customize the path for the page to ensure it aligns with your website structure (e.g.,
/about-us). The page title or a series of random characters will be automatically generated to serve as the URL path if it is not specified. -
Style: Select a specific style for the page if you want it to differ from the site’s default style. Otherwise, leave it set to “Use Default Style.”
-
Crawler access: Choose which automated visitors may read the page. Allow search engines controls whether the page appears in search engine results and in your site’s sitemap file, and the three toggles in the AI services box control AI training, AI search results, and AI assistants separately. See Crawler Access: Search Engines and AI Bots below for details.
-
Add to Site Navigation: Enable this option if you want the page to be classified as a “Site Page” and visible under the Site Pages menu. If disabled, the page will be created as a standalone landing page and will not appear in the Site Pages menu.
-
-
After the page is created, it will open in the Page Editor. You can customize the new page using the editor, adding sections, rows, and elements as needed.
-
Once you’ve completed your edits, click Save to store the changes.
Alternative Method
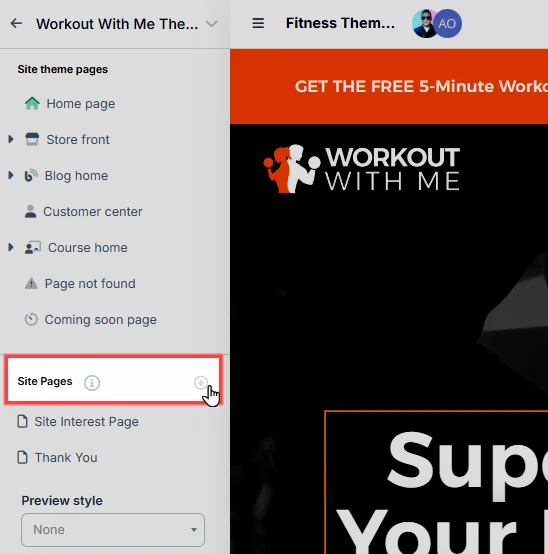
Section titled “Alternative Method”You can also add new site pages directly from the Site Theme Page in the left-hand panel of the site editor:
-
Locate the Site Pages section below the Site Theme Pages in the menu.
-
Click the + Add a Site Page icon to open the new page creation window.
-
Follow the steps above to select a template or start from a blank page, customize it, and save your changes.
Editing a Site Page
Section titled “Editing a Site Page”To edit a site page:
-
To open the Page Editor, click the page name or the Pencil (✏️) icon next to the page in the Site Pages list.
-
You can use the editor to add or customize rows, sections, and elements, tailoring the page to your design needs.
-
Ensure you use Universal Header and Footer sections where navigation is needed for a consistent user experience across the site.
-
When finished, click Save to store your changes.
Linking Your Site Pages
Section titled “Linking Your Site Pages”For seamless navigation, you can link your site pages using buttons or menu items:
-
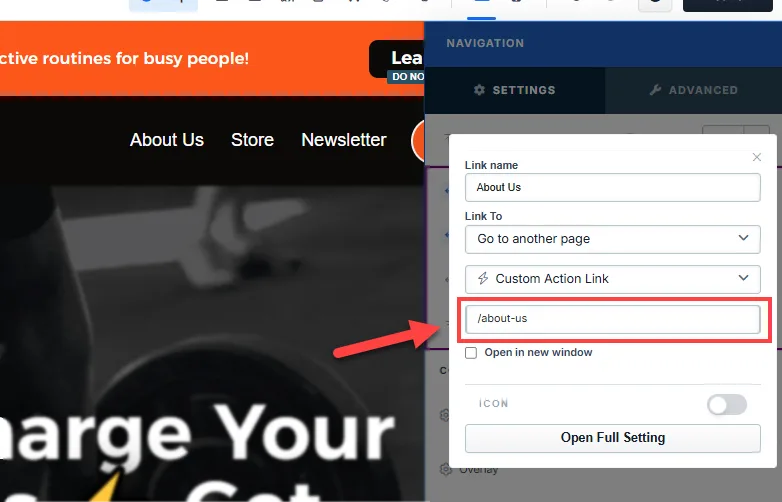
Use a relative path to link to pages within your site (e.g.,
/about-us).
-
Buttons or navigation elements can be used to guide users to specific pages.
Learn more about how to add Navigation and Button elements in the articles Navigation: Add Navigation Menus to Pages and Button: Allow Users to Submit Actions.
Managing Site Page Settings
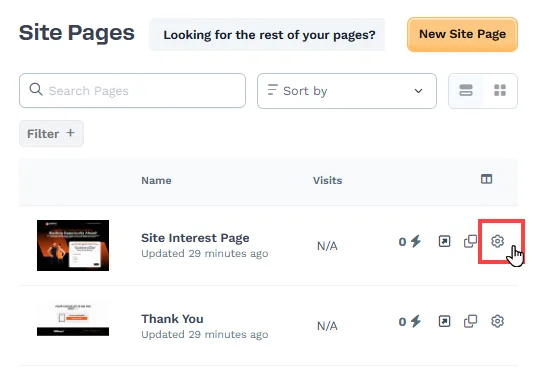
Section titled “Managing Site Page Settings”Site page settings can be accessed by clicking the Gear (⚙️) icon next to the page in the Site Pages list. You may configure:
Page Name and Description
Section titled “Page Name and Description”-
Page Name: This is the internal name of the page in your workspace. It helps you identify the page but is not visible to visitors.
-
Description: Provide a short description of the page for your reference.
SEO & Sharing
Section titled “SEO & Sharing”This section is collapsed when the settings panel opens — click Edit SEO & Sharing to expand it.
-
Page Title: This title appears in search engine results and browser tabs. Use a clear and descriptive title, such as “About Us | WWM.”
-
Page Description: Add a concise description (up to 160 characters) to summarize the content of your site page for search engines.
-
Page URL: Customize the URL path for your home page (e.g.,
/about-us). -
Crawler access: Control which automated visitors can read this page — search engines and three separate categories of AI bot. See Crawler Access: Search Engines and AI Bots below.
-
Sharing Image: Upload an image that appears when your page link is shared on social media.
-
Favicon Image: Upload a small icon image (typically 16x16 or 32x32 pixels) that will be displayed in the browser tab. If an image is not uploaded, the landing page will utilize the favicon from the Site & Blog app settings. This is because the Landing Pages app operates under the same domain associated with the Site & Blog app settings. You may navigate to the Site & Blog app » Site Settings to view the site favicon.
Advanced Settings
Section titled “Advanced Settings”-
Style: Select a specific style for the page if you want it to differ from the site’s default style. Otherwise, leave it set to “Use Default Style.” To create a style guide, go to Workspace Settings > Styles, define your style properties, and save the style guide. Once created, you can select the style guide from the dropdown menu here to apply it to the site home page.
-
Add to Site Navigation: Enable this option if you want the page to be classified as a “Site Page” and visible under the Site Pages menu. If disabled, the page will be created as a standalone landing page and will not appear in the Site Pages menu.
After configuring these settings, click Update Page to apply the changes.
Crawler Access: Search Engines and AI Bots
Section titled “Crawler Access: Search Engines and AI Bots”The Crawler access section lets you control which automated visitors may read an individual page. It sits inside the page’s SEO & Sharing settings — open the page settings with the Gear (⚙️) icon, then click Edit SEO & Sharing to expand the section.
The Four Toggles
Section titled “The Four Toggles”Under Search engines:
- Allow search engines — lets traditional search crawlers index this page so it appears in search results (e.g., Google, Bing, DuckDuckGo). This is the same setting previously labeled “Index in Search Engines?”: when it is on, the page can be indexed and is included in your domain’s sitemap; when it is off, the published page carries a
noindextag and is left out of the sitemap.
Inside the AI services box — AI services use your page in three different ways, and each works independently of search engines:
-
Allow AI training — lets AI companies use this page’s content to train their models (e.g., GPTBot, ClaudeBot, Google-Extended).
-
Allow AI search results — lets AI answer engines index this page and cite it when people ask questions (e.g., OAI-SearchBot, PerplexityBot).
-
Allow AI assistants — lets assistants open this page when a person asks them to, such as pasting your link into ChatGPT (e.g., ChatGPT-User, Claude-User).
Every toggle is worded as an allowance, so on means the crawler is permitted and off means it is blocked. Below the toggles, a summary line describes the page’s current state in plain language (for example, “This page can appear in search results. AI models are blocked from training on its content.”). It updates as you flip the toggles, before you save, so you can confirm the result before clicking Update Page.
Where Crawler Access Is Available
Section titled “Where Crawler Access Is Available”The Crawler access section appears on the pages whose addresses ClickFunnels can express in robots.txt:
-
Site pages (pages added to your site navigation)
-
Standalone landing pages
-
Your site’s Home Page — open it from the left-hand panel of the site editor and click its Gear (⚙️) icon
Other pages show the single Index in Search Engines? toggle instead, with no AI options:
-
Every other site theme template page — Store Front, Product, Collection, Collection List, Checkout, Order Confirmation, Upsell, Customer Center, Member Login, 404, and Coming Soon
-
Blog pages and blog posts, and course pages
-
Pages whose URL points to an external site
How the Setting Is Enforced
Section titled “How the Setting Is Enforced”Turning an AI toggle off adds Disallow rules for that page’s URLs to your domain’s robots.txt file, listed under the user agents in that category. AI crawlers honor robots.txt rather than the page’s noindex meta tag, which is why these controls are separate from Allow search engines.
Duplicating a Site Page
Section titled “Duplicating a Site Page”The Duplicate Page option allows you to create a copy of an existing site page. This feature is helpful when you want to reuse an existing page’s layout or content structure without starting from scratch.
-
Navigate to the Site Pages menu in the Site & Blog app.
-
Locate the page you want to duplicate in the list of site pages.
-
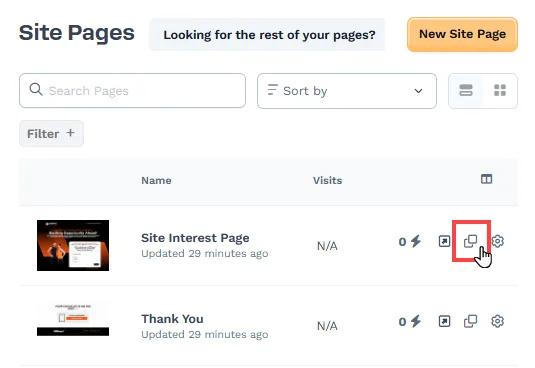
Click the Clone icon (represented by two overlapping squares) next to the page name.
-
A new cloned page will be created and added to the list of site pages. By default, the new page will have “Copy” added to its name (e.g., “About Us Copy”).
Adding Quick Actions to Site Pages
Section titled “Adding Quick Actions to Site Pages”Quick Actions in ClickFunnels allow you to trigger specific actions when users interact with your site page. To add a Quick Action:
-
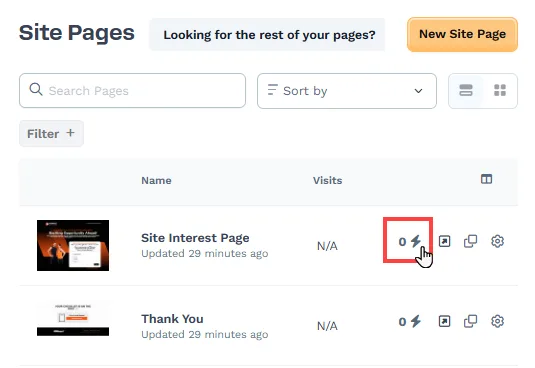
Click the lightning bolt icon (⚡) next to the page in the Site Pages list.
-
Configure the desired Quick Action, such as triggering an email or adding a contact to a specific tag when the page is viewed or a form is submitted.
Learn more about quick actions in the article Automations: How to Add and Manage Quick Actions.
Deleting a Site Page
Section titled “Deleting a Site Page”You can delete it easily if you no longer need a site page. Here’s how:
-
Navigate to the Site Pages menu in the Site & Blog app.
-
Locate the page you want to delete and click the Gear (⚙️) icon next to the page name to open the settings.
-
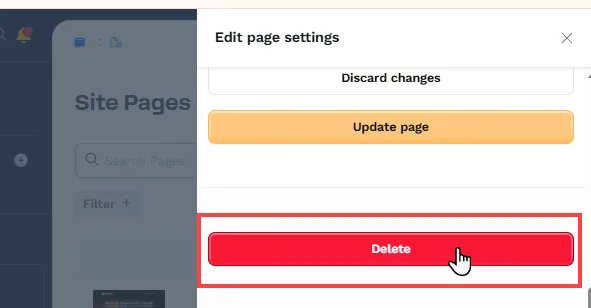
Scroll down to the bottom of the settings and find the Delete button.
-
Click Delete and confirm the deletion by clicking Proceed in the confirmation dialog box.