
How to Enable and Manage Course Completion Certificates
Published: Updated:
Course completion certificates allow students to receive a downloadable PDF certificate after completing a course. Course administrators can enable this feature to offer certificates, providing a tangible reward for students and adding an extra layer of professionalism to your course offerings.
This article will guide you through enabling, managing, and accessing course completion certificates.
Requirements
Section titled “Requirements”-
An active ClickFunnels account
-
The Courses app added to workspace
Enabling Course Completion Certificates
Section titled “Enabling Course Completion Certificates”-
Navigate to the Courses app from the left-hand menu in your ClickFunnels workspace.
-
Locate the course you want to enable the certificate feature for and click the Settings ⚙️ icon to open the course settings.
-
Scroll down to the Customer Center section of the settings.
-
Toggle the Generate Completion Certificates option to enable certificates for that course.
-
Click Update course at the bottom of the panel to save your changes.

Accessing and Downloading Completion Certificates (User-Side)
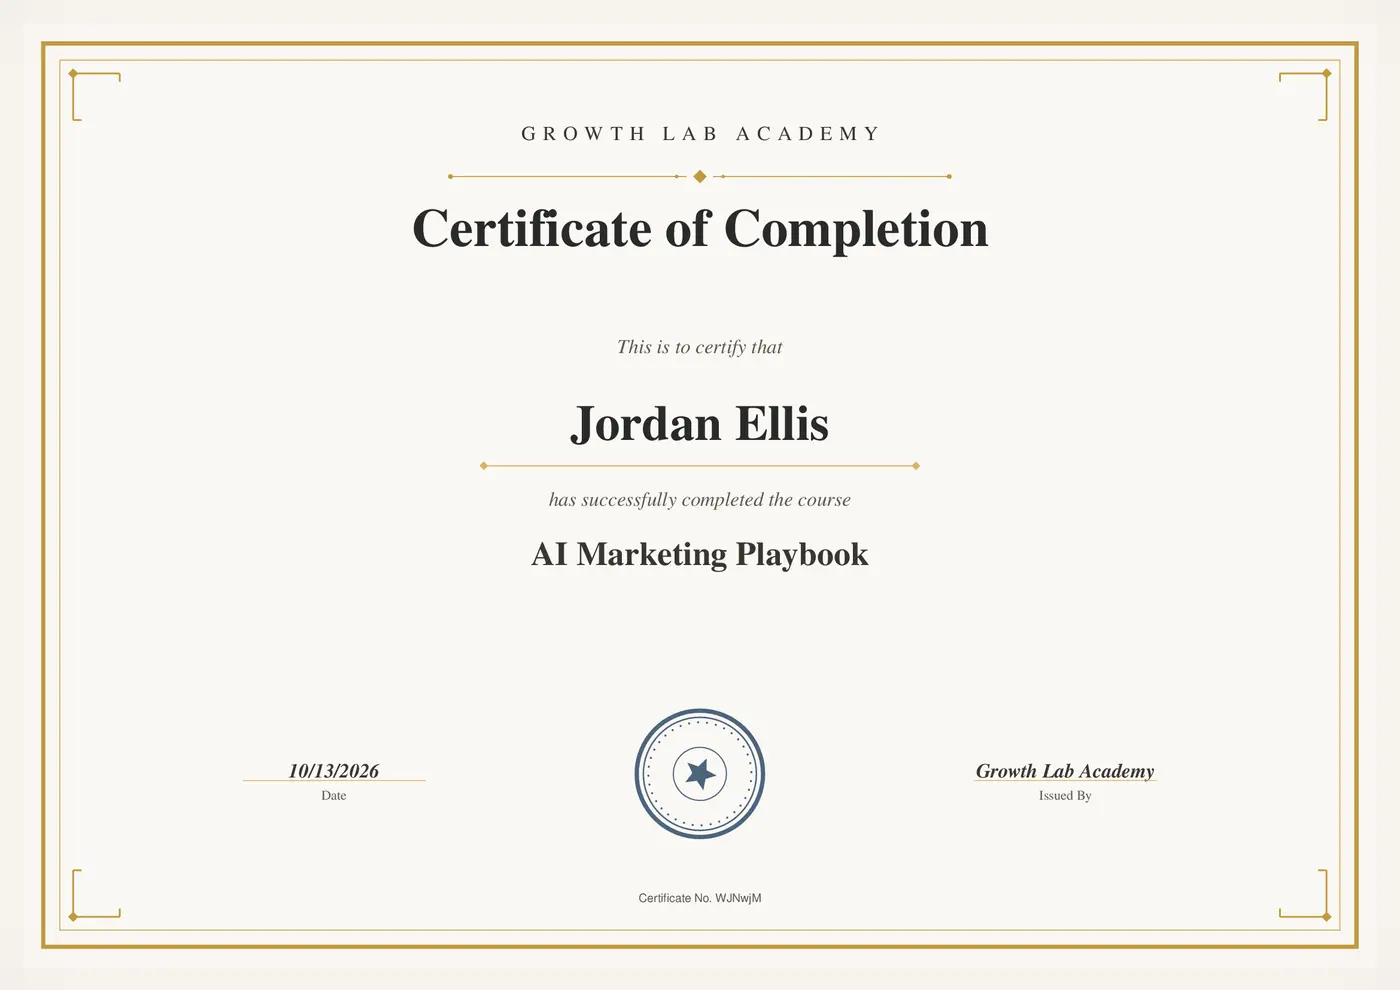
Section titled “Accessing and Downloading Completion Certificates (User-Side)”Students can easily access and download their course completion certificates directly from the Customer Center anytime. The certificate shows your workspace name at the top, the student’s name, the course name, and the completion date, along with a seal, a certificate number, and an Issued By line with your workspace name. If your default site has a Site Header Logo, it appears above the Issued By line.
For more information on navigating the Customer Center and accessing course certificates, check out the Customer Center - Understanding User View.
Using the Notification
Section titled “Using the Notification”-
After completing all course lessons, students will receive a notification via the bell icon at the top of the Customer Center.
-
Click on the notification to view the certificate.
-
Students can then download the certificate directly from this notification.
From My Account
Section titled “From My Account”Students can also access and download the certificate later by navigating to My Account:
-
Click on the profile icon at the top right of the page.
-
Select My Account from the dropdown menu.

-
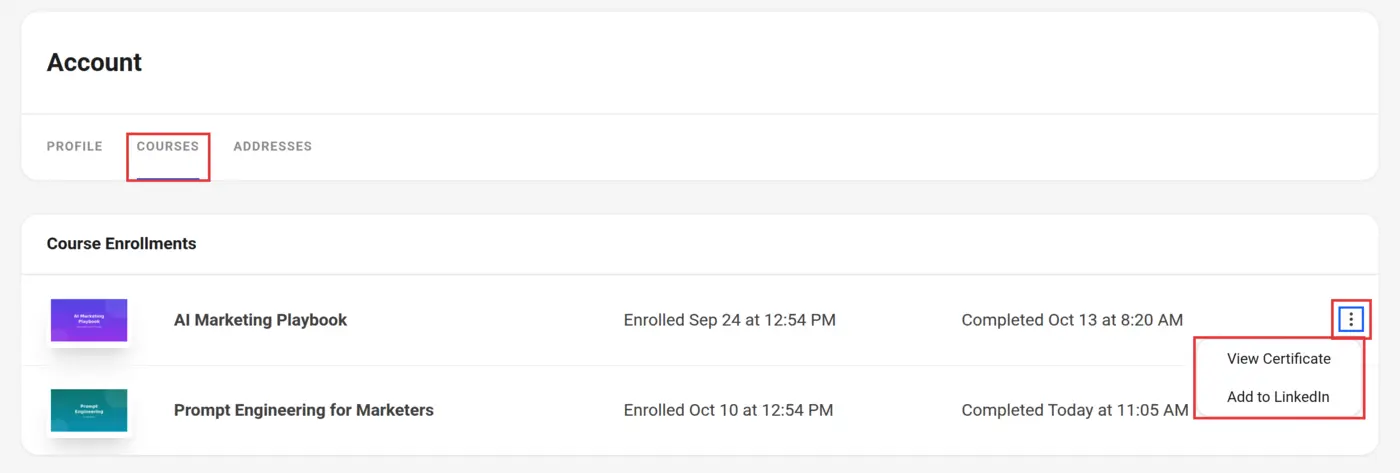
Inside My Account, go to the Courses tab.
-
Find the relevant course, click the three-dot ⋮ next to the course name, and select View Certificate to download it.
-
To add the certificate to their LinkedIn profile, students can select Add to LinkedIn from the same menu.
Displaying the Site Header Logo on the Certificate
Section titled “Displaying the Site Header Logo on the Certificate”To show your logo on certificates, add a Site Header Logo to your default site:
-
Click on the Site section from the left-hand menu.
-
Click Overview under Site.
-
Click the three-dot ⋮ icon next to your site name and select Site Settings.

-
In the Site Header Logo section, click Select Image and upload your preferred logo.
-
Click Update Site to save your changes.
Once uploaded, your logo will appear on all course completion certificates for students.