Uploading Audio Files
Published: Updated:
Uploading and using audio files in ClickFunnels can significantly enhance your content by providing auditory elements to your audience. Whether you’re sharing podcasts, lectures, music, or other audio resources, ClickFunnels makes it easy to integrate these files across various parts of your funnels, courses, and membership sites. In this article, you will learn how to upload audio files to your ClickFunnels account and use them effectively within different sections of your content.
Requirements
Section titled “Requirements”-
An active ClickFunnels account
-
An audio file for uploading (accepted formats include:
.MP3,.MP4,.WAV,.AAC,.OGG, and.WEBM) -
Maximum audio file size: 1,000 MB (1 GB)
Uploading an Audio File
Section titled “Uploading an Audio File”-
From your ClickFunnels dashboard, navigate to Workspace Settings on the left-hand menu.
-
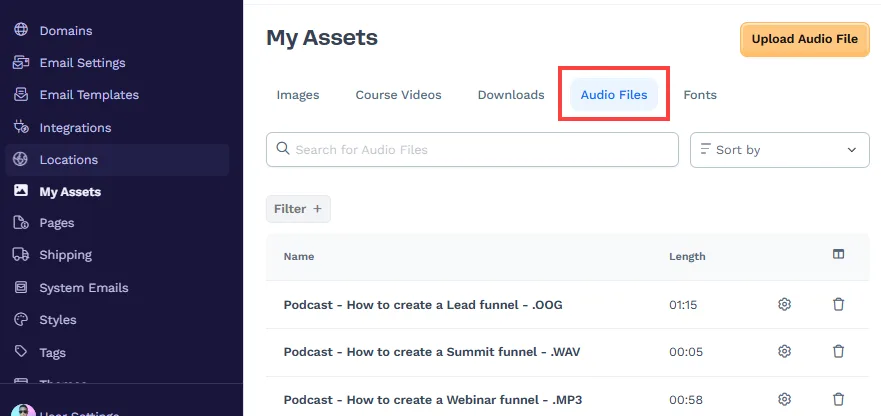
Select My Assets.
-
Click on the Audio Files tab.
-
Upload your audio files directly from the Audio Files page. You can either drag and drop one or more files anywhere onto the page — a full-page overlay appears while you drag — or click Select Files to Upload in the header (or the empty-state button) to choose files from your device. You can add multiple files at once, and each uploads with its own progress indicator.
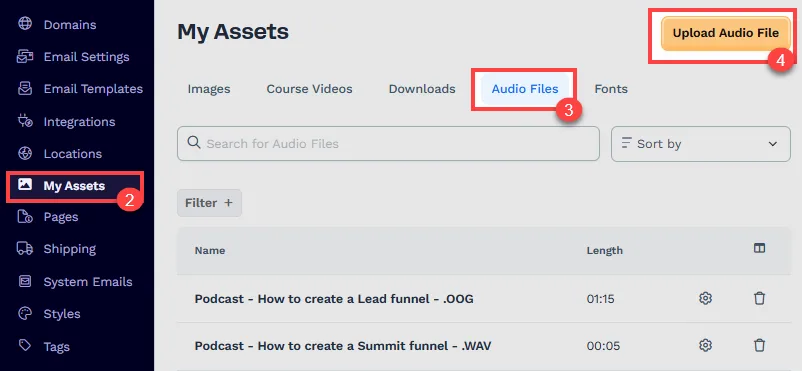
ClickFunnels automatically files each audio file under the Audio Files tab based on its file type. The supported audio formats are
MP3,MP4,WAV,AAC,OGG, andWEBMand the maximum file size limit is 1,000 MB (1 GB). -
Each audio file’s name is derived from its file name. After uploading, you can edit the file’s details, including its name.
How to Use Audio Files in a Course Lesson
Section titled “How to Use Audio Files in a Course Lesson”-
Go to your course and click Edit Lesson for the specific lesson where you want to insert audio files.
-
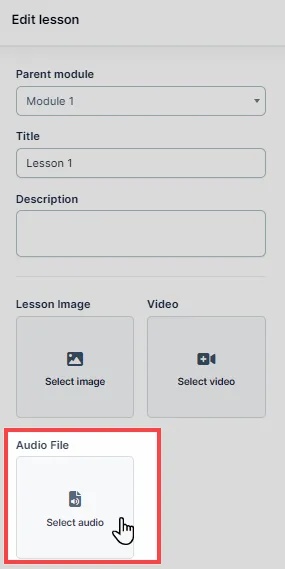
In the left-side menu of the lesson editor, click Select Audio under the Audio File section. This allows you to choose the audio file you previously uploaded from My Assets.
-
In the page editor, click the orange Add Element or Plus icon (+) to add a new element.
-
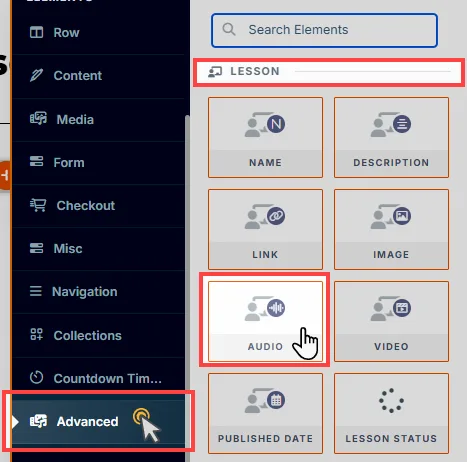
Navigate to the Advanced category and scroll to the Lesson section. Then, insert the Audio element into the lesson. You can adjust the design and settings of the audio placeholder as needed.
-
You need to repeat this process for each lesson if you want to add audios. The “Lesson Audio” element will automatically render the associated audio you add to the lesson.
How to Use Audio Files with the Audio Element
Section titled “How to Use Audio Files with the Audio Element”-
Navigate to My Assets and locate the audio file you want to use.
-
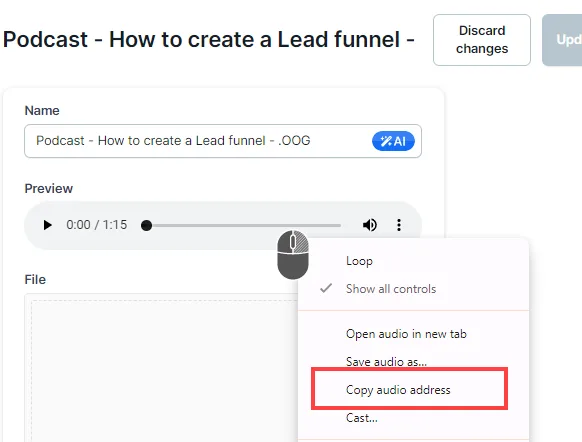
Right-click on the audio player and select Copy Audio Address to copy the file’s URL.
-
Go to the page where you want to use the audio and click Edit Page to open the page editor.
-
Within the editor, find the row where you want to place the audio, then click the orange Add Element or Plus icon (+) to add a new element.
-
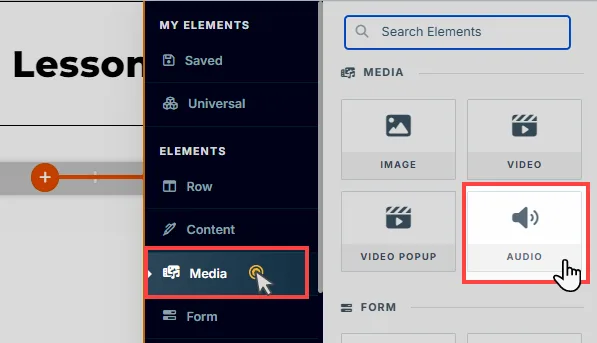
Select the Audio element from the Media category and insert it into the row.
-
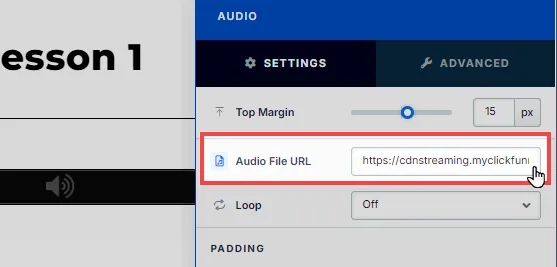
Paste the copied audio URL into the Audio File URL field within the element settings.
-
Once you’ve pasted the URL, the audio file will be linked to your page’s standard audio player, and visitors can listen to it directly.
User View
Section titled “User View”When the page is viewed, the audio player will appear to enable audio playback. Users can play, pause, adjust the volume, and skip forward or rewind the audio via the audio control panel.