
Uploading Custom Fonts
Published: Updated:
Adding custom fonts to your ClickFunnels pages allows you to maintain brand consistency and create visually appealing content that stands out. Whether you have specific typography guidelines or want to add a unique touch to your funnels, custom fonts give you the flexibility to design pages that resonate with your audience. In this article, you will learn how to upload custom fonts to your ClickFunnels account and use them effectively across your pages.
Requirements
Section titled “Requirements”-
An active ClickFunnels account
-
A font file for uploading (accepted formats include:
TTF,WOFF,WOFF2,OTF) -
Max font file size: One Megabyte (1 MB)
Upload Custom Fonts in Assets
Section titled “Upload Custom Fonts in Assets”-
From your ClickFunnels dashboard, navigate to Workspace Settings on the left-hand menu.
-
Select My Assets.
-
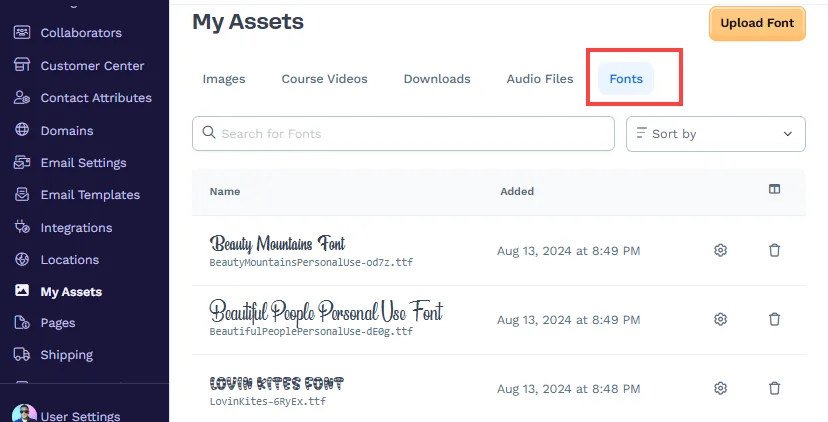
Click on the Fonts tab.
-
Upload your fonts directly from the Fonts page. You can either drag and drop one or more font files anywhere onto the page — a full-page overlay appears while you drag — or click Select Files to Upload in the header (or the empty-state button) to choose fonts from your device. You can add multiple fonts at once, and each uploads with its own progress indicator.
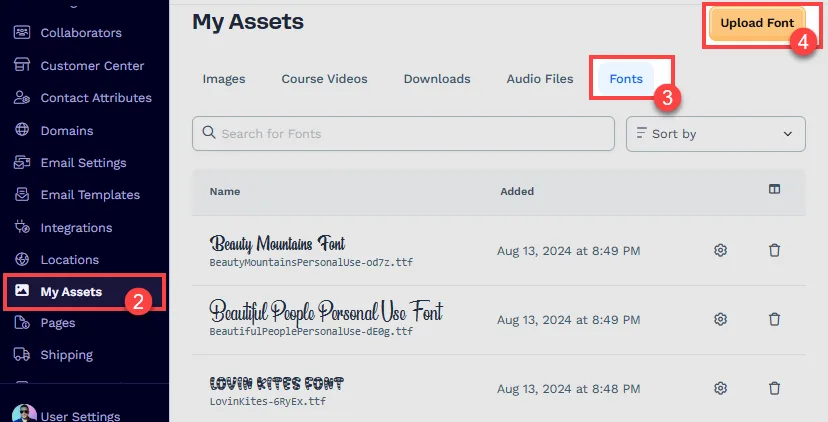
ClickFunnels automatically files each font under the Fonts tab based on its file type. Supported font types include
.ttf,.otf.woffand.woff2. The maximum size allowed for each font file is 1 MB. -
Each font’s name is derived from its file name. Font names must be unique, so if a name already exists, ClickFunnels automatically adjusts it to keep it unique.
How to Use Custom Fonts on a Page
Section titled “How to Use Custom Fonts on a Page”-
Navigate to the specific page or course lesson where you want to apply a custom font and click Edit Page.
-
In the page editor, insert a text element (e.g., Headline, Subheadline, Paragraph) where you want to apply the custom font.
-
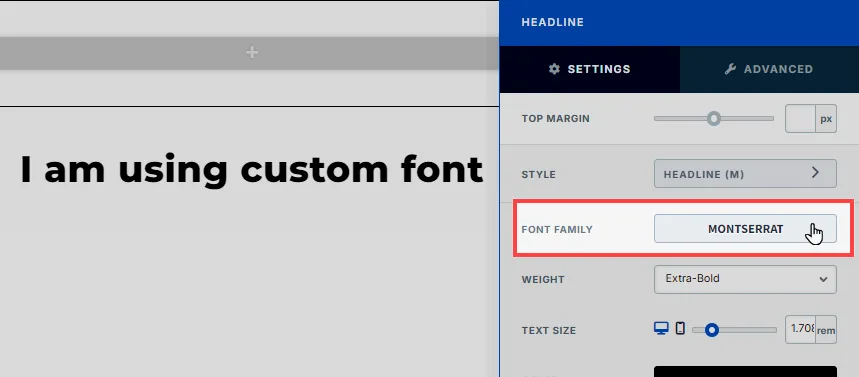
In the settings panel for the selected text element, find the Font Family option.
-
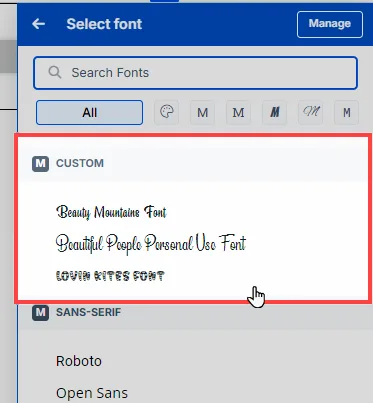
Click on the font dropdown and scroll to the Custom section.
-
Select the custom font you uploaded from the list.
-
The selected custom font will be applied to the text element, and you can further adjust the font size, weight, and other text options as needed.