
Email Domains: Verifying Email DNS Records
Published: Updated:
To send marketing and transactional emails using your custom domain, you must verify your email domain or subdomain in ClickFunnels. ClickFunnels provides the necessary DNS records to set up your domain for email sending, ensuring proper authentication and deliverability. In this article, you’ll learn how to verify your email domain by adding and checking the required DNS records.
Requirements
Section titled “Requirements”-
An active ClickFunnels account
-
A domain secured to the workspace
-
Access to the email settings (available to team members with roles: funnel builder, marketing, or administrator)
What is an Email Domain
Section titled “What is an Email Domain”The email domain refers to the custom domain you add to your ClickFunnels account to send marketing and transactional emails. Once a domain or subdomain is connected to your workspace, ClickFunnels provides specific DNS records required to enable email sending from that domain.
When setting up a domain, ClickFunnels automatically generates two sets of DNS records:
-
Domain Integration DNS Records: These records allow you to connect the domain to ClickFunnels.
-
Email DNS Records: These records enable you to send custom emails from ClickFunnels using your domain. The required DNS records include DKIM, SPF, DMARC, and CNAME.
Clarification with Example:
Even if you connect a subdomain (e.g., info.yourdomain.com), the root domain is still considered the email domain (in this case, yourdomain.com). ClickFunnels will provide the necessary email DNS records for the root domain, allowing you to create associated email addresses, even though you’re using a subdomain.
For instance, if you connect info.yourdomain.com to ClickFunnels, you can still create an email address such as contact@yourdomain.com by adding the email DNS records to your root domain’s DNS settings.
How to Verify Email Domain DNS Records
Section titled “How to Verify Email Domain DNS Records”When you connect a domain or subdomain in ClickFunnels, you are prompted to add specific email DNS records to ensure proper email delivery. If you did not add these records during the initial setup, you can follow the steps below to verify the DNS records for your email domain.
-
Navigate to Workspace Settings on the left side of the navigation.
-
Select Email Settings.
-
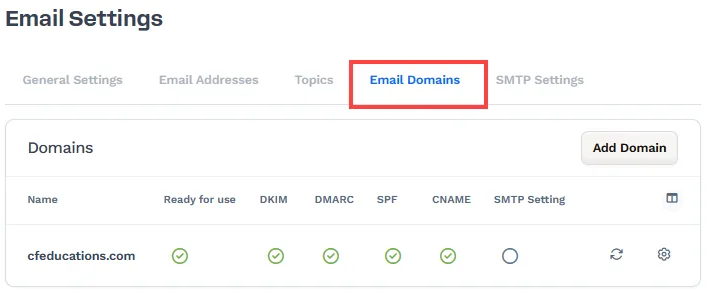
Click on the Email Domains menu.
-
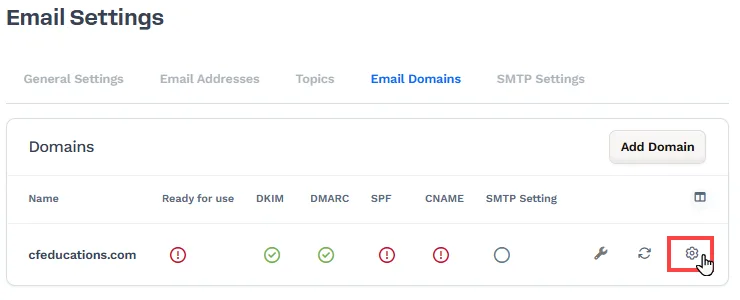
Click the Gear (⚙️) icon next to the domain with unverified DNS records.
-
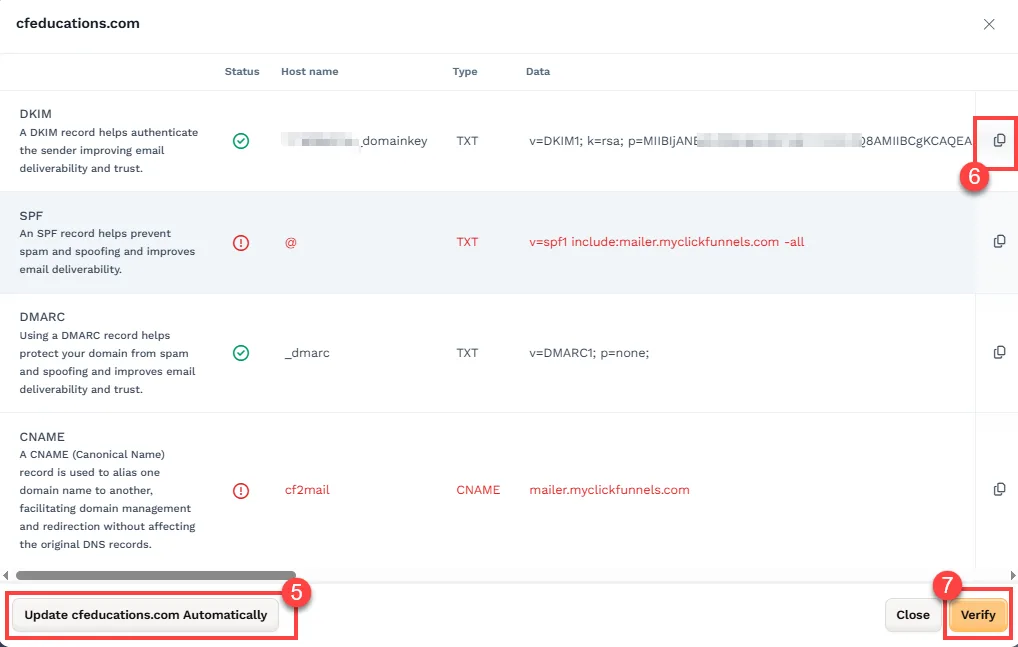
Click the Update… Automatically button and follow the on-screen instructions to allow access to and configure your domain’s DNS records automatically.
-
Alternatively, if the automated process is unsuccessful or you do not want to use the automatic method, manually add the DNS records to your domain’s DNS provider. ClickFunnels will provide DKIM, SPF, DMARK, and CNAME records for manual addition.
-
Finally, click the Verify button.
Once the email domain is verified, you can create a custom email address associated with this domain.
💡 Learn more: Adding a Custom Email Address in ClickFunnels
SMTP Status
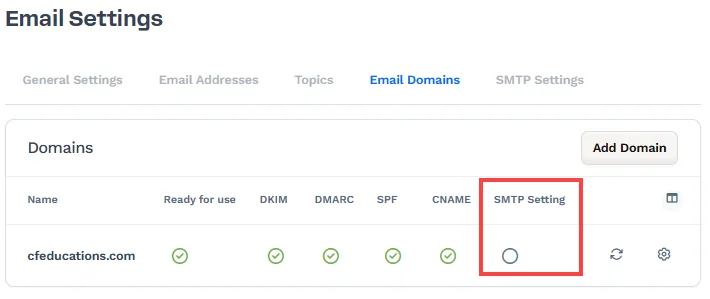
Section titled “SMTP Status”The SMTP Settings column in the Email Domains section shows whether your domain is connected to an external SMTP server for email delivery. When you connect an SMTP provider (such as SendGrid or Mailgun) in ClickFunnels, you must associate an email domain with it. The SMTP status will indicate whether the domain is currently using an SMTP service for sending emails:
-
Green or Checkmark: This indicates that the domain is connected to an external SMTP server. All marketing emails from this domain will be delivered via the external SMTP provider, and ClickFunnels’ email server will not be used.
-
Empty or Null: This indicates that no SMTP server has been connected for this domain. In this case, ClickFunnels’ email servers will be used to send emails.