
Uploading Course Videos
Published: Updated:
Course videos are a vital component of online education, providing an engaging way to deliver content and enhance the learning experience for your students. ClickFunnels allows you to easily upload, manage, and add course videos directly within your courses, eliminating the need for external video hosting services. In this article, you will learn how to upload course videos to your ClickFunnels account, manage them effectively, and use them within your courses to create a dynamic educational environment.
Requirements
Section titled “Requirements”-
An active ClickFunnels account
-
Video files stored on your local device
-
Supported video file types:
.MP4,.AVI, and.MPEG -
Maximum video file size: 3000 MB (3 GB)
Upload Videos in Assets
Section titled “Upload Videos in Assets”-
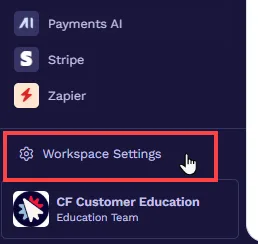
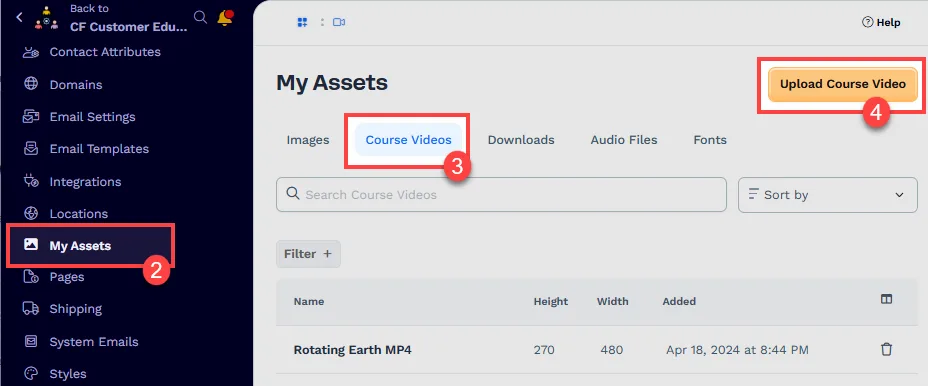
From the ClickFunnels Dashboard, navigate to the Workspace Settings on the left-hand menu.
-
Select My Assets.
-
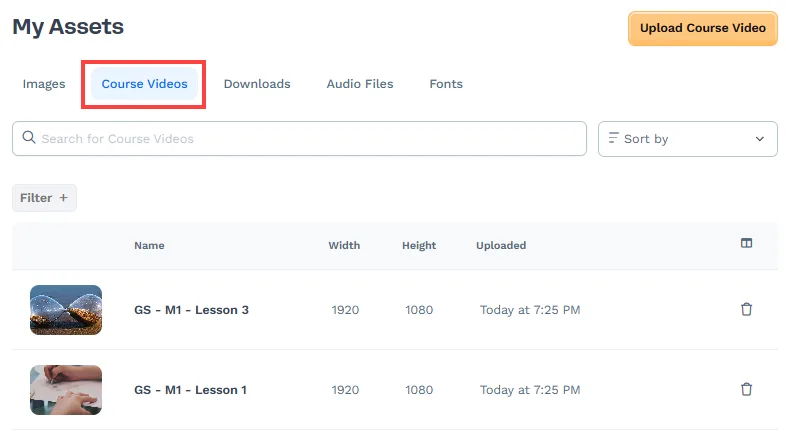
Click on the Course Videos tab.
-
Upload your videos directly from the Course Videos page. You can either drag and drop one or more video files anywhere onto the page — a full-page overlay appears while you drag — or click Select Files to Upload in the header (or the empty-state button) to choose videos from your device. You can add multiple videos at once, and each uploads with its own progress indicator.
Updating a Course Video
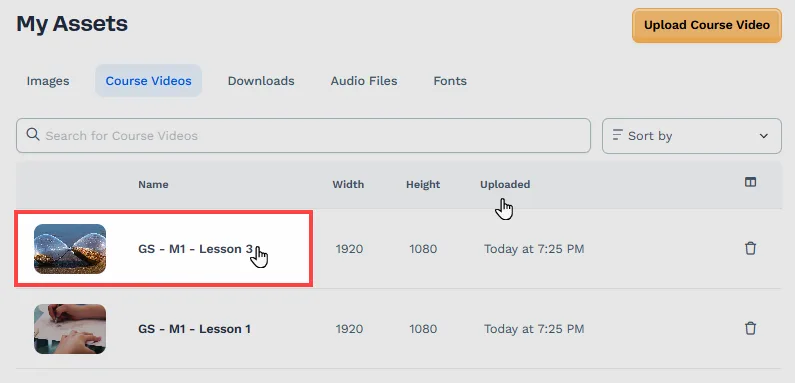
Section titled “Updating a Course Video”After uploading the videos, you can update them by clicking on a course video name. Follow the instructions below:
-
Navigate to Workspace Settings.
-
Select My Assets.
-
Click Course Videos.
-
Select a video you want to update.
-
In the Name field, enter the name of the video.
-
In the File section, drag and drop your video file or click the Browse files link to upload a video from your local storage. Remember, the supported video formats are
MP4,AVI, andMPEGand the maximum file size for videos is 3000 MB (3 GB). The new video will replace the previously uploaded video. -
In the Poster Image section, you can upload an image that will serve as a placeholder while the video is loading or before it starts playing. If the poster image is not uploaded, the first frame of the video will be used instead.
-
Click Update Video to finalize and upload the video to your assets.
Adding a Course Video to a Course Lesson
Section titled “Adding a Course Video to a Course Lesson”Once you have uploaded your course videos, you can easily use them in your courses within ClickFunnels. Follow the steps below to add a video to a course lesson:
-
Go to your course and click Edit Lesson for the specific lesson where you want to add a video.
-
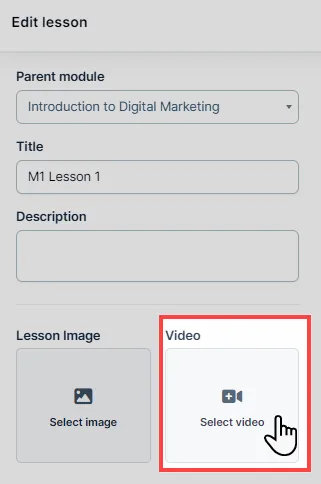
In the lesson editor, navigate to the left and click Select Video.
-
Choose the video from the list that you uploaded under “Course Videos”.
-
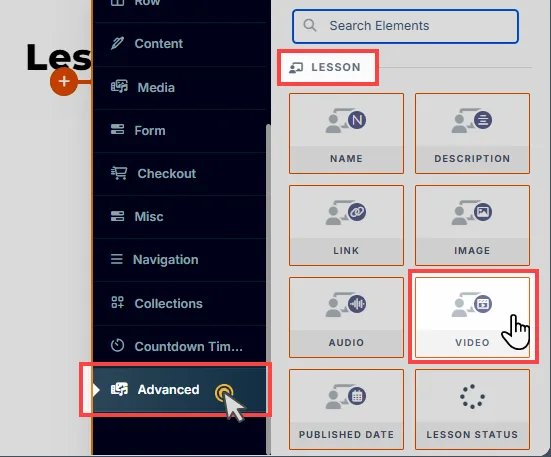
In the page editor, click the orange Add Element or Plus icon (+) to add a new element.
-
Select the Advanced category, scroll to the Lesson section, and insert the Video element in the page editor. You can adjust the design and settings of the video placeholder as needed.
-
You need to repeat this process for each lesson if you want to add videos. The Lesson Video element will automatically render the video you added to the lesson.
Using Course Videos with Standard Video Element
Section titled “Using Course Videos with Standard Video Element”To use a course video with a standard video element on a ClickFunnels page, follow these steps:
-
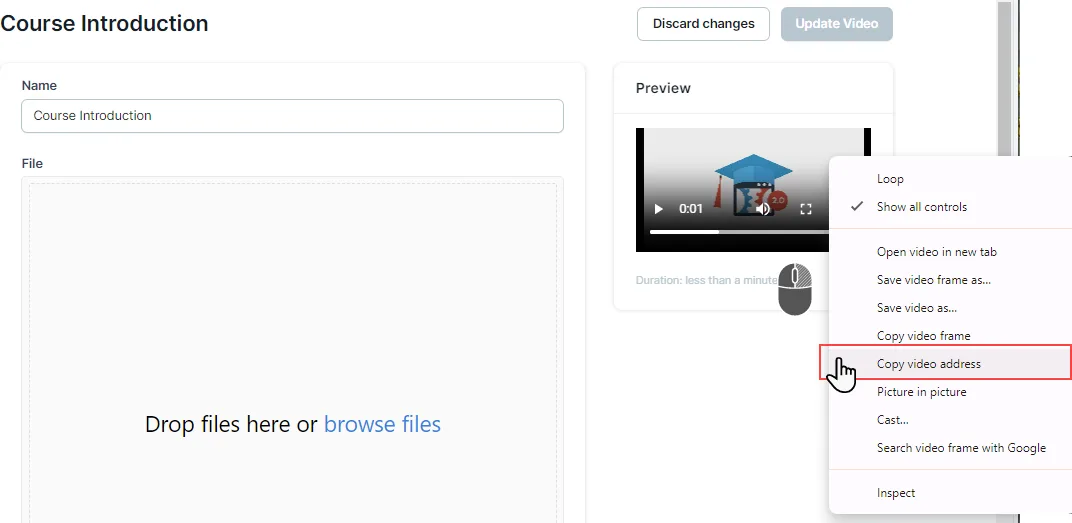
Access your video asset by navigating to the Course Videos section within the My Assets menu.
-
In the Preview section, where the video thumbnail is displayed, right-click on the video and select Copy Video Address.
-
Go to the page where you want to use the course video and click Edit Page to open the page editor.
-
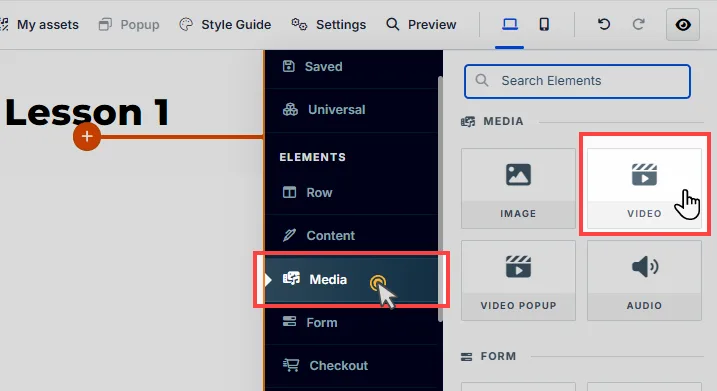
Within the editor, find the row where you want to place the video, then click the orange Add Element or Plus icon (+) to add a new element.
-
Select the Video element from the Media category and insert it into the row.
-
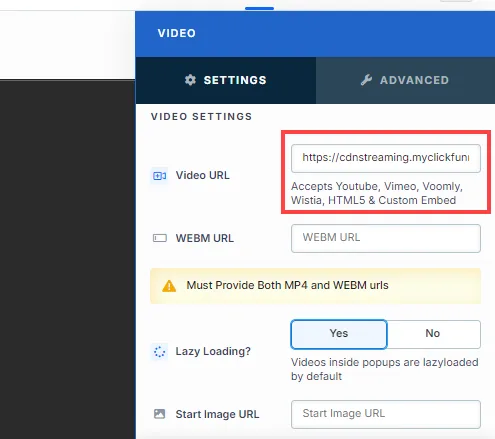
Paste the copied video URL into the Video URL field within the video element settings.
-
After adding the video URL, you will be prompted to add a WebM URL for the video. This is optional but recommended to ensure optimal performance and compatibility across all browsers, as most modern browsers support the
.WebMformat and provide better efficiency on specific devices. If you don’t have a WebM version, you can use a video converter app to create one. Upload the WebM version of the same video file to a hosting platform outside of ClickFunnels (e.g., Dropbox) and paste the video URL into the WEBM URL field. -
Once the MP4 and WebM URLs are added, your video will be ready to be viewed on your page.