
HTML/JS: Insert Custom HTML and JavaScript Code
Published: Updated:
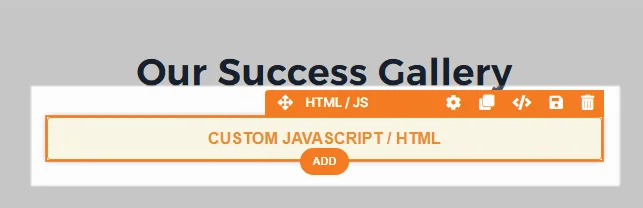
The HTML/JS element in ClickFunnels allows users to embed custom HTML and JavaScript code directly within a funnel page. This feature is designed for advanced users who want to add unique functionalities or styles that go beyond what standard ClickFunnels elements offer. In this article, you’ll learn how to properly add HTML and JavaScript code in the HTML/JS element to enhance your funnel pages.
Requirements
Section titled “Requirements”-
An active ClickFunnels account
-
A page created in your workspace
Adding an HTML/JS Element in the Page Editor
Section titled “Adding an HTML/JS Element in the Page Editor”-
Inside the page editor, add a Section where you want to place the element.
-
Add a Row within that section.
-
Click the orange + Plus or Add New Element button inside the row to insert a new element.
-
From the MISC (Miscellaneous) category, select the HTML/JS element.
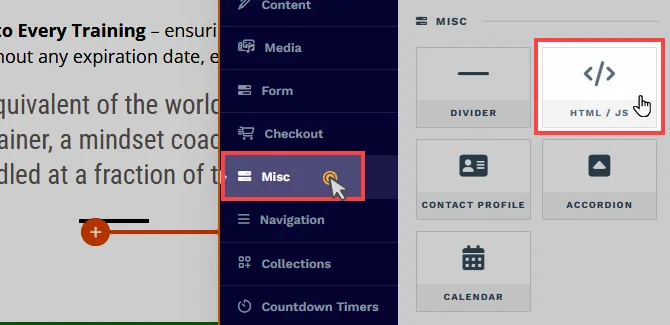
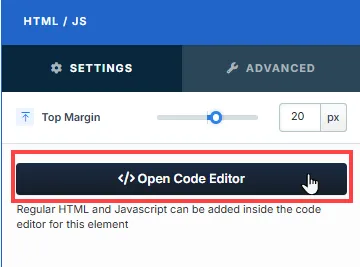
Once the HTML/JS element is added, you can open the settings sidebar, select Open Code Editor, and enter your HTML and JavaScript code directly within the editor.
Customizing the HTML/JS Element
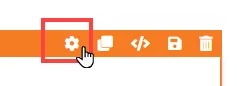
Section titled “Customizing the HTML/JS Element”When you hover over an element, its border will be highlighted in orange. To access an element’s settings, click on the gear ⚙️ icon or click directly on the element.
Top Margin
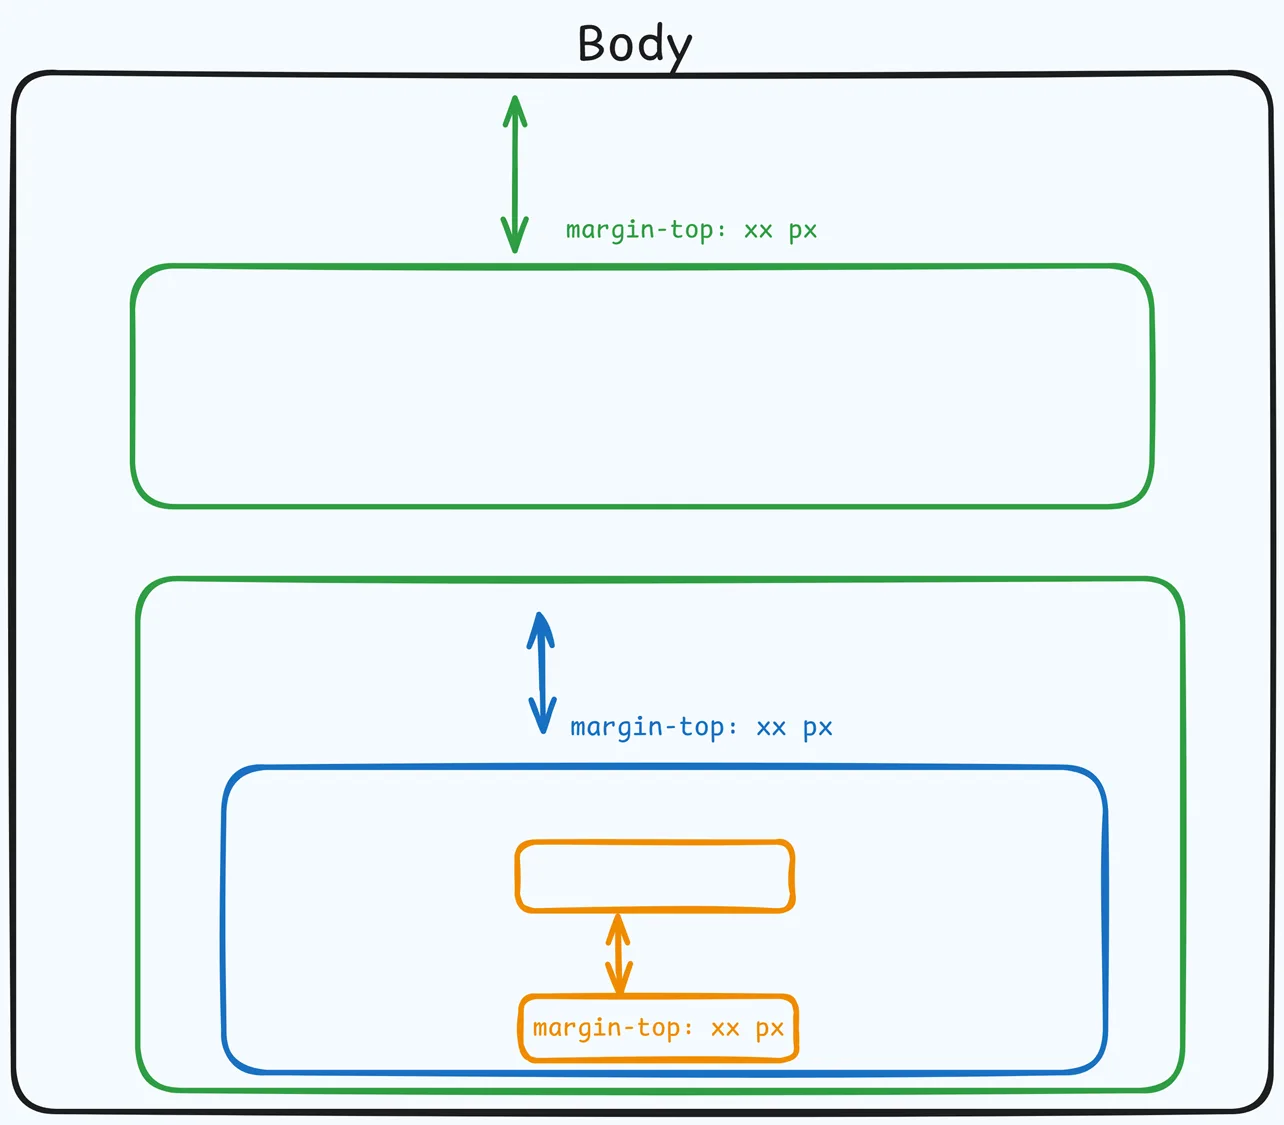
 The Top Margin setting lets you control the space between the current container (section, row, flex, and element) and the container directly above it. If no previous container exists, the margin will be applied relative to the parent container. If no preceding container is added, the Body will be the parent.
You can set top margin values independently for desktop and mobile by using the device icons (🖥️ & 📱 ). If no mobile value is specified, it will inherit the desktop setting by default. Use the slider or manually enter a value in pixels (px) or percentage (%) to create consistent spacing across screen sizes.
Open Code Editor
Clicking on Open Code Editor opens a text editor for adding custom HTML and JavaScript code. This editor supports both HTML and JavaScript code. Refer to the Adding HTML Code and Adding JavaScript Code sections below to learn more about properly adding HTML and JavaScript code.
Control Panel
The Control Panel appears at the bottom of every container(Section, Row, Flex, and Element) in the page editor, offering quick access to essential settings and actions for that container. Here’s what each icon represents:

-
ALL: The container will be visible on all devices (desktop, tablet, and mobile).
-
Desktop (🖥️**) Icon**: The container will only be visible in desktop view.
-
Mobile (📱) Icon: The container will only be visible in mobile view.
-
Eye (👁️) Icon: Use this to hide the container from the page. Once clicked, the container will be hidden in the editor but not deleted. You can click the Layout menu in the top navigation bar to find the hidden containers. Select All, Desktop, or Mobile icon to unhide in the editor.
-
Code (</>) Icon: This icon opens the code editor, where you can insert custom CSS or JavaScript code to modify the container’s behavior or styling.
-
Trash (🗑️**) Icon**: Removes the container from the page editor entirely.
Advanced Settings
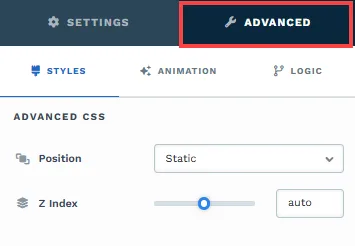
To further customize your container (section, row, column, and element), ClickFunnels provides Advanced settings that allow you to control style, advanced CSS, animation, and rendering logic. We’ve separated these advanced features into dedicated articles to avoid overwhelming you with too much content in one place and to keep our documentation concise. Explore the following resources for more details:
-
Advanced Settings - Customize Styles: Learn how to populate contents dynamically, position containers, and apply z-index.
-
Advanced Settings - Customize Animation: Learn how to add animations, control entry and exit effects, and adjust animation delay.
-
Advanced Settings - Customize Logic: Learn how to apply conditional logic to elements and add custom attributes.
Adding HTML Code
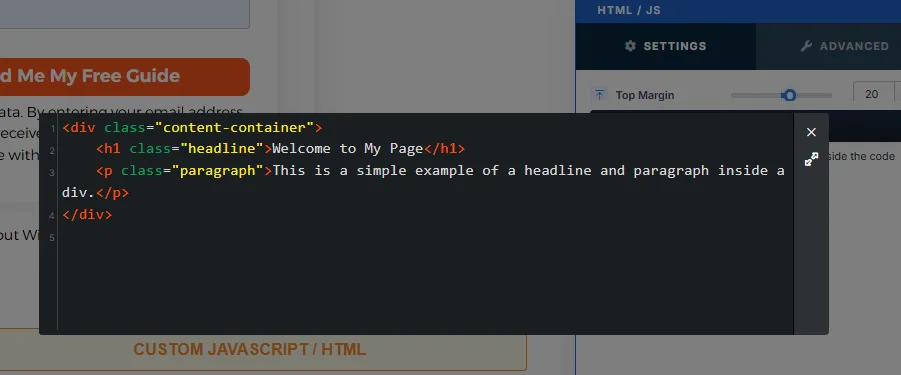
Section titled “Adding HTML Code”To add HTML code within the Custom HTML/JS element:
-
Open the Code Editor by clicking on Open Code Editor in the settings.
-
Enter your HTML code directly into the editor.
Adding JavaScript Code
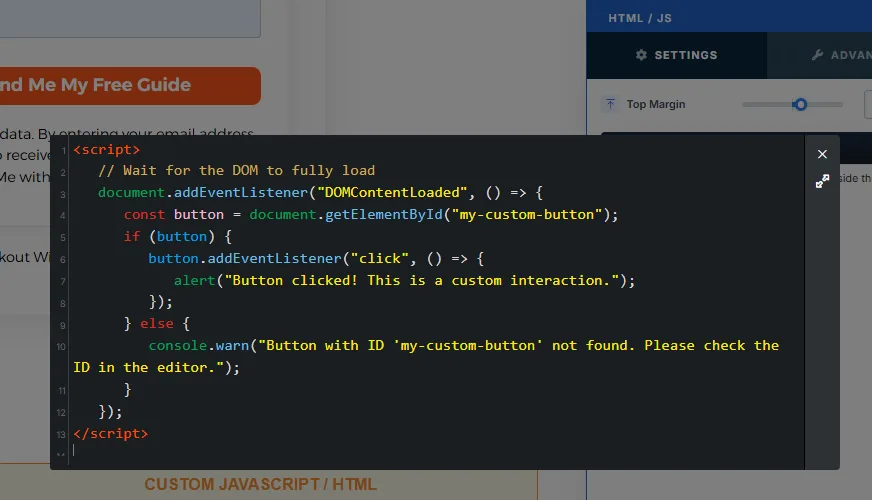
Section titled “Adding JavaScript Code”The Custom HTML/JS element also supports JavaScript, allowing for interactive functionality or dynamic behavior.
To add JavaScript code:
-
Open the Code Editor by clicking on Open Code Editor in the settings.
-
Add your JavaScript code, enclosed in
<script> </script>tags.
Troubleshooting Custom Code
Section titled “Troubleshooting Custom Code”If your code isn’t working as expected:
-
Check Console for Errors: Open your browser’s developer tools and review the console for error messages.
-
Review Code Structure: Ensure your HTML and JavaScript syntax is correct and doesn’t conflict with existing elements.
-
Consult a Developer: Consider consulting a professional developer for assistance with complex functionality.