
How to Create a New Funnel
Published: Updated:
A funnel is a step-by-step process that guides potential customers through your marketing and sales journey. It starts with attracting visitors, then engaging them with valuable offers, and finally converting them into paying customers. In this article, we’ll walk you through the process of setting up your first funnel, step by step. For a deeper dive into funnel features, settings, and advanced optimization, visit our Getting Started with Funnels article.

Requirements
Section titled “Requirements”- An active ClickFunnels account
Option 1: Create a Funnel Using An Existing Template
Section titled “Option 1: Create a Funnel Using An Existing Template”-
Click on Funnels from the left navigation menu.
-
Click on the Create Funnel button.
-
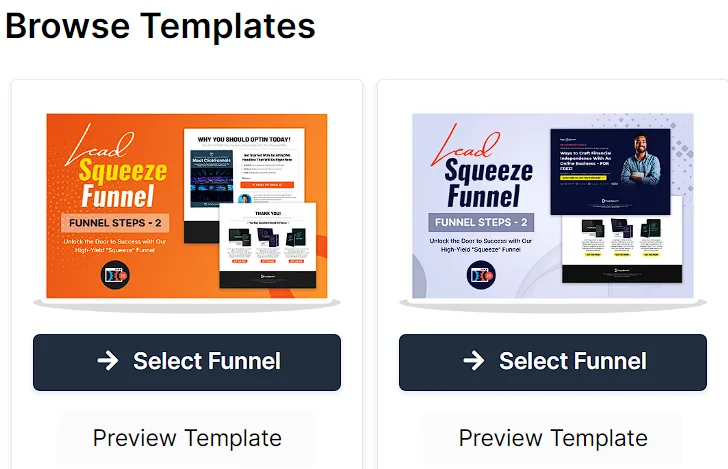
Explore the available templates. To see a template in action, click Preview Template.
-
Once you’ve chosen a template, click Select Funnel to proceed.
-
Get started customizing your funnel by clicking on Customize Now.
-
This will direct you to the Funnel Editor, where you can begin customizing your funnel pages.
Option 2: Build a Funnel From Scratch
Section titled “Option 2: Build a Funnel From Scratch”-
Click on Funnels from the left navigation menu.
-
Click on the Create Funnel button.
-
Click the Start from Scratch button.
-
Give your funnel a Name.
-
Choose a Funnel Path URL. This is the unique web address where your funnel will be hosted, making it accessible to your audience.
-
Click the Create Funnel button.
-
This will direct you to the Funnel Editor, where you can begin adding steps to your funnel. Check our article on How to Add a New Funnel Step to learn how to add steps to your funnel.
Option 3: Create a Funnel with ClickFunnels AI
Section titled “Option 3: Create a Funnel with ClickFunnels AI”ClickFunnels AI is your built-in funnel-building assistant. Describe your business and what you want to achieve, and it researches your market, designs your pages, writes your copy, generates images, and builds a complete funnel for you, all from a simple conversation.
-
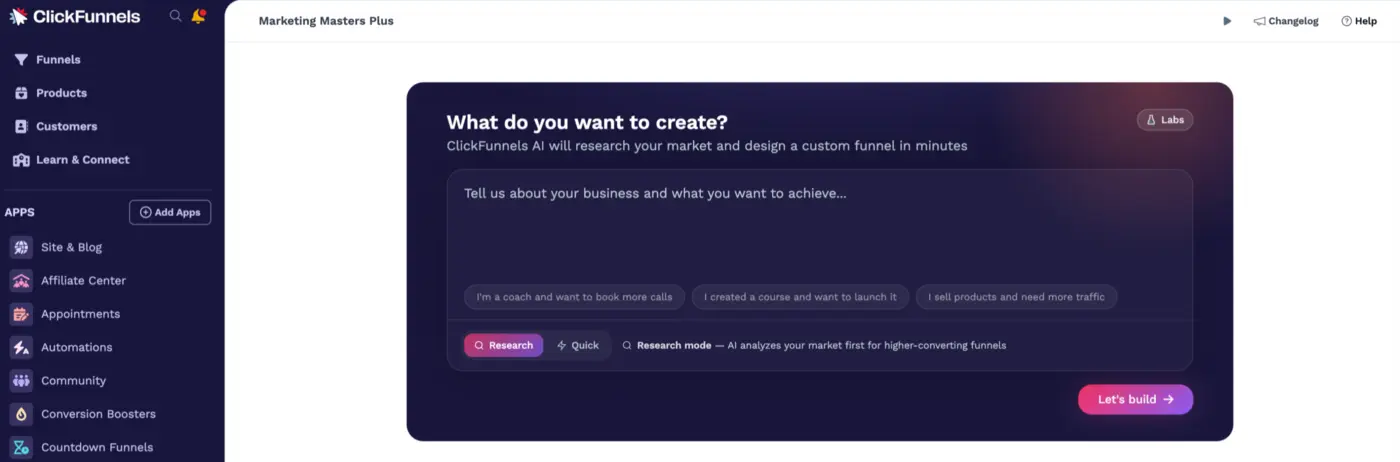
Open your workspace dashboard. Once your team has enabled ClickFunnels AI, the AI assistant appears there.
-
Describe your funnel in the box, for example, “I’m a coach, and I want to book more calls.” Use Quick mode to start building right away, or switch the toggle to Research mode to have the AI study your market first and recommend a funnel type.
-
You’ll land in the Funnel Editor with the AI sidebar open. It asks a couple of quick questions, then builds your funnel: fully designed pages, with copy, ready to edit.
-
Keep shaping the funnel by asking the AI sidebar for changes, editing pages by hand, or both.
For the full walkthrough, including how a team admin enables ClickFunnels AI, how to grant the AI User role to team members, and how the beta usage allowance works, see Getting Started with ClickFunnels AI (Beta).
Edit Funnel Pages
Section titled “Edit Funnel Pages”In the funnel editor, you’ll see a map of all the pages within the funnel. Here, you can access various options such as funnel settings, page options, preview pages, and view analytics.
-
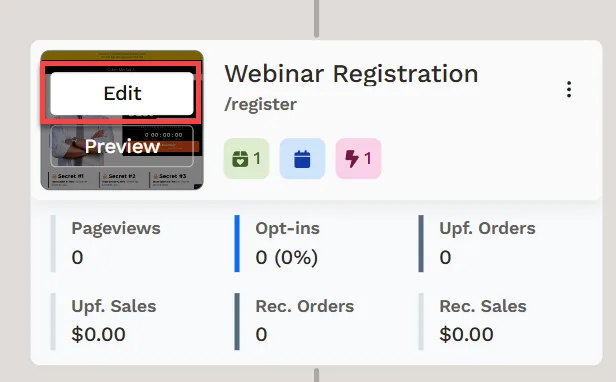
To edit a page, simply hover over its thumbnail in the page editor and click Edit.
-
Each funnel page is organized into distinct sections, columns, rows, and elements — each of which you can customize to further edit your page. Please refer to the Getting Started with Editor article for more instructions.
-
Click the Save button at the top right of the page to keep your changes.
-
You can click on the eye icon to preview your latest saved version and ensure it looks perfect.
How to Publish a Funnel
Section titled “How to Publish a Funnel”When you’re satisfied with your changes and ready to publish your funnel, follow these steps:
-
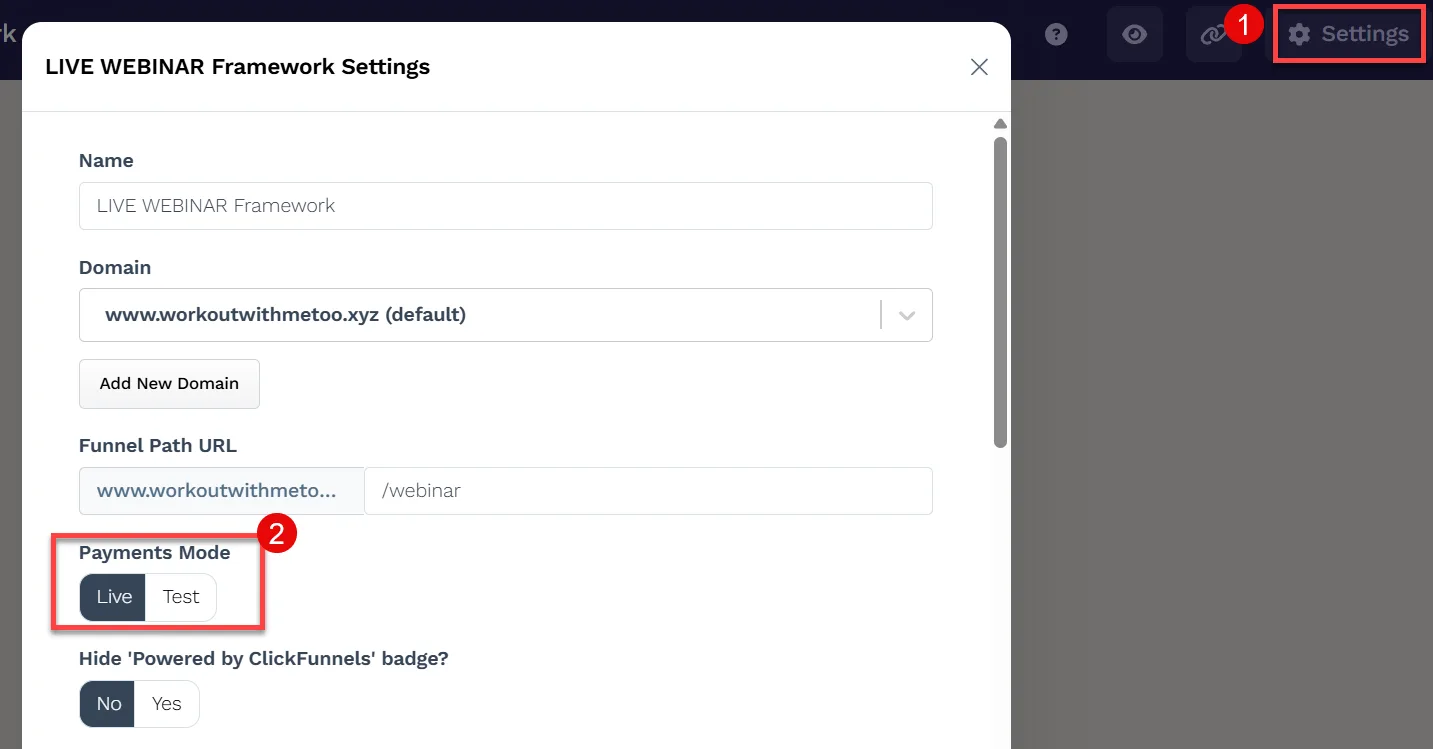
Click the Settings button at the top-right corner of the funnel workflow page to open the funnel’s settings.
-
Toggle the funnel’s Payments Mode to Live, then click the Update Funnel button at the corner of the pop-up settings.
-
Congratulations! Your funnel is now live. You can click the URL in the funnel workflow view to copy it to your clipboard and share it on your social media and marketing platforms.