
'Register for Countdown Event' Step - Register Contacts for Countdown Events
Published: Updated:
The “Register for Countdown Event” step in ClickFunnels workflows registers a contact for a countdown event you choose, without the contact having to opt in or view a page the event is attached to. This makes it possible to enroll contacts in an event-related email sequence later — for example, someone who missed the original opt-in, or someone you want to move to an alternate event date. In this article, you will learn how to add and configure the “Register for Countdown Event” step, and how to use the matching “Registered for Countdown Event” condition to branch a workflow on whether a contact is already registered.
Requirements
Section titled “Requirements”-
An active ClickFunnels account
-
The Countdown Funnels app added to your workspace, with at least one countdown event created
-
A workflow created in your workspace
Overview of the “Register for Countdown Event” Step
Section titled “Overview of the “Register for Countdown Event” Step”Before this step existed, a contact could only be registered for a countdown event by opting in on — or viewing — a funnel page that the event was attached to. That left no way to register someone afterwards, which matters because the countdown event registration is what starts the workflows triggered by the “Countdown Event - Contact Registered” event, and what the event email embed code counts down to.
The “Register for Countdown Event” step closes that gap. When a contact reaches the step, ClickFunnels registers them for the countdown event you selected and calculates their personal deadline the same way a page registration would:
-
One Time events use the fixed event date and time.
-
Recurring events use the recurrence interval counted from the moment the step runs, so each contact gets their own deadline.
-
Hybrid events use the next occurrence of the configured day and time.
Because the registration is created in the normal way, it also fires the “Countdown Event - Contact Registered” event. Any workflow triggered by that event for the same countdown event will start, the registration appears on the countdown event’s registrants list and on the contact’s Marketing tab, and countdown timers embedded in workflow emails count down to that contact’s deadline.
Unlike the “Calendar Event Delay” step, this step does not require the workflow to be triggered by a countdown event registration. You pick the event inside the step, so it works in an opt-in workflow, in a workflow you run manually for a contact, or anywhere else in your automation.
Adding the “Register for Countdown Event” Step to Your Workflow
Section titled “Adding the “Register for Countdown Event” Step to Your Workflow”-
Navigate to the Automations app and select Workflows.
-
Open an existing workflow or create a new one.
-
Click on the Plus Icon (+) in your workflow editor.
-
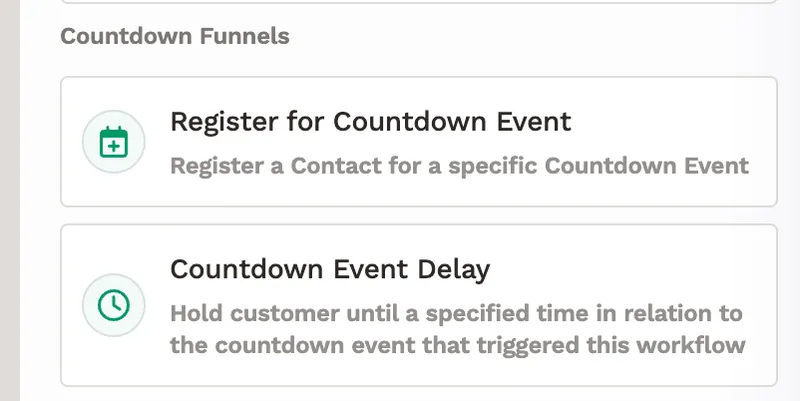
Select the Register for Countdown Event step under the Countdown Funnels category.
Configuring the “Register for Countdown Event” Step
Section titled “Configuring the “Register for Countdown Event” Step”Once you’ve added the step, configure it as follows:
-
Select the Countdown Event you want to register the contact for. The dropdown lists every countdown event in your workspace.
-
Choose what should happen in the If the deadline has already passed field. This decides what the step does when the selected event’s deadline is already in the past at the moment the contact reaches the step:
-
Register anyway (the default): the contact is registered even though the deadline has passed, and the workflow continues to the next step. Use this when the point of the registration is to put the contact into the event’s email sequence, regardless of the countdown.
-
Skip registration and continue: no registration is created, and the contact simply moves on to the next step in the workflow.
-
End the workflow run: no registration is created and the workflow run is completed for that contact, so none of the following steps execute.
-
-
Click the Create button to save the step and return to the workflow editor. When editing an existing step, click Save.
The step shows the selected event in the workflow editor (for example, Register for "Black Friday Sale Deadline"). A step that has not had an event selected yet is labeled Pick a countdown funnel, and it does nothing until you choose one.
Branching on Registrations: the “Registered for Countdown Event” Condition
Section titled “Branching on Registrations: the “Registered for Countdown Event” Condition”A matching contact condition, Registered for Countdown Event, was added under the Contact Activity category of the contact filter. It is available anywhere that filter is used — including the “Conditional Split Path” and “Conditional Goal” steps, and the Contacts list.
The condition offers two clauses:
-
is — the contact is registered for one specific countdown event.
-
is one of — the contact is registered for any of the countdown events you select, which is handy for treating a group of related events (for example, every session of a webinar) as one audience.
The most common use is to avoid registering a contact twice. Add a “Conditional Split Path” step with the condition Registered for Countdown Event is your event, then place the “Register for Countdown Event” step on the No path — contacts who are already registered skip it and continue down the Yes path.
Practical Use Cases
Section titled “Practical Use Cases”-
Registering opt-ins for an alternate event: a contact opts in for a webinar on your funnel page, but you want to place them into a different session — or into a make-up session for people who missed the live call. Add the step to the opt-in workflow and select the alternate countdown event.
-
Managing close-cart events: register buyers (or non-buyers) for a cart-closing countdown event so they receive the deadline sequence and see accurate countdown timers in those emails.
-
Manually enrolling contacts who missed the opt-in: run a workflow manually for a contact or a segment of contacts to register them after the fact, using Register anyway so a passed deadline doesn’t block the registration. Keep the countdown event delays out of the workflow you run manually — in a manual run they are skipped — and let the registration this step creates trigger the workflow that holds them.
-
Re-registering for a recurring event: register contacts for a recurring event to start a fresh deadline for them, for instance when they ask for another chance at a limited-time offer.
Verifying the Registration
Section titled “Verifying the Registration”After the step runs, you can confirm the registration in three places:
-
The countdown event’s registrants list — in the Countdown Funnels app, open Countdown Events and click the Contacts icon for the event.
-
The contact’s Marketing tab, under Calendar Event Registrations.
-
The contact’s Activity timeline, where the registration entry names the countdown event and links to it. See “Contact Profile Overview”.